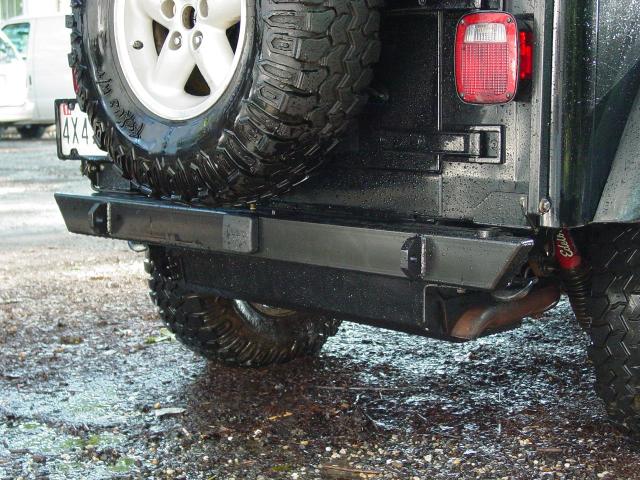
Heavy Duty Rear Bumper

Comp 4x4

Rear Detail - Click to Enlarge

7/25/03

4X4 ICON 2000 - 2008 The DVD! - Click here for details!

4X4 ICON 2000 - 2008 The DVD!

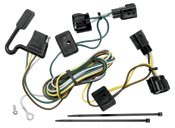
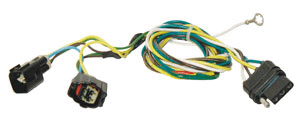
Update: 11/20/06 | Trailer Wiring Harness

There were some very specific things I was looking for in a rear bumper:

  • clevis mounting tabs
  • recessed 2" receiver hitch
  • provision for the addition of an optional tire carrier rack at a later time
  • wide enough to use for a step to the roof rack
  • light weight
  • price below $200

I liked a number of bumpers that satisfied one or more of these requirements, but I was never able to get all of them in one bumper.  Just when I had decided to sacrifice the clevis mounting tabs and tire carrier, and buy the Olympic rock bumper, I took one more look on eBay hoping to find a good deal on used or new bumpers.


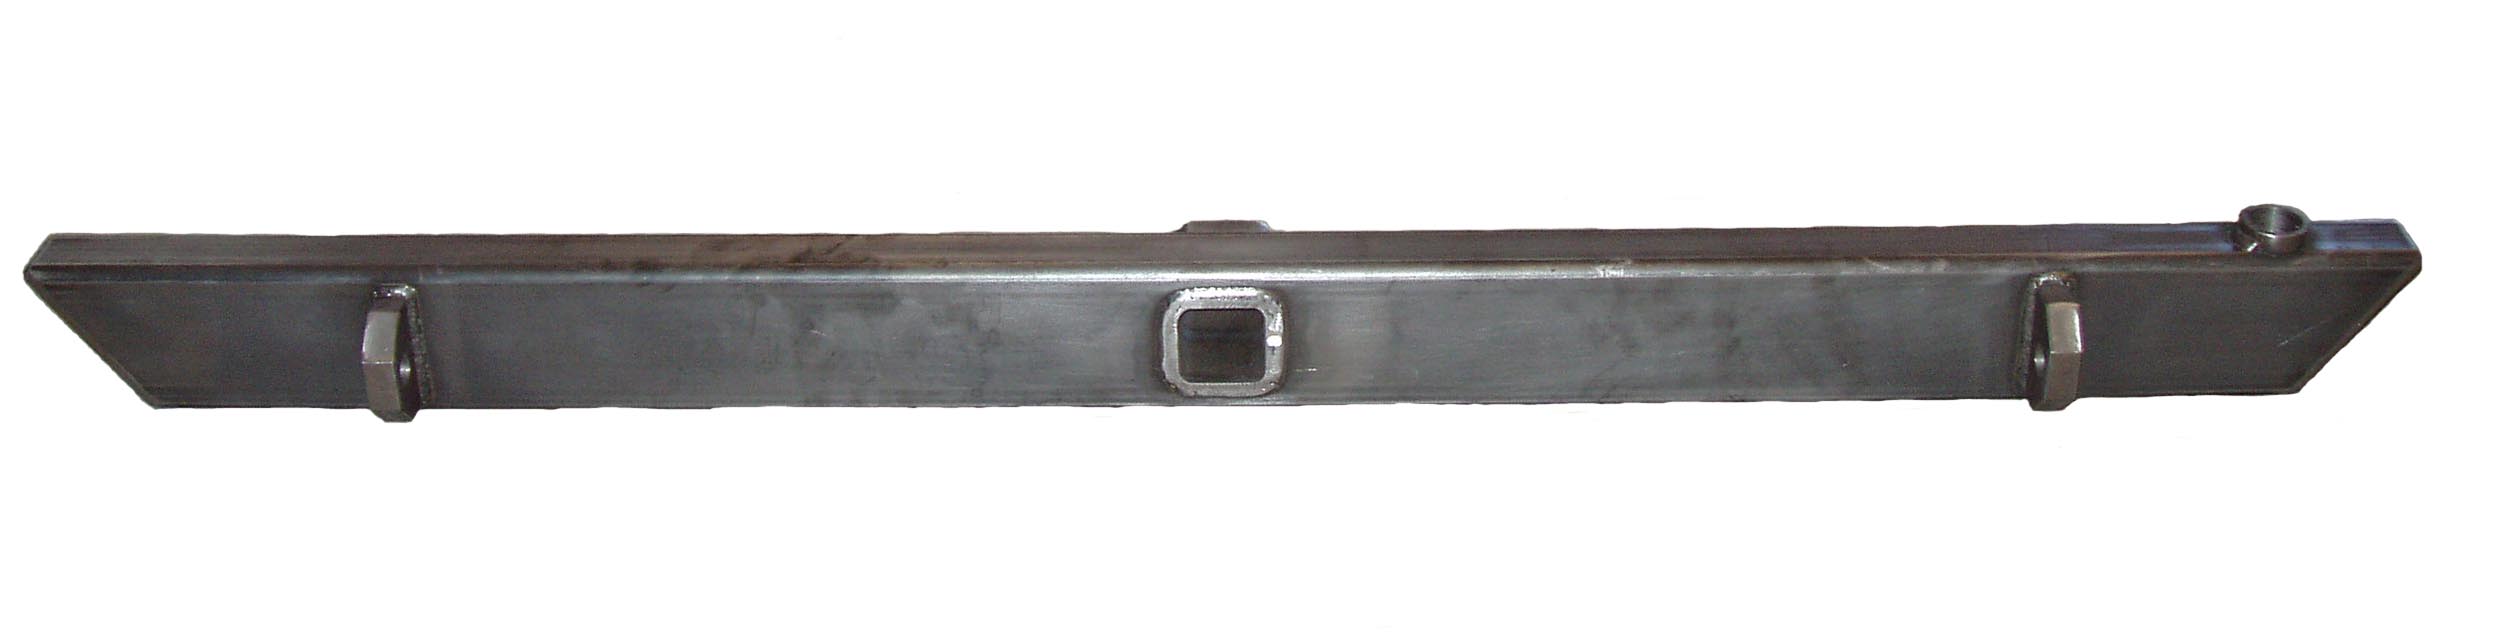
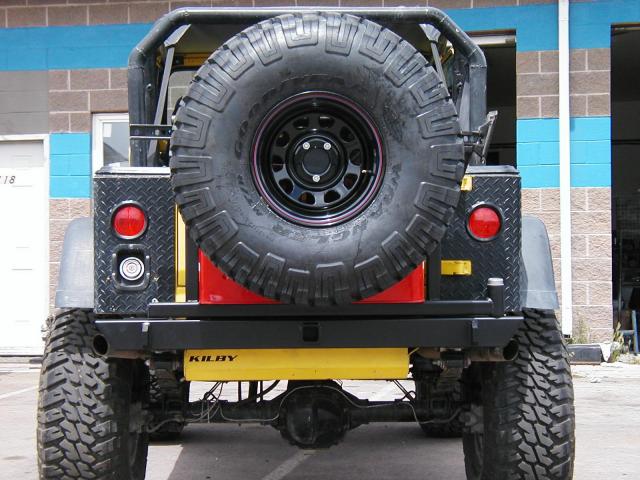
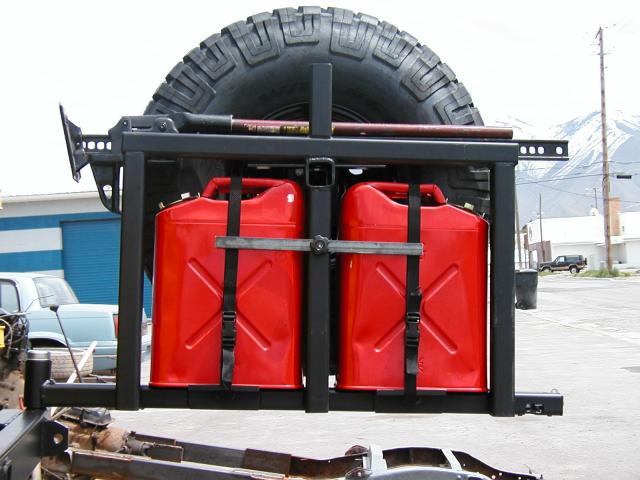
Instead I found a new bumper made by Jared of COMP4x4.  The price was right and it had all the features I wanted.  Here are the pictures from the auction (reduced in size).

rear carrier and bumper - Click to Enlarge
Carrier - Click to Enlarge rear bumper mounted - click to enlarge

Bare Metal - click to enlarge

I wrote to the eBay seller and asked about the weight.  It was 45 pounds.  I figured that this was reasonable, and with the dimensions supplied, I calculated shipping.  I placed a bid that would allow me to get everything for less than $200 (including finishing materials) and soon had won the auction.  The bumper was sent bare metal as shown above with an address label on it.

When it arrived I was frustrated by the need to go to the post office to sign for it, and had to wait an extra day since they would not leave it without me being present.  I picked it up and had fun watching the people there deal with it.  I think they wondered what I could possibly want with a heavy piece of steel!

I had already assembled the stuff I would use to finish and install the bumper:

  • Self-etching primer (black)
  • Acrylic Enamel (black "SATIN")
  • 7/16" drill bit (for new bolt holes in cross member)
  • 5/8" drill bit (for modifying receiver extension)
  • self-adhesive traction strips

I already had:

  • blue thread locker (for bolts)
  • bare-metal etch
  • prep-sol
  • tools
  • floor jack
Supplies - Click to Enlarge

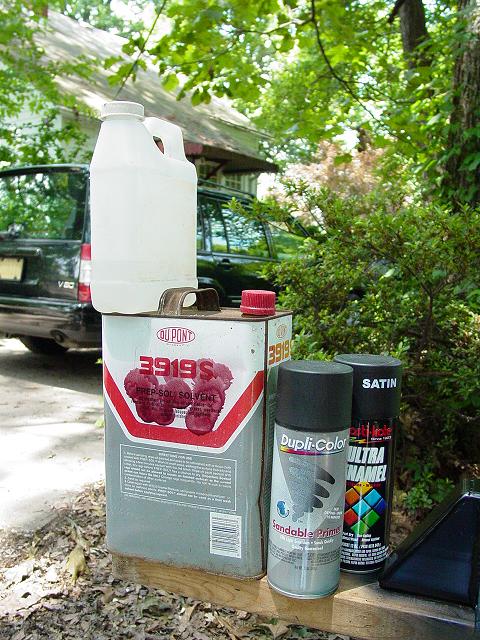
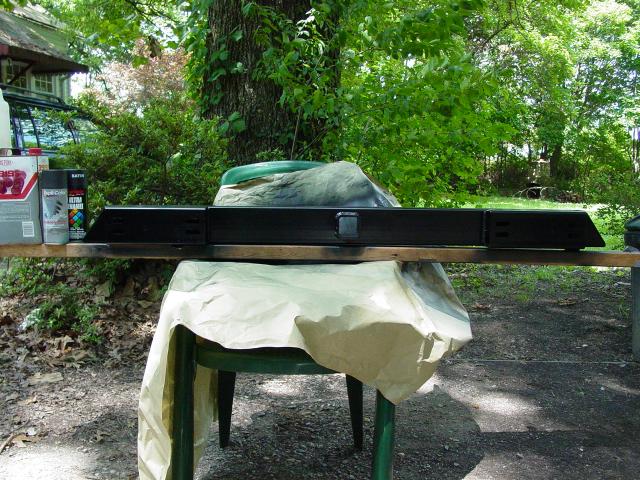
First I cleaned off the whole bumper with prep-sol to remove any dirt or oils.  Once it was clean, I applied the bare-metal etch to prepare for primer.  Next I set up a stand and started applying thin coats of primer, building up to a good thickness slowly.

Once the primer dried, I started painting with the black satin acrylic enamel.  I put four or five skin coats on to cover the primer and then put several thin coats on to build the thickness, with a final finish coat to get the desired surface.  I left the bumper to dry in a low-humidity, moderate temperature room for 24 hours.

Fresh Paint - click to enlarge
Cross member and gas tank skid - click to enlarge 
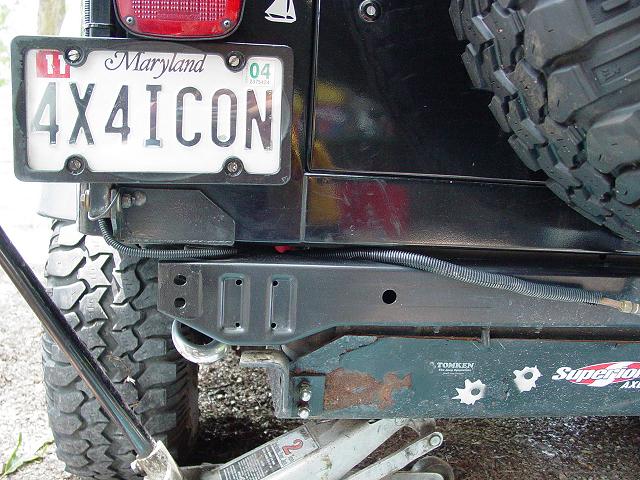
The next day, I installed the bumper.  I started by removing the plastic ends from my stock bumper, then the six bolts that held it onto the Jeep.

The instructions suggest lowering the gas tank.  This seemed like a lot of work to me, so I modified my approach somewhat.  I lowered the rear edge of the Tomken gas tank skid, then the rear edge of the factory gas tank skid plate (held by four nuts).  I spread the gap enough so I could get my hands between.

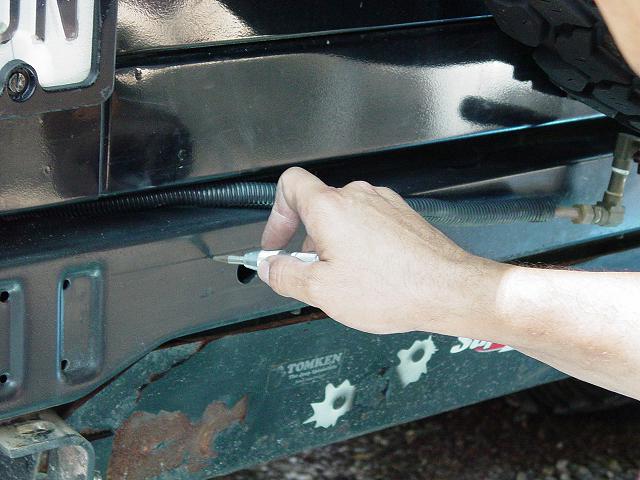
I marked up, center-punched and drilled the two-pair of holes in the cross member, cleaned the surface as with the bumper and painted the new holes to prevent rust.

Center Punch - click to enlarge
Measure 
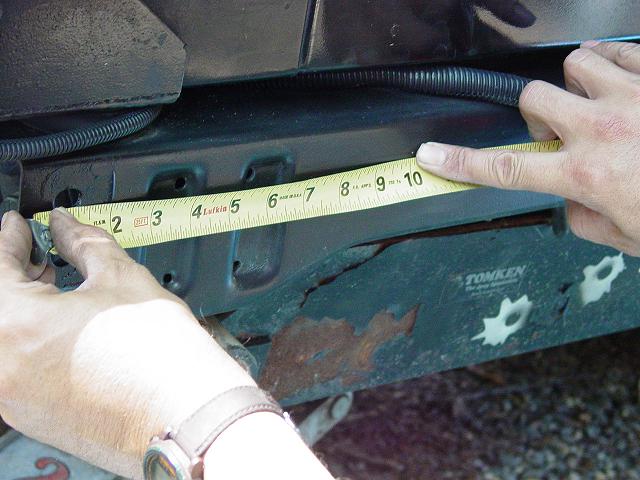
The new holes were 8 inches in from the existing holes on the end.  Note the photographic evidence of me measuring incorrectly...

Next, I put the bumper on a floor jack with a piece of 2x4 underneath, and raised it up into position.  I put the bolts in loosely and positioned the bumper where I wanted it.  Then I put thread locker on all the bolts and tightened them down.

With the bumper in place, I sprayed the mounting bolts to help keep them from rusting, and to tone down their appearance.

Mounting on cross member - Click to Enlarge

Side showing mounting

Cleaning Inside of Gas Tank Skid Plate 
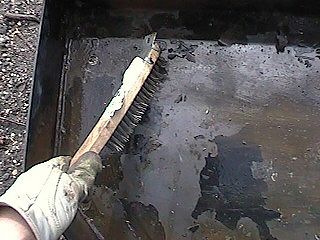
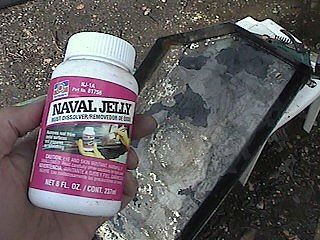
While I was working on this area, I refinished the gas tank skid plate to help make it look more presentable. 

I scraped all the loose flakes off with a wire brush and used Naval Jelly to neutralize the rust.

Rust Removal

Step surface - click to enlarge

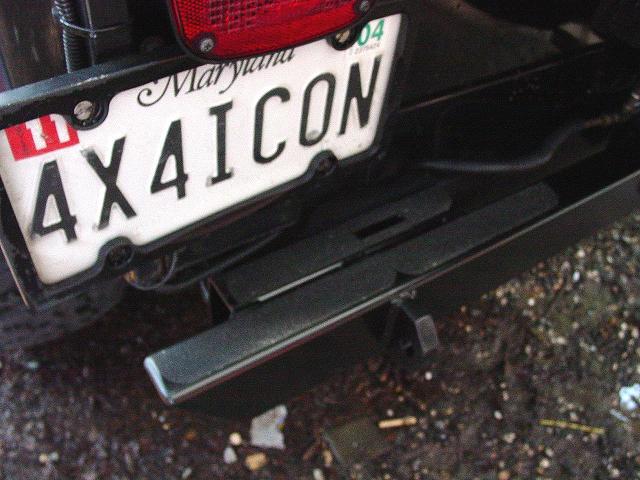
I applied self-adhesive, non-slip surfaces to the places on the bumper where I usually step to get to my rack.  I hope it will also prevent rapid wear of the paint as well.


Rear Detail - Click to Enlarge


Side/Rear ViewSideSide showing mountingSide showing mountingStep Surface and Carrier provisionSide showing mountingClose-up rear 3/4 viewReceiver Plug

SideSideRear 3/4 ViewRearRear DetailRear 3/4 ViewRear 3/4 viewRear/Side ViewSide

Side/Rear Detail

Rear Quarter
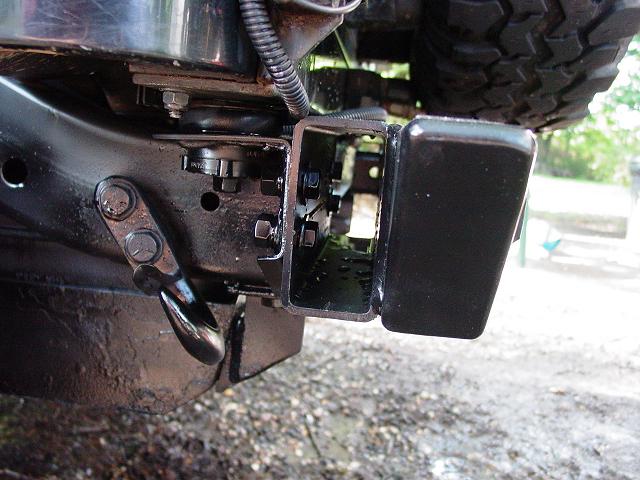
I had to make some modifications to the receiver hitch adapter that I purchased.  It steps down the hole from 2 inches to 1 1/4 inches for using my bike rack. 

The adapter also extends the hitch out so that the bike rack clears the spare tire.  But the holes for putting the hitch pin in didn't line up, so I drilled new ones.  That was fun - they need to be perfectly centered on the adapter and each other to work right.

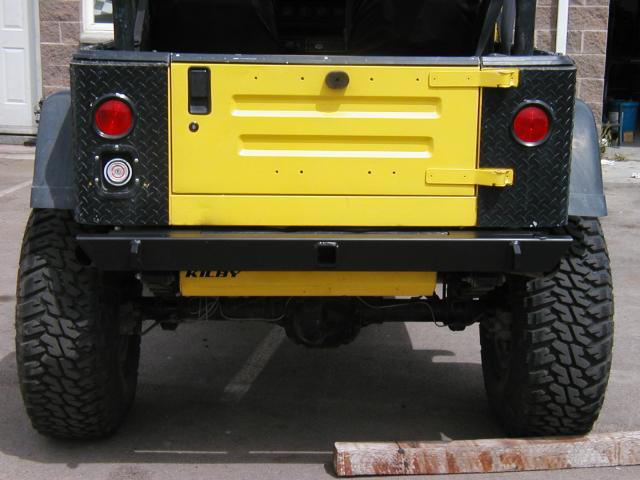
I am very pleased with the final result.  By waiting, I got all the features of the bumper that I wanted, and paid less than most of the bumpers out there that didn't have everything I wanted.  I will have to see how well the paint holds up before I decide whether or not powder coating is in my future for this part.


Trailer Wiring Harness


Wiring Harness

Wiring Harness

Somewhere along the way, probably in early 2005, I installed a trailer wiring harness.  It simply plugs in to each rear light plug and routes to the hitch area providing a four-connector outlet for a trailer.  I did this so that in event I needed to tow a trailer, I would be ready.

The install is mindlessly easy.  The left and right tail light plugs are disconnected from the tail lights and the trailer wiring harness is plugged in.  Then the plugs of the trailer wiring harness are plugged into the tail lights.  A ground wire is attached to a metal part on the chassis.  The trailer connector is fished through the chassis and wire-tied close to the trailer hitch so it can be used.  Then the connectors are taped to prevent water and dirt from entering.

Here's a typical installation guide.  (Click Here)


Update 11/20/06


FTB0001 with Hardware  FTB0001 - Frame Tie-In Mounting Bracket


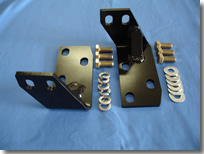
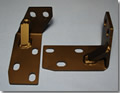
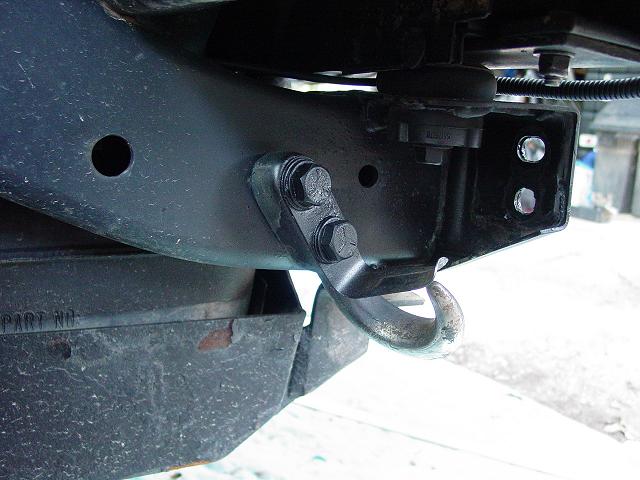
Jared sent the Rear Bumper Frame Tie-In Mounting Brackets for the bumper.  I have written a detailed account of installing them on my Jeep.  Check out the page here.


Return to Jeep Specs | Modification Schedule | Tomken Gas Tank skid plate

Shop for Jeep Toys and Books | See the Toy Jeeps | Off-Road Index 


Click or the [ BACK ] button on your browser to return to the previous page.

Photos (except as noted), Layout and Design © 2002 Paul M. Provencher All Rights Reserved.
Contents of this Web Site may not be used without written permission

Hit Counter Visitors since 7/25/03

Home