
4X4 ICON 2000 - 2003 The CD!
I broke a valve stem. Sooner or
later I knew it would happen. I had even provided myself the necessary tools and
supplies in my collection of airing-up stuff.
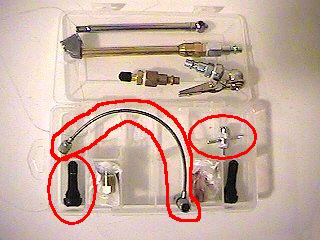
The stem is a part that costs less than
two dollars, but without a spare tire if it happened, it would be a major pain.
I ran some scenarios in my head and came up with the possibility that I could ruin a
valve stem after already getting a flat tire. It made sense to carry a spare
stem and the tools necessary to install it on the trail. Here is what I came up
with:
All that for a $2 part?
Well, let's break it down:
- Break the bead on the tire (Hi-Lift Jack)
- Install new stem (stem, fishing tool)
- Re-seat tire bead (valve core tool,
compressor, tank, hose, and fittings)
Sheesh! That's gonna leave a
mark... Yes, the on-board air is a bit pricy. But in three years, I have used
the on-board air on over 100 trips; to inflate sports equipment; air mattresses; bike
tires; and several times to assist friends with problems. I think the price-per-use
has been reduced to under a dollar. And when you need air and the nearest gas
station is 20 miles away, I don't know anyone who would walk 20 miles instead of spending
a dollar for air. Fortunately, by the time I needed to install the stem, the on-board air was already installed so that step was out of the
way... The rest of the stuff was sitting in my miscellaneous air parts box and cost
me less than a few dollars.
I removed the wheel using a floor jack
(Why not? I was at home). If I had been on the road or trail, I would have used the
bottle jack.
Next, I took down the Hi-Lift from it's permanent storage location on the roof rack.
This
approach to bead unseating should be considered an emergency approach and avoided if
proper tire mounting equipment is available. I put the wheel with the
damaged valve stem under the front bumper of the Jeep, lined up the Hi-Lift so that the
foot was on the edge of the bead where it goes under the wheel, just to one side of the
valve stem. Then I jacked until the Hi-Lift foot had pushed the bead off the rim.
Great care is needed to avoid having the Jeep fall off the jack when the tire bead
pops because the vehicle will drop about 7 inches. It must be supported by something
else.
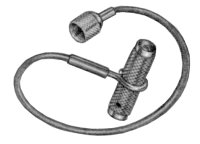
With the bead unseated, the old stem is
removed (usually you can just rip it out with the stem fishing tool attached).
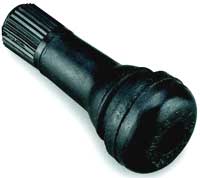
The new stem is fitted through the hole
from inside the tire and then seated using the stem fishing tool.
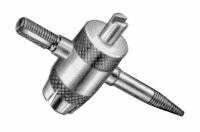
Next the valve core is removed from the
stem to allow faster air flow using the valve core tool.
If your air chuck requires a valve core
to allow air to enter the tire, do not remove the valve core. Next, place some water
around the bead area of the tire and inflate the tire. Start filling the tire while
checking for leaks. The air tank or a fast a/c compressor (or power tank) is
required to provide the volume and pressure needed to seat the bead.
The bead should seat if you have a good
seal around the tire and wheel when you put air in. This can be facilitated with a
ratchet strap but care must be used to avoid placing it too tightly on the tire since it
will be even tighter when the tire is inflated and may be difficult or impossible to
remove without letting the air out of the tire.
Once the tire seats (big "POP")
check the air pressure and inflate or deflate to the desired pressure, after reinstalling
the valve core if it was removed. Put the wheel back on the vehicle, torque the lug
nuts and you're ready to rock!


Visitors since 10/2/04