11/14/02
![]()
| Once in a while
you read about some simple modification that can make a difference in how nice your Jeep
looks or how nice it is to work with on the trail. These can be inexpensive little things
that often get put on the back burner and forgotten. Such was the case with this modification. It required a trip to the dealer for parts. I didn't have some of the tools needed to do the job right. I seldom encountered the situation that this modification was designed to address. So I didn't do anything but make mental note of it. |
|
|
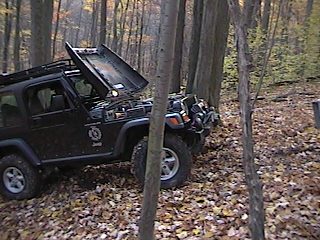
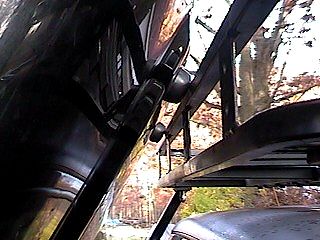
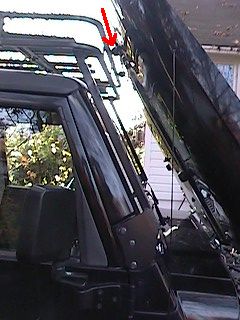
Then I got my winch. By itself, that still didn't really make much difference. Most of the winching I did at the beginning was light-weight and did not require that I open the hood. Then finally I got myself in a situation that produced a heavier load and I found myself opening the hood to give some added protection in case of a snapped cable. I didn't want to put the hood on the upright. So I balanced it up against the leading edge of my roof rack. And that's when I remembered this modification: Rubber Bumpers mounted on the hood to prevent scratching when the hood is opened in this manner... |
| So I went to
the dealer and bought the two rubber bumpers. On the way home, I stopped at Home Depot and
bought a drill bit that would give me the right sized hole. Then I went home to drill a
couple holes for the bumpers. Or so I thought. When I looked at the job, I realized that the bumpers needed to be located so that they were symmetrical with the other two already present for the windshield. And they needed to be placed so that they matched with the roof rack when the hood was open. |
|
|
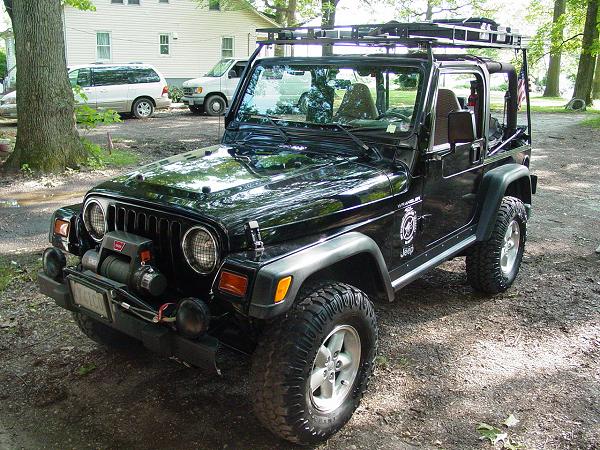
It was pretty easy to locate the proper position. I flipped up the hood and rested it up against the roof rack. Using a grease pencil, I traced the edges of the roof rack onto the hood. Then I flipped the hood down and measured in from the edge of the raised design line to the holes for rubber bumpers for the windshield (I carefully removed the existing bumpers for measuring). I transferred this measurement to the front of the hood where the markings were for the roof rack and found the intersection of lines. |
| I double checked my markings and when I was satisfied that the bumpers would hit the rack properly, and would be spaced well, I used the center punch to make a small indentation where I would drill. I hit each mark two or three times to make sure the mark was deep enough to hold the drill bit in place.
|
|
|
|
| Next, I used a small drill bit to enlarge the center mark enough to hold a larger drill bit in place. Some folks like to put some tape over the mark before drilling to protect the paint, and guard against the drill bit migrating and scratching the finish. You could do this if you wanted - I was confident (fool that I am) and didn't bother. Once the center marks were made, I drilled the holes out to final size. I placed a board under the hood where the hole was being drilled to prevent damage to underhood components. Don't skip this step! The radiator was directly under my holes and would not fair well!
|
|
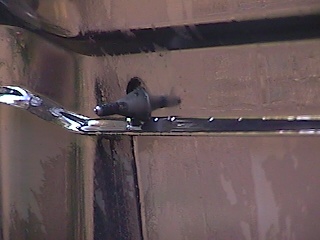
| This is where I discovered complications... Because of the location of the roof rack, the holes lined up perfectly with the reinforcing member on the underside of the hood. That meant drilling through two layers of metal. That wasn't really too difficult. The real problem was that the bumpers were not designed to be retained by two thicknesses of metal, so the nipples would not pull through the hole far enough to seat! |
 |
|
In order to overcome this I needed to remove a large hole on the metal reinforcing to allow the nipple to protrude through only one layer of metal. In order to do this, I bought a hole saw in a size slightly larger than the hole for the bumper. |
I drilled out the hole on the reinforcing member centered on the hole through the hood. I burnished the edges of the newly drilled metal, then painted it to prevent rust. I applied the paint from under the hood so as not to damage the external finish, and confined my painting with masking so the underhood area would remain clean. |
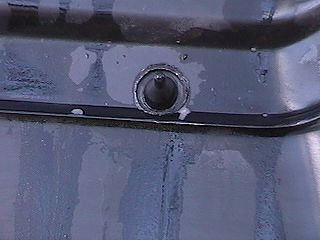 |
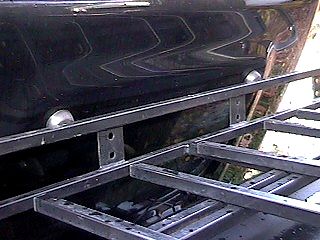
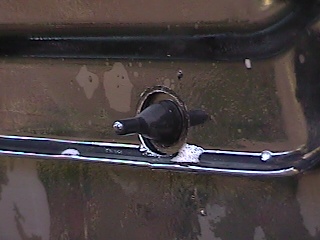
| Once the paint was dry, I sprayed some releasing agent on the bumpers and pulled the nipples through the holes, seating the bumper as intended. You could substitute dishwashing liquid in water for the release agent - you mainly want the rubber bumpers to slide into the holes easily. | |
|
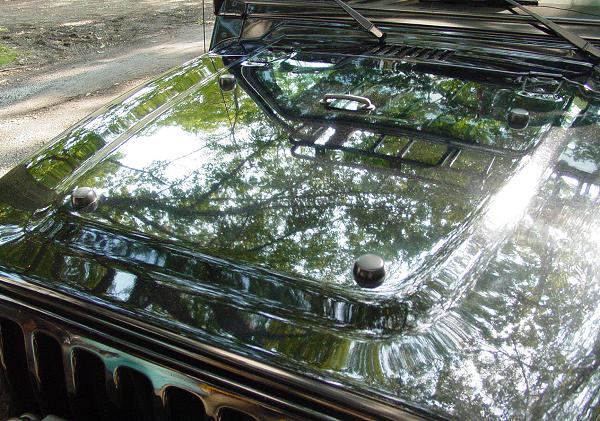
That's it. They bumpers line up as planned and prevent dents and scratches from damaging my hood, and make it a little less worrisome to flip the hood up. |
I have found that people who do not own Jeeps (like your friends trying to be helpful, and people doing safety inspections, oil changes, and repair work) are sometimes ignorant and will just casually flip up the hood and let it hit the rack (or in most people's case, the top edge of the windshield. You can't always catch them in time! Now it's not a problem! |
 |
| If you do not
have a rack, your bump stops will be located closer to the windshield and might even miss
the reinforcing metal underneath, making your installation even easier than mine. The hole
size is critical since it must be big enough for the rubber nipple to fit through, but not
so large that it does not seat. I tried various drill bits on the existing holes that the
factory made until I found a bit that fit the hole just a little loosely. When burnishing
the hole I made it just right. Do not attempt to drill the holes without making the mark with a center punch. You could probably use a nail but remember that you don't want to leave a mark that shows, so mistakes can be costly. I've been drilling holes in my cars for so long it doesn't phase me anymore but I still measure twice, and drill once! |
|
The only thing that I think I might do is add a tether and a footmans loop (a real one, not like that stupid plastic one on the hood) under the hood where it is hidden, and use it to hold the hood open when I winch or work on the Jeep. The cost to do this job without already having the necessary tools is substantial. But remember, you will use a center punch on any drilling job you do, so it is money well spent. I recently broke mine so this was a good time to replace it. The drill bit will most likely be used again and again, as well as the hole saw and mandrel. So I look at the cost of the tools as an investment. The cost of the rubber bumpers was so low that I actually replaced the first two I bought after trying to force them to fit the two thicknesses of metal: The nipples got all ragged and ruined, so would not have held if I tried to use them after fixing my holes. That was the price of haste... |
|
|
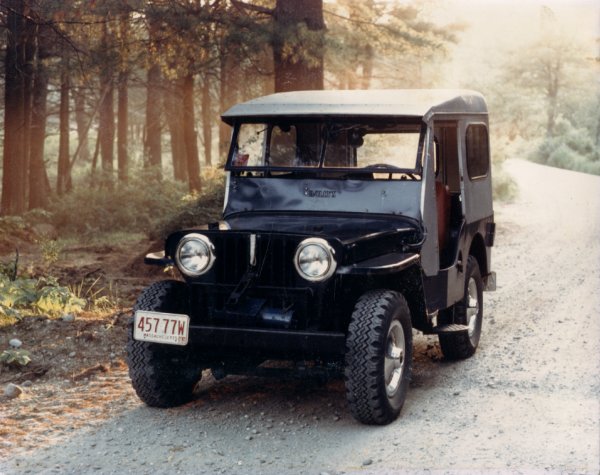
The final result is reminiscent of an old Willys, that had two blocks of wood in roughly the same locations for the purpose of supporting the windshield when flipped down. So in a way, this adds a nice vintage touch as well! |
|
|
|
Photos, Layout and
Design © 2001-2008 Paul M. Provencher All Rights
Reserved.
Contents of this Web Site may not be used without written permission
Visitors since 11/14/02
Last Updated 02/09/2008 09:53:42 AM -0500