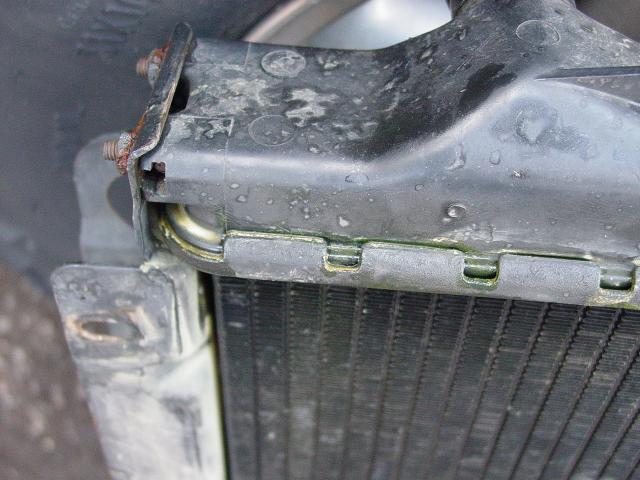
It is well known that the TJ Radiator is prone to leaking
from the upper passenger side corner where the plastic top is crimped onto the aluminum
body. Mine was no exception. From time to time it would weep a little bit,
usually when the engine was just warming up.

When cold or fully up to temperature, it was fine but
that in between range was sometimes trouble. I just made sure I had enough fluid in
there and checked the temperature gauge routinely.
I went to an OCC Club lunch one Friday at Fuddruckers in
Tyson's Corner and noticed that there was a green puddle under the front of my Jeep soon
after I parked. I opened the hood and found the radiator leaking from the corner
much faster than ever. I decided it was time to remedy this problem.
Now those in the know will tell you that it is a waste of
time to rebuild this particular radiator. It is doomed to fail in the same way.
That may be, but the cost of a new radiator was not in my budget, having just
finished fixing the idler pulleys on the trail, and facing some rear axle seal work in the
next couple days.
My friend Carl had recently swapped his radiator out and
had his rebuilt. He was keeping this one on hand as a spare. When I mentioned
that I was going to swap mine out, he very graciously offered to trade me my leaky one and
some money for his rebuilt one. Done deal! He plans to take mine to be rebuilt
and stock-piled.
The install is typical for any radiator; made simpler by
the fact that the air conditioning has a separate condenser, eliminating the need to
discharge the A/C system. What a relief!
I started draining the radiator into a clean recovery
container. I simply opened the drain valve at the bottom with my catch bin on a
wheel ramp so it wouldn't splash all over the place.
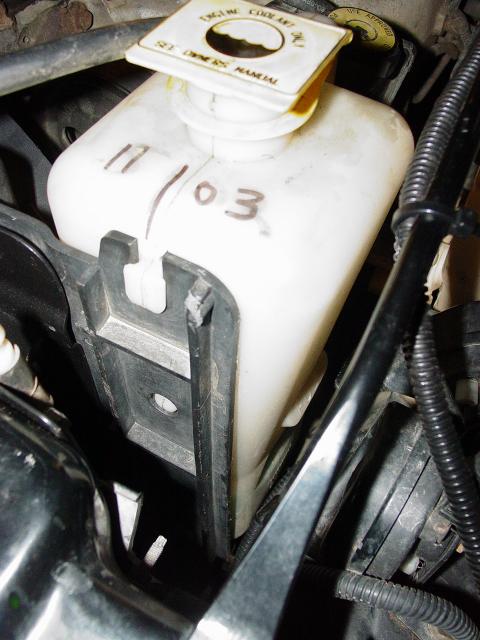
I slid the overflow tank upwards in the notched openings
that hold it to the radiator shroud, and removed it after sliding the overflow hose off
the radiator fill opening.

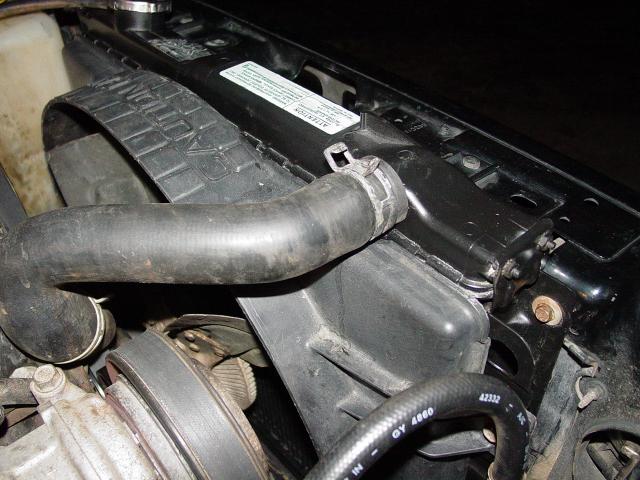
While the radiator drained, I removed the four
self-tapping screws that hold the fan shroud to the radiator supports.
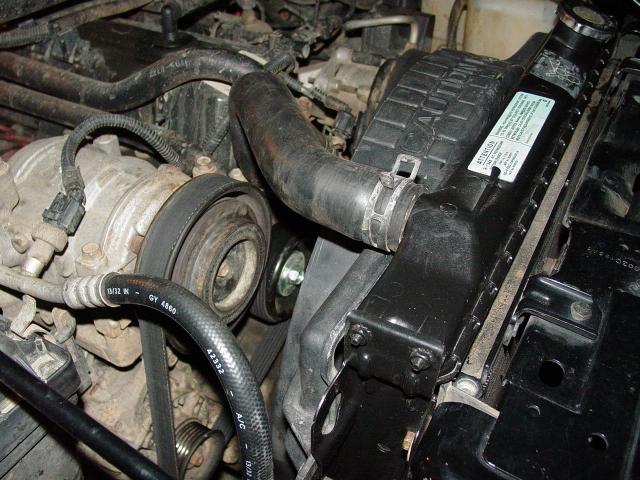
Then I removed the hoses, top and bottom. The
factory clamps can be released using a pair of drop-jaw pliers. I purchased hoses in
case the old ones were seized or damaged but they came off easily and were still very
pliable, and did not have any cracks or stretched sections. I will keep the new
hoses for spares.
With the fan shroud slid back to the engine block, I
removed the six bolts that hold the radiator to the vehicle. They came off with
either a socket or spanner. One of the bolts holds the front differential breather
hose, so I was careful to set that to one side and reconnect it later when I reassembled
the radiator.


The lower passenger side one was particularly unpleasant
owing to the tight space available for my bear paw and wrench.
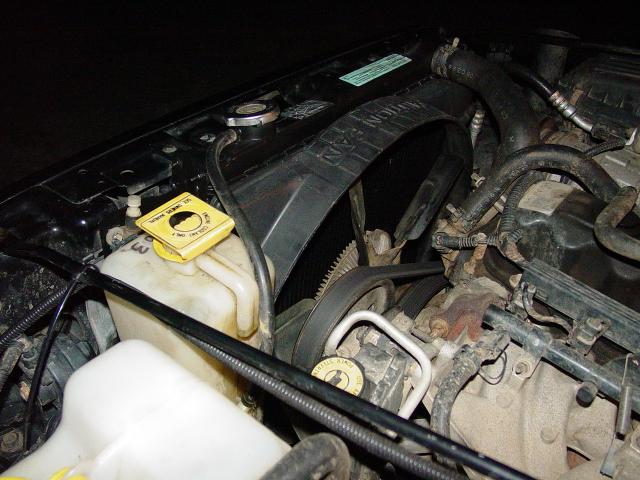
The radiator finished draining. I lifted it
straight up being careful not to drag it on the fan blades or other parts. Then I
carefully removed the fan shroud, just barely sneaking it between the fan clutch and the
a/c condenser. It is not necessary to remove the shroud but I wanted to clean it up.

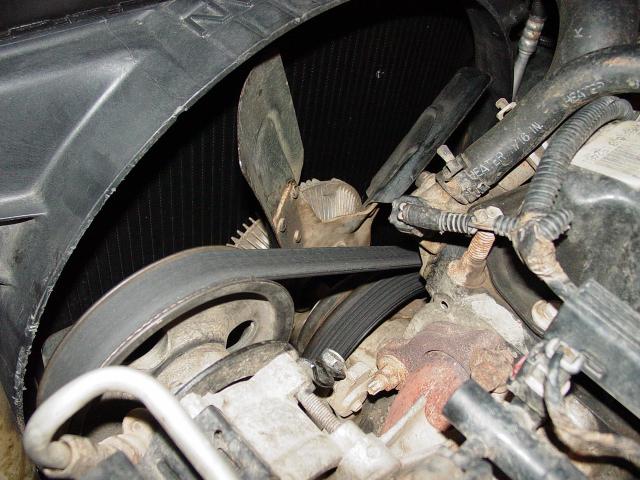
While the radiator was out, I put the correct bolts in
place on the idler pulley that I had replaced on the trail
a few days earlier.

I cleaned all the dirt and mud that I can never reach
with the radiator in the way. I scrubbed down all the radiator fluid stains so it
will be easier to spot new leaks.
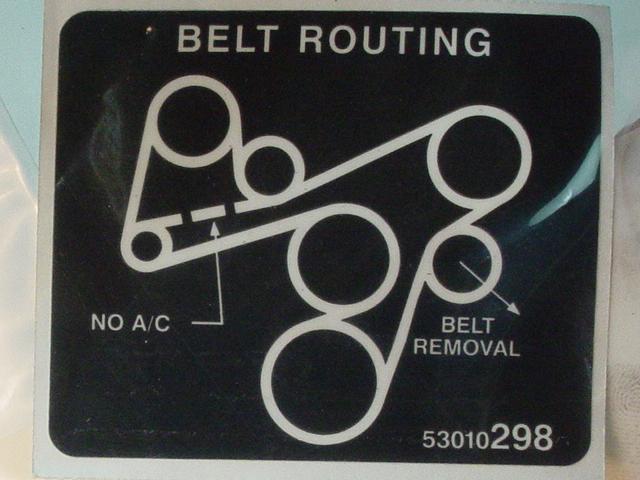
I saved the fan belt routing label to reaffix to the new
radiator.

In the end I ordered a new sticker from
the dealer.
With everything cleaned up, I put the parts back together
in reverse order of disassembly.

I reconnected the hoses and made sure the drain was
closed. Then I poured radiator fluid back into the radiator through the cap on the
radiator, and filled up the overflow tank. The vacuum created when the engine cools
off later will draw fluid from the overflow tank into the radiator. Then it can be
topped off to the "FULL" mark on the overflow tank.

I started the engine and checked for leaks. At
first I was alarmed to see fluid running from the bottom of the radiator but I soon
determined it was plain water being sucked out of the a/c condenser - it had gotten in
there when I cleaned everything off.
No leaks appeared and I let the Jeep run to come up to
temperature. Later, when it had cooled off completely, I returned to check the fluid
level and for leaks. The fluid had been drawn into the radiator as expected, so I
mixed some radiator fluid in a 50-50 mix with de-mineralized water and topped up the
overflow tank. There were no leaks anywhere (so far...).
This job was easy. There was more time invested in
getting the parts and supplies than the actual swap itself.
| RADIATOR,
Engine Cooling Aluminum (rebuilt/exchange) |
5208 0183AB |
| HOSE,
Radiator Inlet (reused) |
5202 8264 |
| HOSE, Radiator To Pump (reused) |
5202 8143 |
| CLAMP,
Hose to Radiator (4) (reused) |
5200 5580 |
| LABEL, Belt Routing |
5301 0298 |
| Anti Freeze (<3
gallons) |
|
That was due in part to the spare radiator
being handy.