Rock and Roll...
I learned that
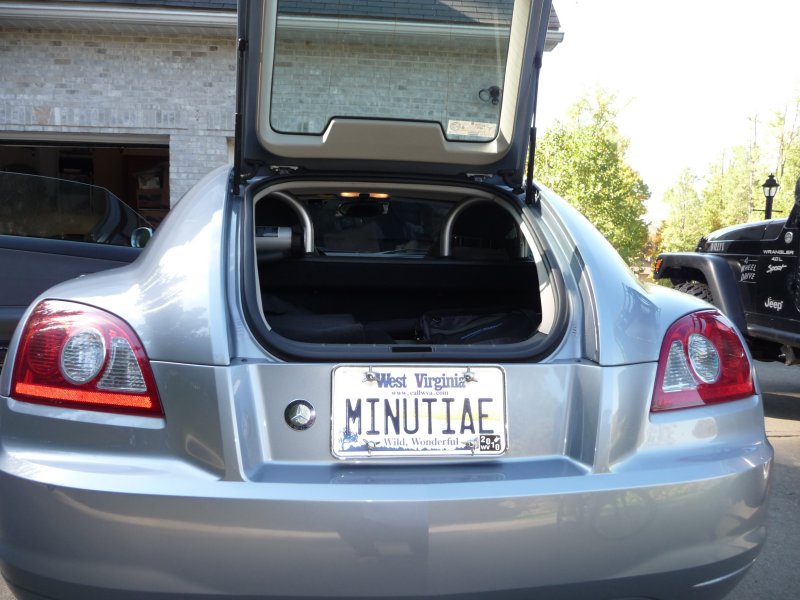
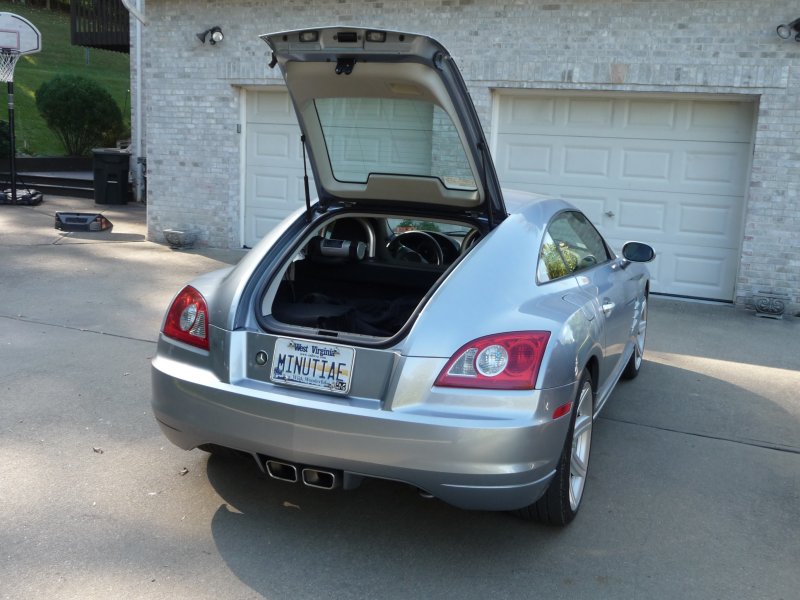
the Crossfire coupe, which uses the Mercedes SLK base, has a few
vestigial provisions built into the unibody. Of interest
for this project is the fact that the bulkhead that separates
the passengers from the hatch area has all the provisions for
roll bars, even though the coupe is not equipped from the
factory with them. I found
these instructions for replacing the roll bars in a Mercedes
SLK - and the parts (even the unibody parts) are identical in
the Crossfire, so I decided to investigate further.
Upon removing
the plastic cover on the top of the bulkhead and moving the
carpeting out of the way, I was able to confirm that indeed
there were openings for the bars and holes for the bolts.
All one really has to do is get a set of roll bars and install
them. Well, more or less...
You see, there
are a few things that need to be done first, and all of them are
a bit of a pain. First, the roll bars. They can be a
little expensive. But I decided if I could get a pair for
less than $100 I would go ahead with the modification.
eBay obliged me and soon I had two roll bars.
I found that
the bars are quite long and cannot be installed in the coupe
without either cutting a hole in the roof or cutting the ends of
the roll bars off. I didn't want to lose the strength so I
pondered the possibilities and came up with an idea that would
allow me to remove the ends, and reassemble them in the car,
preserving most, if not all of the strength of the bars.
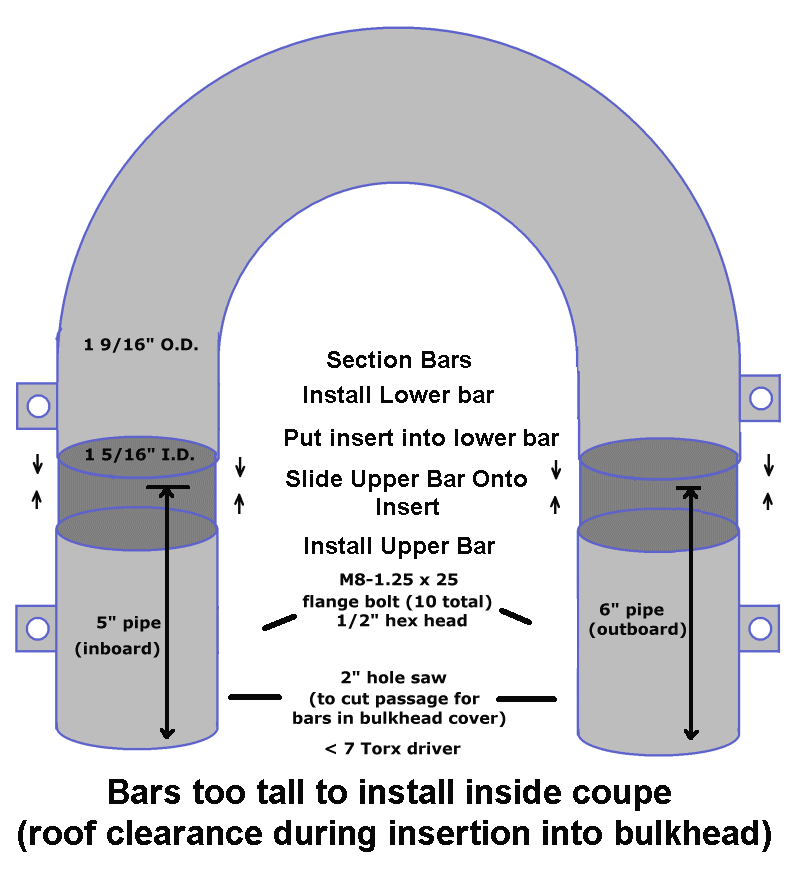
I cut the bars
below the upper mounting points. This required a trip to a
local machine shop. They took care of it in short order
and soon I had two roll bars and four roll bar ends. Next
I went to the pipe section and purchased a 24" length of pipe
the same outer diameter as the roll bar internal diameter.
I had the pipe cut in 5" and 6" lengths (2 of each) to use as
inserts.
I purchased 10
bolts - 8M-1.25 x 25 - the size necessary to bolt the bars into
the car - along with lock washers to fit. I also purchased
a tube of JB Weld to use to epoxy the tube inserts inside the
lower roll bar parts. I glued the inserts into the pieces
of the roll bar that I had cut off, and set them aside to dry
overnight.
Once home, I
removed the necessary parts to gain access to the mounting
points for the roll bars. I installed the roll bars and
tightened them down. Then using a triangle-square I marked
the location of the roll bars and depth from the back of the
bulkhead to the back of the roll bars. Then I removed the
roll bars and installed the bulkhead cover. With the cover
installed, I transferred the roll bar locations to the cover
with blue masking tape. Each bar is 1 3/4" in diameter, so
I was able to calculate the four squares that the bars occupied.
I removed the
bulkhead cover and drew "X"'s on each 1 3/4" square to locate
each center. Using a center punch, I marked each center.
Then I drilled each center to create a pilot hole. With a
2" hole saw I drilled out the four holes. I got lucky and
managed to place them perfectly for the roll bars to go through
to the mounting locations.
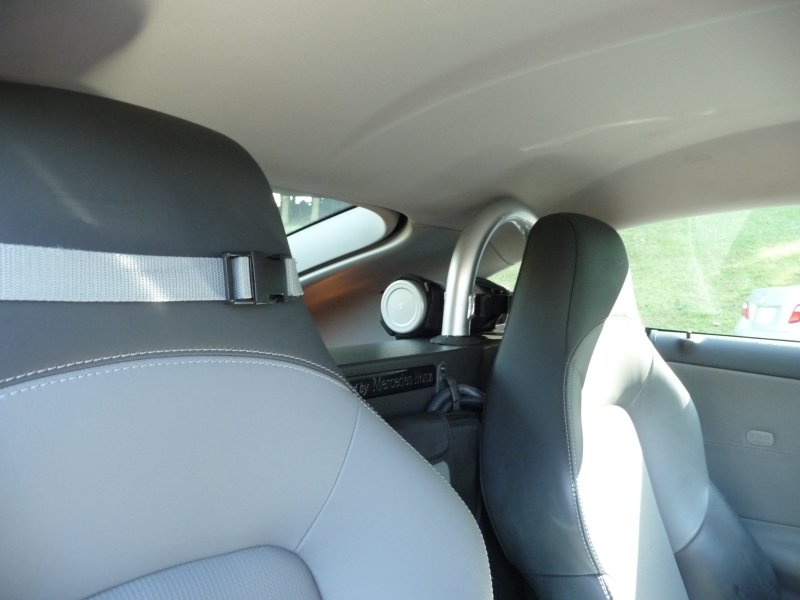
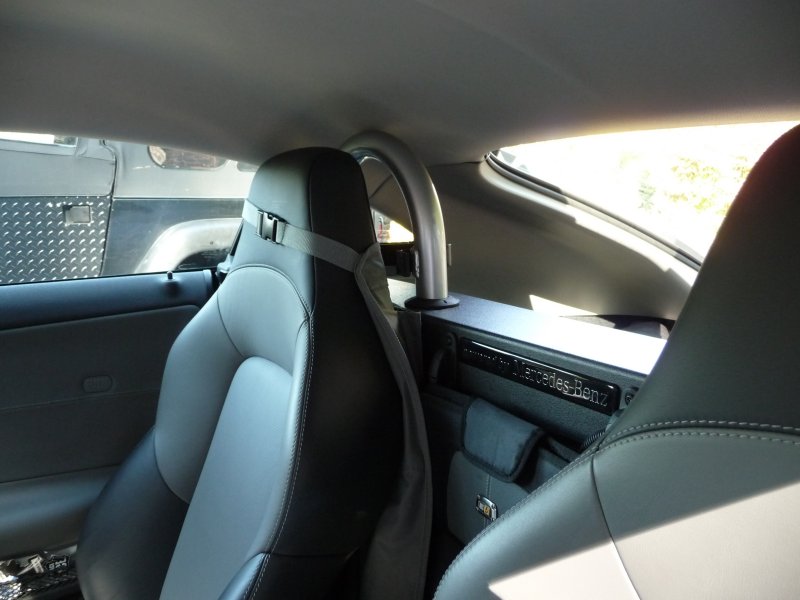
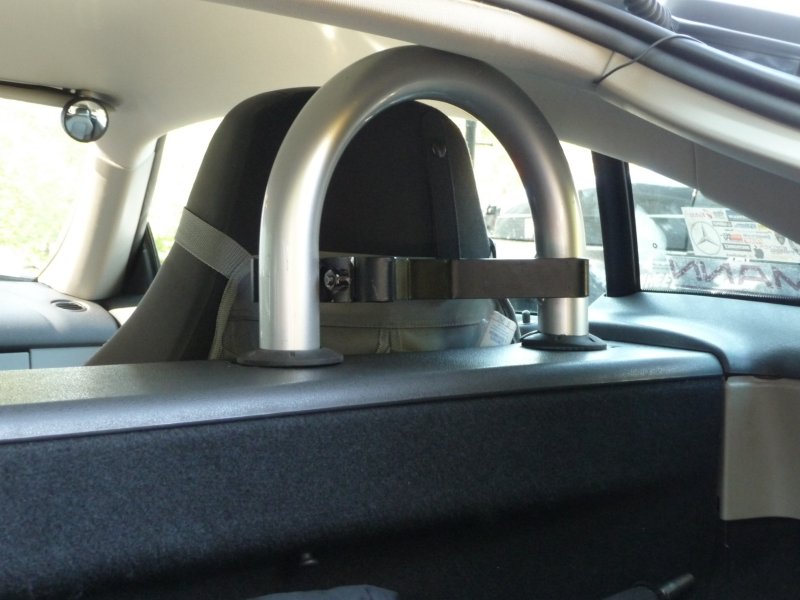
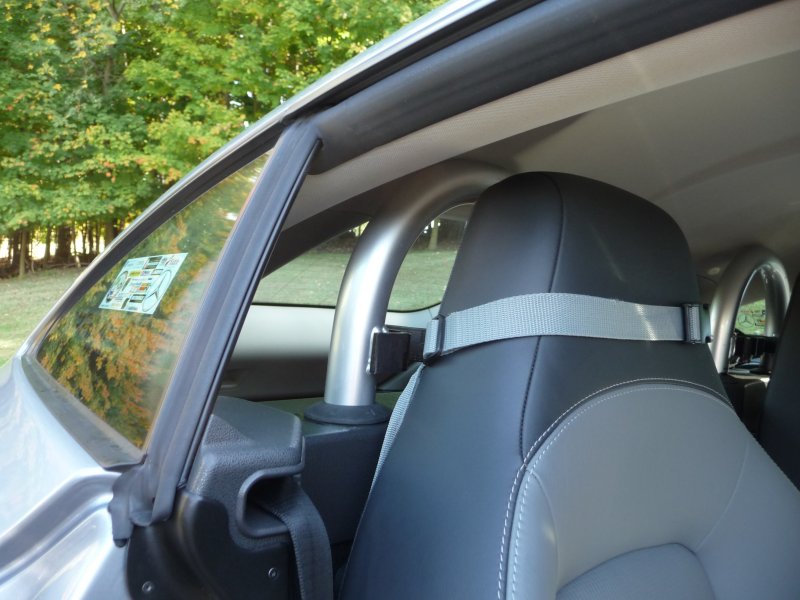
I put the
bulkhead cover back in place and installed the lower and upper
roll bar parts and bolted them in place. Next I took the
rubber grommets that had come with the roll bars and glued them
into place with heavy duty weatherstripping cement.
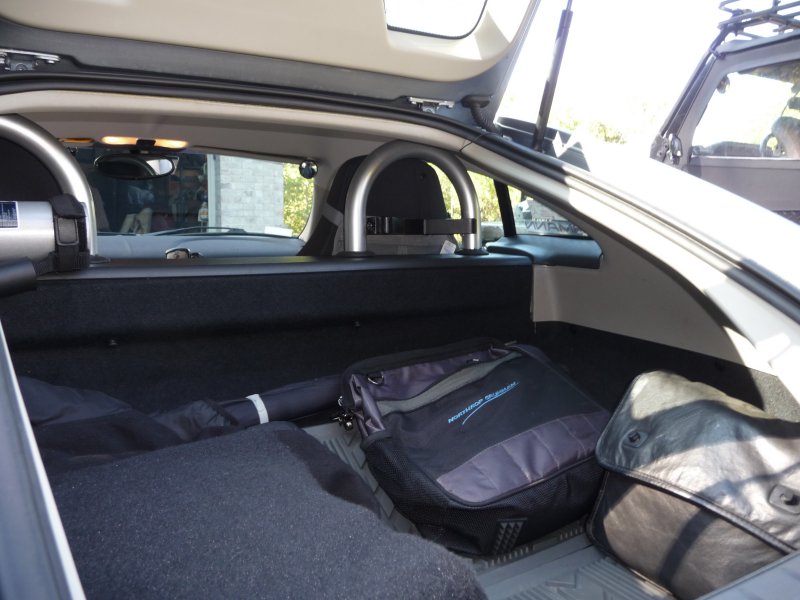
I relocated my
fire extinguisher and radar detector remote speaker, then
reassembled all the parts I had removed in order to access the
mounting locations.


The major time
for this job was spent getting the supplies, having the bars cut
down, and making careful measures before cutting the bulkhead
cover. Other than those things, this job went very
quickly.