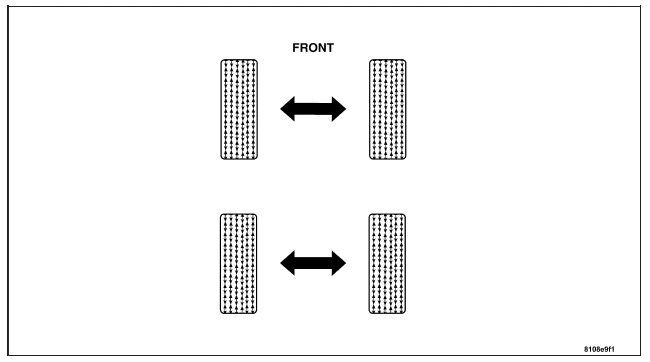
SENSOR
DESCRIPTION
CAUTION: Be sure
that an original equipment valve stem cap or a valve
stem cap of the same sealing capability is always
used if the valve stem cap requires replacement.
A tire pressure
sensor/transmitter is installed in each wheel of
this vehicle as part of the tire pressure monitoring
system. A special valve stem incorporated into each
tire pressure sensor/transmitter attaches it to the
wheel.
VALVE STEM CORE AND CAP
On this vehicle,
the valve stem is part of the tire pressure
sensor/transmitter and is used as its antenna. If
corrosion were to develop in the valve stem, it
would affect the ability of the tire pressure
sensor/transmitter to send the radio frequency
signal to the TPM module. The valve stem used
on this vehicle is made from aluminum. Corrosion of
aluminum will be caused by putting a dissimilar
metal in contact with it. To prevent this type of
corrosion from developing within the valve stem, the
core of the valve stem is made of a compatible metal
and is specially coated. For this reason, a
standard valve stem core must never be installed in
this valve stem. If the core of the valve stem is
removed when servicing the tire, the original valve
stem core must be reinstalled. If the valve stem
core needs to be replaced, it must be replaced with
an original equipment valve stem core.
The valve stem caps
used on this vehicle are specially designed for
their use on the valve stem of the tire pressure
sensor/transmitter. Each valve stem cap has an
O-ring in the upper end of the valve stem cap to
provide a positive seal at the end of the valve
stem. This keeps dirt contamination and corrosion
out of the valve stem caused by moisture. As listed
earlier, these conditions can affect the ability of
the tire pressure transmitter to send the radio
frequency signal to the TPM module.
OPERATION
Each tire pressure
sensor/transmitter serves three functions:
- It is used as
a valve stem to inflate and deflate the tire.
- It
periodically measures tire pressure.
(Approximately every 30 seconds.)
- It transmits
the tire pressure value to the low tire pressure
warning module in the vehicle. (Approximately
every 60 seconds or if tire pressure changes by
one psi or more between transmissions.)
The system operates
by monitoring a radio frequency transmission from
the sensor/transmitters located in each wheel. When
the vehicle reaches a speed of approximately 32 km/h
(20 mph), centrifugal force created by the rotating
wheels closes a roll switch inside each
sensor/transmitter, powering up the circuitry.
The
sensor/transmitters will only send out information
when vehicle speed is above 32 km/h (20 mph). To
facilitate transmitting the radio signal to the TPM
module, the valve stem acts as the antenna for the
tire pressure sensor/transmitter. When the TPM
module senses that pressure is below one of two
calibrated thresholds, (low pressure or critical
pressure) the TPM system will set a diagnostic
trouble code and indirectly operate the “Low Tire”
pressure indicator lamp and the chime tone through
the body control module (BCM).
The tire pressure
sensor/transmitter is powered by an internal
battery. The battery is not replaceable separately.
In the event of battery failure, the entire tire
pressure sensor/transmitter at that wheel will
require replacement. To extend the life of the
battery, the sensor/transmitter is not activated
until the vehicle reaches a speed of approximately
32 km/h (20 mph) as stated earlier.
Each tire pressure
sensor/transmitter has a unique identity code. This
will allow the TPM system to indicate to a
technician, through diagnostic trouble codes in the
module, which tire of the vehicle has lost air
pressure. This code is also used to identify to a
technician which pressure sensor/transmitter has set
a diagnostic trouble code. For this reason, if a
tire pressure sensor/transmitter needs to be
replaced, the new sensor/transmitter must be
programmed to have its identity code recognized by
the receiver.
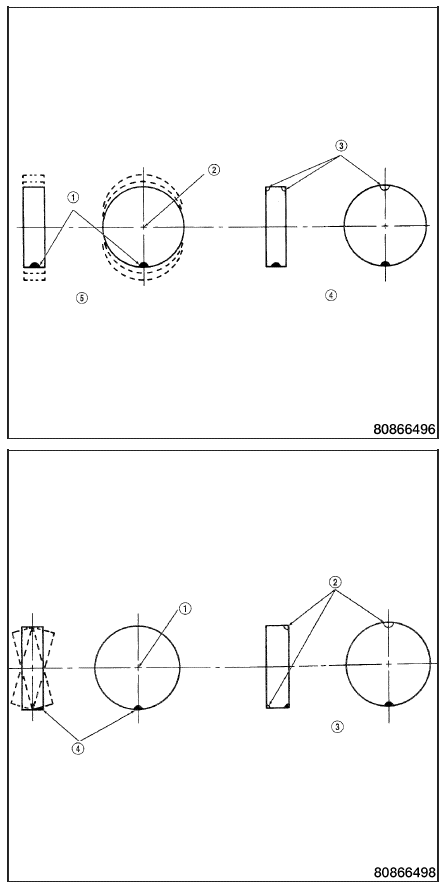
REMOVAL
1. Remove the
tire/wheel from the vehicle.
CAUTION: When
removing the stick-on balancing weights from the
wheel, do not use an abrasive cleaner or a cleaner
which will damage the protective finish on the
wheel.
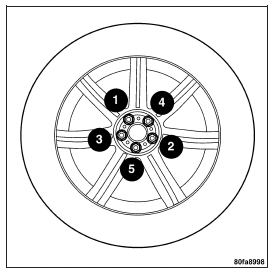
2. Remove the
balancing weights from the wheel (1).
Note: The cap
used on this valve stem contains an O-ring seal to
prevent contamination and moisture from entering the
valve stem. Retain this valve stem cap for reuse. Do
not substitute a regular valve stem cap in its
place.
3. Remove the cap
from the valve stem (2).
Note: The valve
stem used on this vehicle is made of aluminum and
the core is nickel plated brass. The original valve
stem core must be reinstalled and not substituted
for a valve stem core made of a different material.
This is required to prevent corrosion in the valve
stem caused by the different metals.
4. Using the
appropriate tool, remove the core (4) from the valve
stem (2).
5. Let the tire
fully deflate.
CAUTION: The
pressure transmitter must be removed from the wheel
and dropped into the tire prior to breaking the bead
and dismounting the tire. Failure to do this will
greatly increase the risk of damaging the pressure
transducer when servicing the tire.
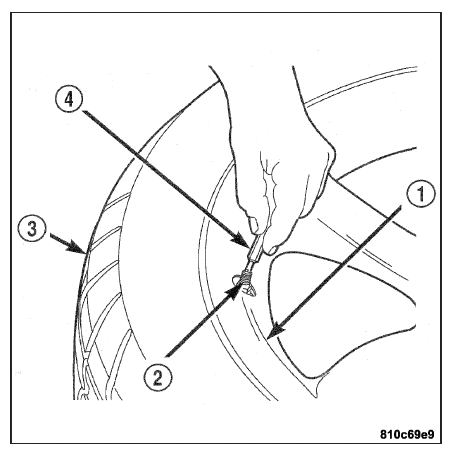
6. Remove the nut
(1) mounting the valve stem (4) of the pressure
sensor/transmitter to the wheel (2). Drop sensor/
transmitter into the tire (3).
CAUTION: When
breaking the top and bottom bead of the tire off the
wheel, care must be used so the bead breaking
mechanism on the tire changer does not damage the
wheel. This includes the surface of the wheel flange
on the inside of the wheel.
7. Using the tire
changer manufacturer’s procedure, first break down
the upper bead of the tire. Then break down the
bottom bead of the tire.
CAUTION: When
dismounting the upper tire bead from the wheel, the
proper procedure must be used. Not using the proper
procedure will result in damage to the wheel and
tire.
8. Dismount the
upper bead of the tire(1) from the wheel(2).
The upper bead must
be fully dismounted from the wheel to remove the
tire pressure transmitter from the
inside of the tire. The bottom bead of the tire does
not need to be removed from the wheel.
9. Pull upward on
the tire(1). Reach inside the tire and remove the
pressure sensor/transmitter(3). |

 A
smooth, low noise ride and an unbeatable
warranty make the CH95 stand out from
the crowd.
A
smooth, low noise ride and an unbeatable
warranty make the CH95 stand out from
the crowd.