Front Hub Replacement

SPI_top_nav_r1_c5.gif (2004 bytes)

Old (Left) and New (Right) Hubs - Click to EnlargeOld (Left) and New (Right) Hubs - Click to Enlarge

1/23/05

Update 8/26/07

4X4 ICON 2000 - 2008 The DVD! - Click here for details!

4X4 ICON 2000 - 2008 The DVD!

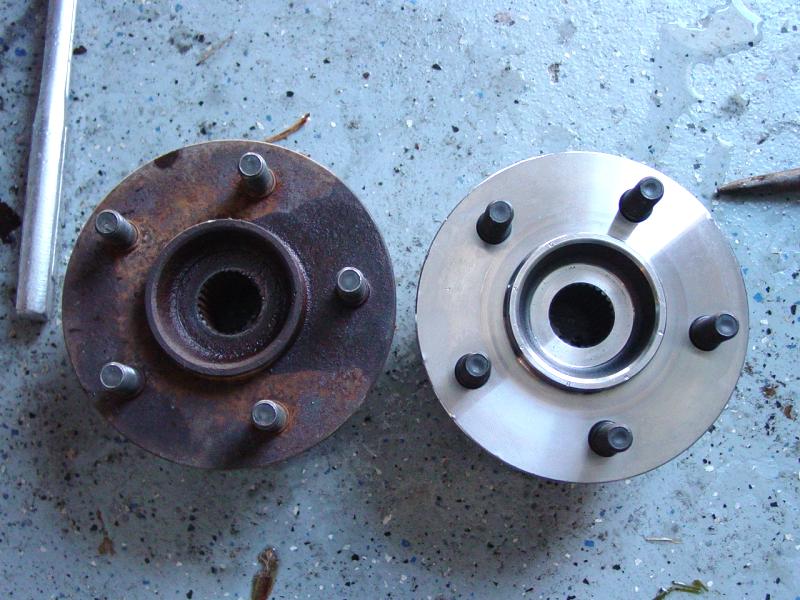
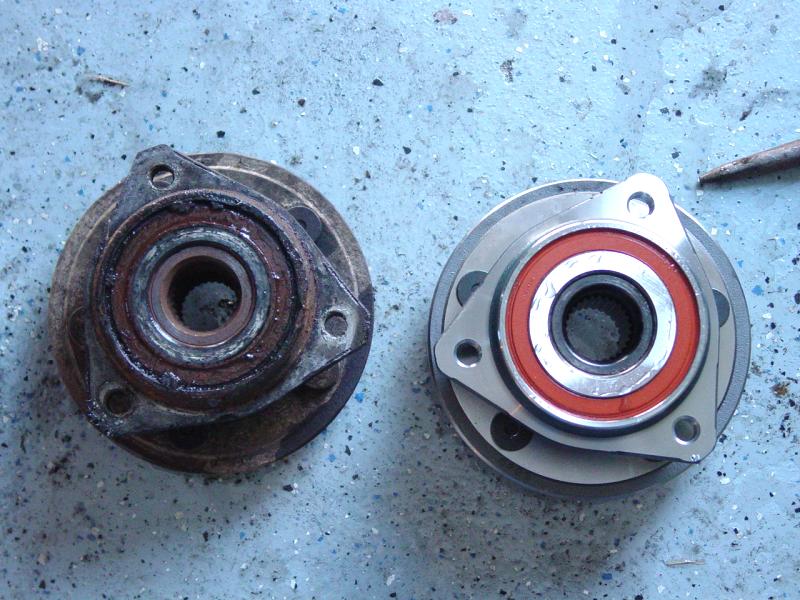
While getting the Jeep inspected for my West Virginia Registration, we discovered that one of the front hubs was worn.  While I was there I had the technician use his impact wrench to remove the hub nut for me as I was unable to remove it when I replaced the front axle u-joints.  He put some anti-seize on the spindle and reassembled it.  That made it likely that I would be able to take it apart when I replaced the hub myself at home.

A few days later I got the part in:

Hub Info - DAN43379 D30F Wheel Bearing and Hub Assembly 25281  11206 4046C - Click to Enlarge

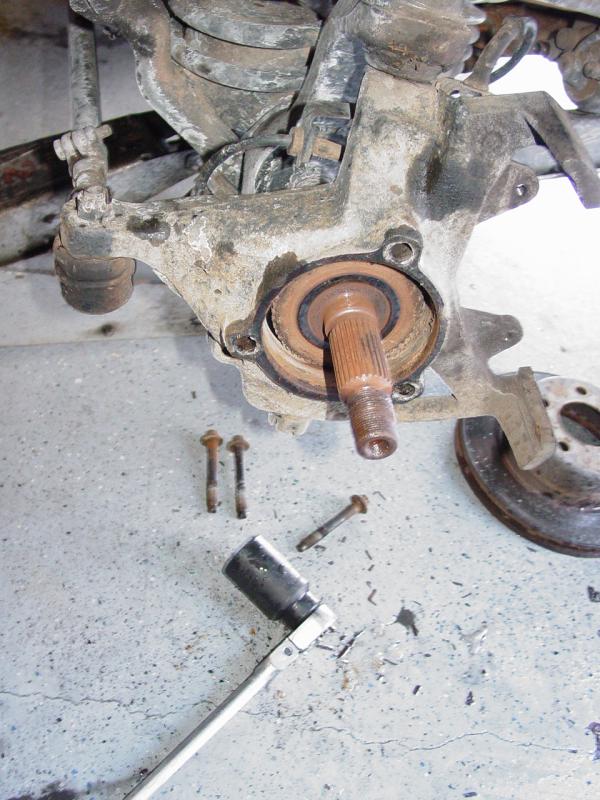
I had the 36mm axle nut socket, the 13mm socket for the three bolts that hold the hub in place, and the standard sizes for removing 
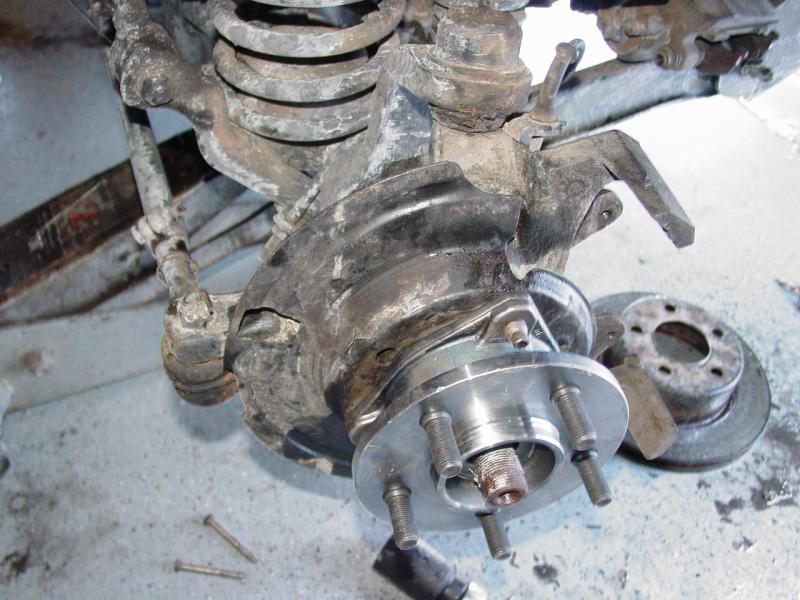
the wheel and the brake caliper.  I took the wheel off and set it aside.  Then I removed the brake caliper.  Then being careful not to damage the ABS sensor wire, I removed the three bolts holding the hub in place.  Then the spindle nut, after removing the cotter pin and retaining cap and spring. 

Disassembled - Click to Enlarge

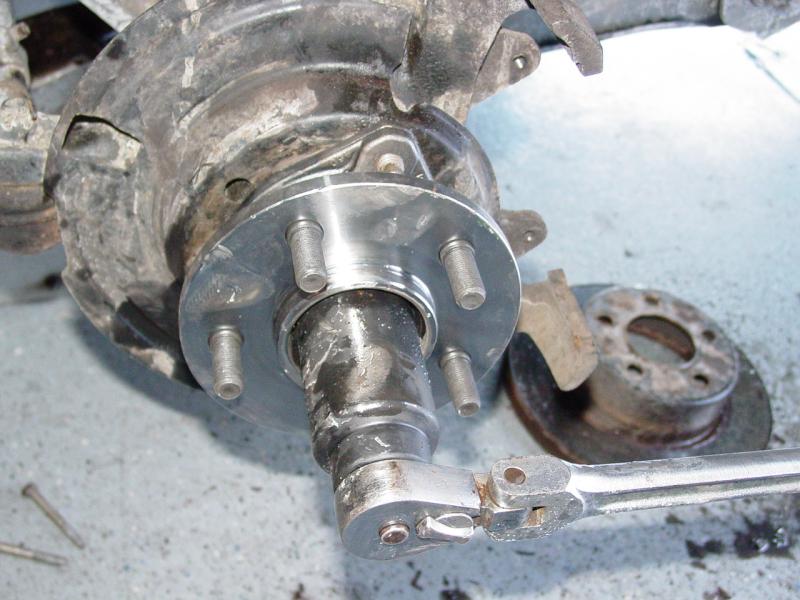
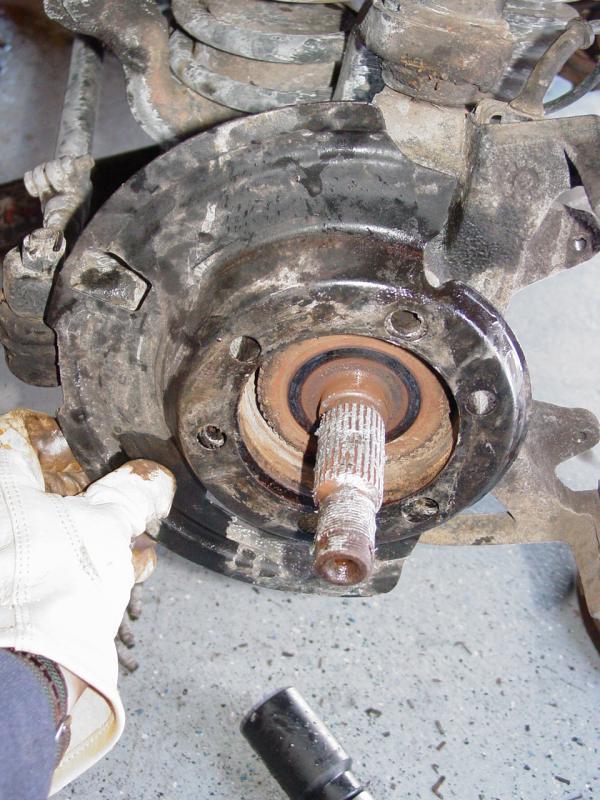
Everything came apart easily, proof that anti-seize really works.


I was a little worried that the spindle spline would be seized into the hub but was pleased to find that it came out easily.   Reassembly was the reverse of disassembly, just making sure to put the dust/backing plate back in place in between the housing and the hub. 

Backing Plate positioned - Click to Enlarge

This was a quick fix to a problem that has safety and tire wear implications.  I was happy to get this job done so quickly and easily!

Hub installed before installing brakes

Hub with Anti-seize compound - Click to EnlargeHub with hub nut and 36mm socket - Click to Enlarge


Update 8/26/07

When I fixed the hub on 1/23/05 I only did one side.  So sooner or later the other side had to go.  And finally it did.  I took this opportunity to replace both hubs and set the one that I put in last time as an emergency spare.  And while I had the hubs out I installed axle tube end seals to help prevent junk from going inside the axle housing.

The work was pretty easy with Ted helping me and keeping me company.

I purchased an electric impact hammer to help get the axle nuts off.  It worked fine.

Dewalt Electric Impact Wrench DW292K
Dewalt DW292K


Return to Jeep Specs Page

Shop for Jeep Toys and Books | See the Toy Jeeps | Off-Road Index 


Click or the [ BACK ] button on your browser to return to the previous page.

Photos, Layout and Design © 2005 Paul M. Provencher All Rights Reserved.
Contents of this Web Site may not be used without written permission

Hit Counter Visitors since 1/23/05

366 4/6/06

Home