Most times
I have gone out on trips with my full doors. Quite often the
internal struggle whether to bring them or not would go something like this:
"It's
not supposed to rain."
"Yeah,
but what if it does - it's two hours on the road and it will really
stink if it's raining and the doors are leaning against the wall in the
garage and not on the Jeep!"
Or I
would go out for an overnight trip and decide to remove the doors,
but be forced to leave them in camp. This wasn't nearly as
problematic (though it did sometimes result in later wishing I had them
along) but I always had the nagging fear they'd be gone when I returned.
Anyone who's priced full steel doors from Jeep lately knows that the
insurance company would not be very happy to hear from me, and I would
not be very happy with either the cost of replacing them myself or
paying the surcharge on the insurance.
So most
of the time I just left the doors on, sometimes happy I did when the
weather turned, but often wishing I had half doors that I could stow on
board and use them only when needed.
I looked
at two options to solve this problem and had decided that soft upper and
lower doors would work. But when I got my new sailcloth top, it
came with new door uppers. That was nice except that I didn't have
the lowers and these would only fit on the hard lower halves.
Pricing just the lower soft doors, I found they were not made to accept
uppers. It's a great example of bad engineering, or good marketing
- making the uppers so that are dedicated to just one solution and not
both, but such as it was, I decided to scare up some upper door frames,
mount the new upper skins and stow them away for the day when I got some
lower half doors to use them with. The door frames were cheap so
it was not a big investment.
I found
some steel half-doors online and had made arrangements to get them but the deal
fell through. I watched regular steel half doors sell all day long
on eBay for $600 or more.
I even refinished a set for my friend Carl.
By the time I got through all this suffering, I pretty much decided
there was nothing I could do but sell the uppers and buy what I needed.
Then I
found the perfect solution.
Warrior Products makes a half door
that is compatible with my soft uppers. So after staring at them
in the catalog all winter long, I finally bought them.
I chose
to get the black ones and the brackets required to install the uppers.
But that's just the beginning...

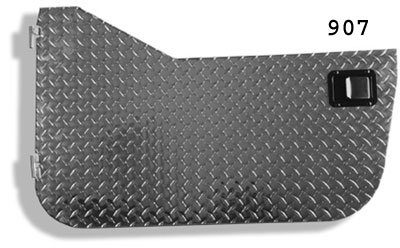
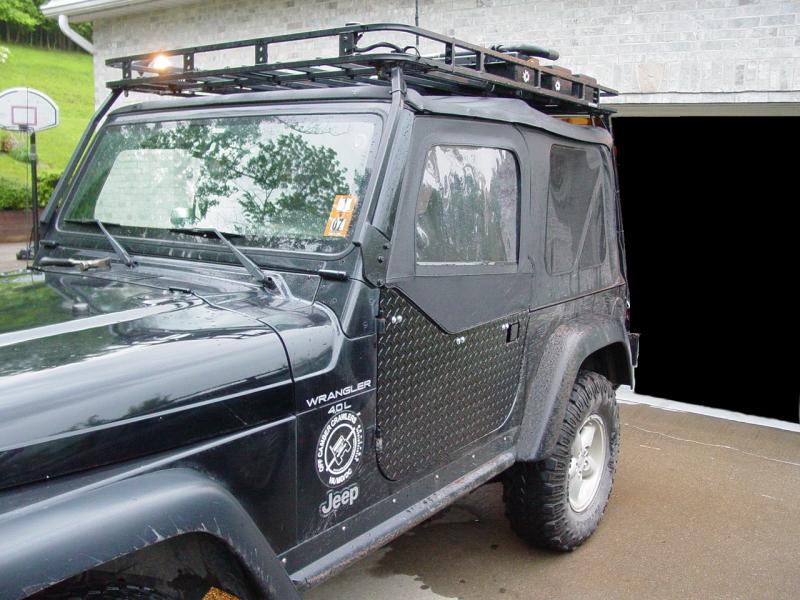
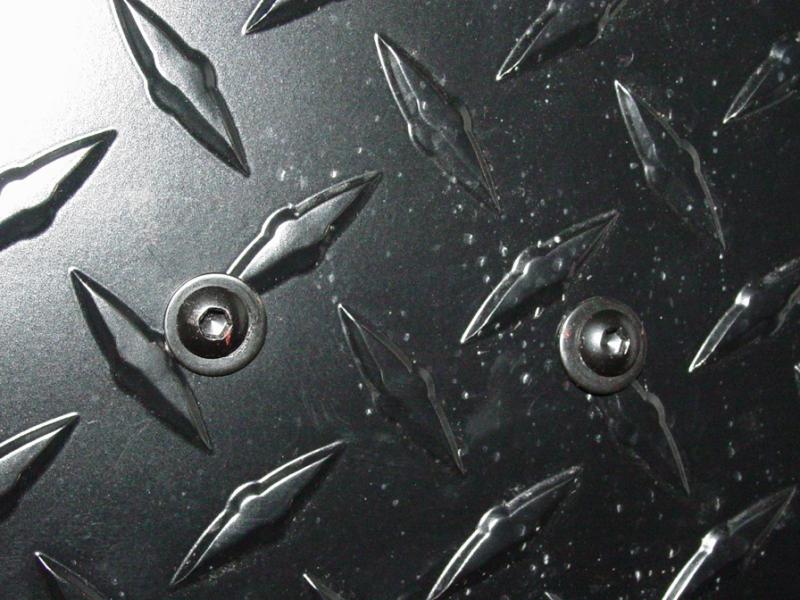
Warrior Products Diamond Plate Half Doors in Black for 97-06 Jeep
Wrangler TJ
(Quadratec Part No:
11140.02 326.04)
These are the
doors we installed on the 1999 Wrangler (picture may not match the product
color)
Warrior Products Window Brackets for Diamond Plate Doors for 97-06 Jeep
Wrangler TJ
(Quadratec Part No:
11140.900 51.84)
They
came very quickly and I got busy deciding what I was going to do with
them. They are cut from diamond plate aluminum and are powder coat
black.
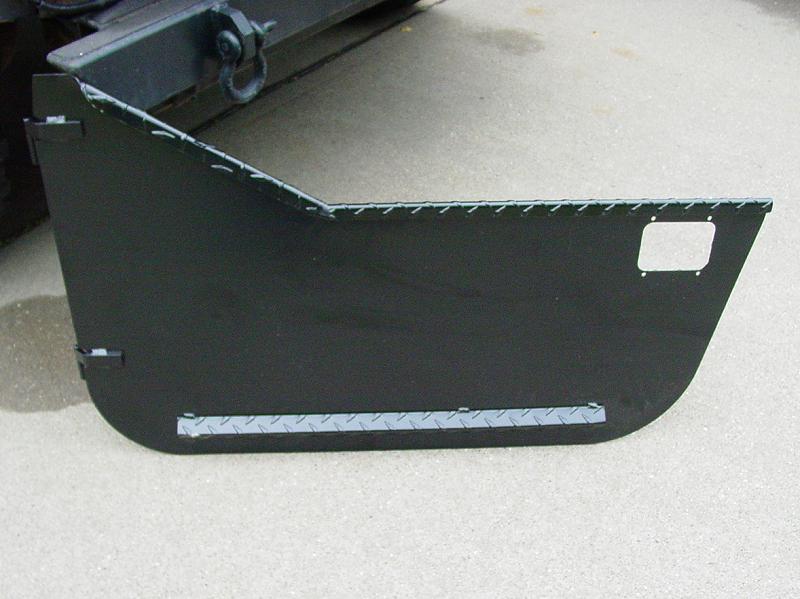
They are
quite minimalist. The thinking is this - the full doors I have are
large, heavy and cannot be removed on an outing unless they are left
behind somewhere and retrieved later. This presents two problems. First,
storage in a secure location to prevent damage and theft, and second I
take a calculated risk if I leave home without them and encounter cold
or wet weather and need them. Overall
I am pleased with them though in their minimal state I needed to
engineer and install several items to make them useful:
Latches


The
doors come complete with latches. They're not very impressive in
terms of their life expectancy but they'll have to do until I can find
something better. I would recommend treating them well if you want
them to last.
I
installed them on their respective doors using the provided hardware.
More about hardware in a little bit...
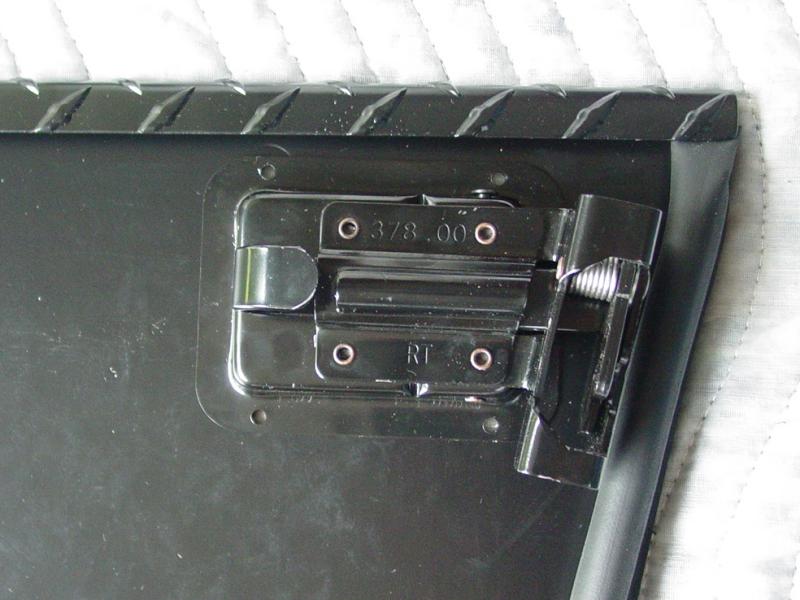
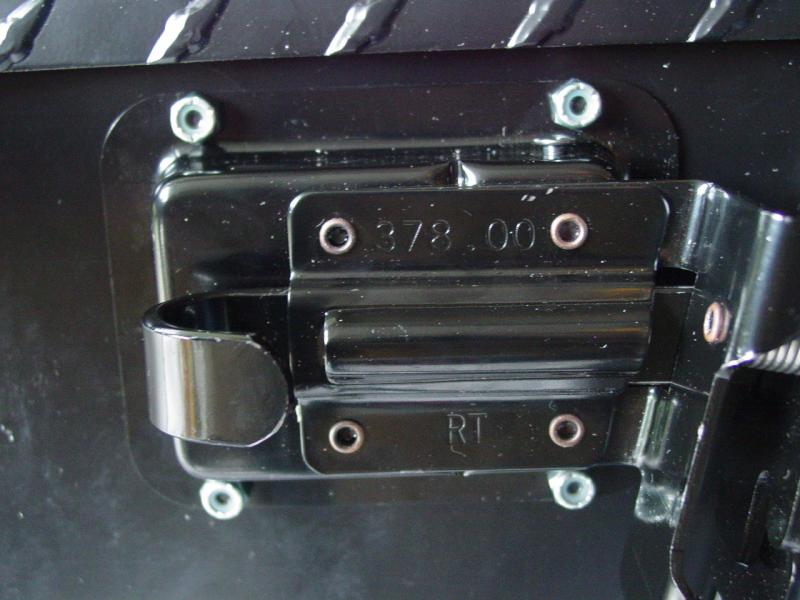
The
latch has an angle to the catch that conforms to the shape of the door
opening.

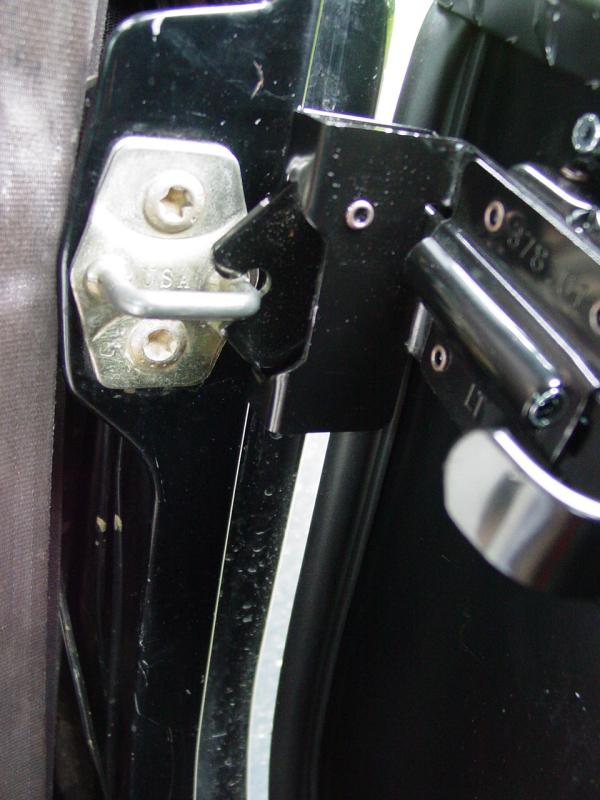
The
instructions are very vague but it appears from the way the door panels
fit on the Jeep and the contour of the panels that the latches are meant
to be installed with the plate outside the door panel. That is how
they're shown in the factory photos. But with the added thickness
of the weatherstripping I used, I installed them on the inside of the
door panel.
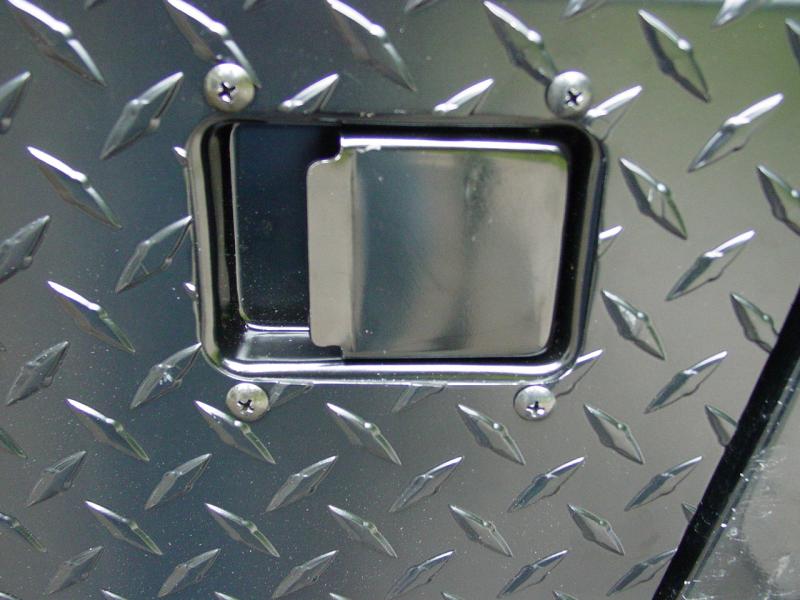
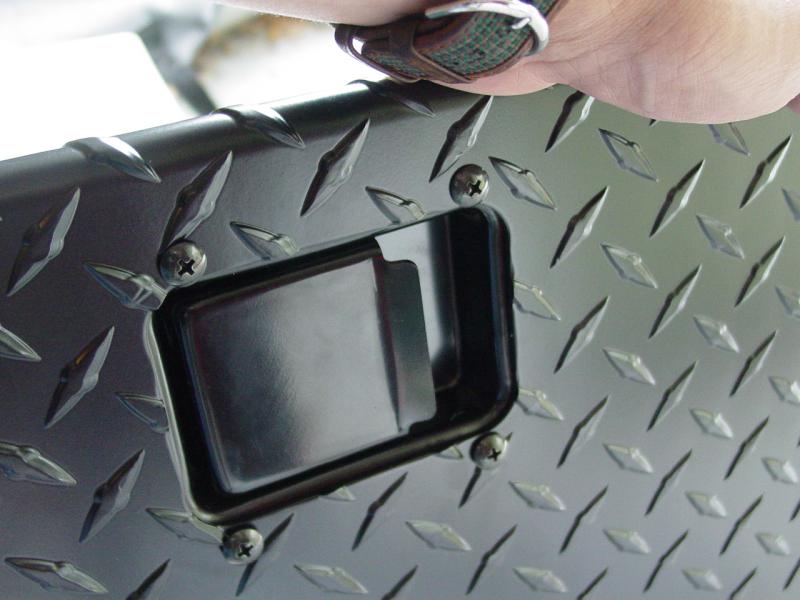
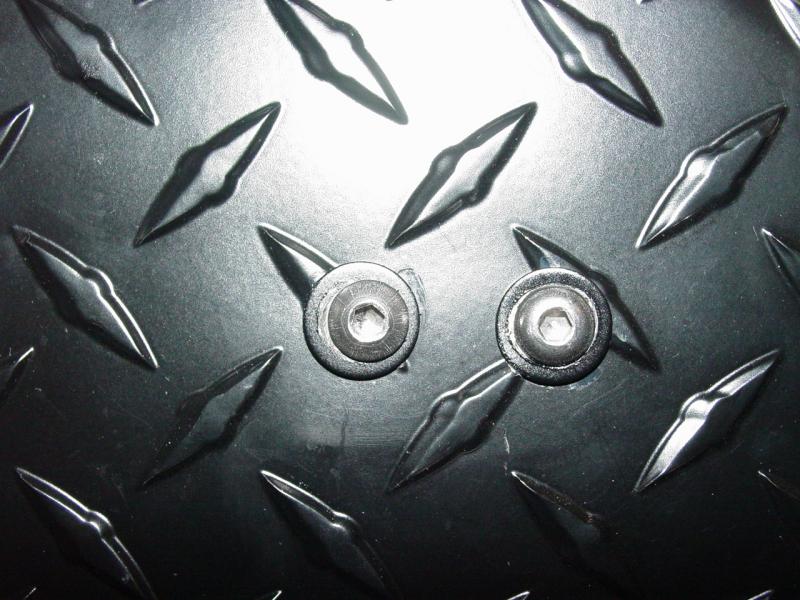
Installing the latches is pretty straightforward. The holes are
drilled in the door panels and aside from specific parts for left and
right (they're labeled in case you can't tell), there's not much to
tell.
Doors | Upper Doors |
Hardware | Weatherstripping |
Mirrors | Check Straps
| Storage Bins
These are the
doors we installed on the 1999 Wrangler (picture may not match the product
color)
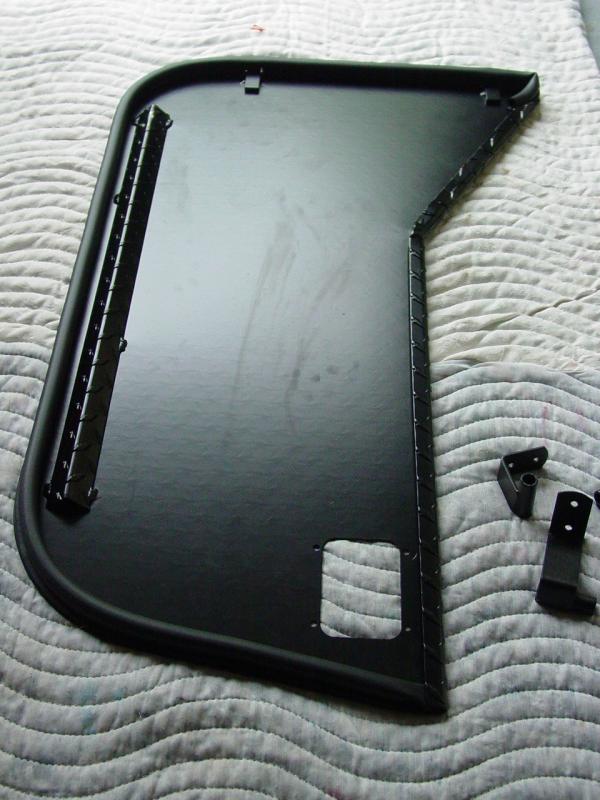
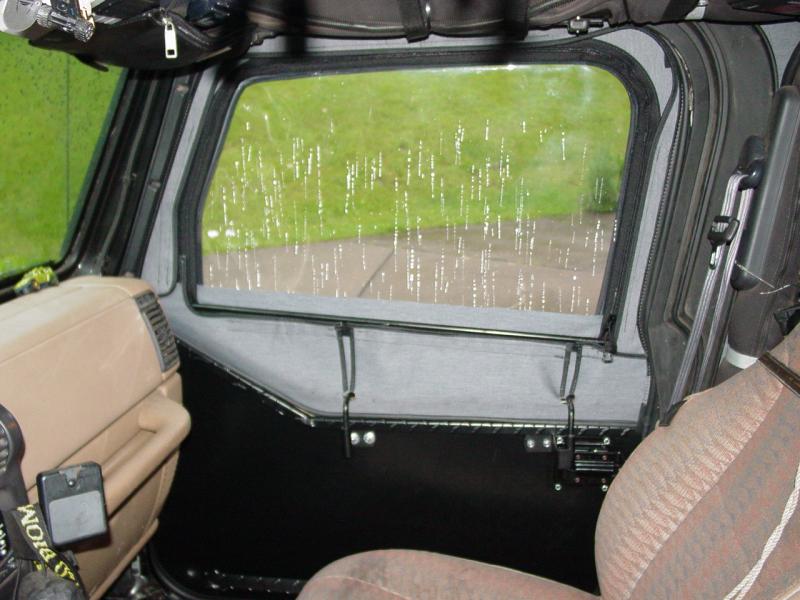
Soft
Upper Door Panels

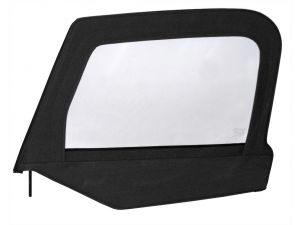
The new
doors are designed to take an upper soft panel with plastic window,
and break down into two pieces each. These are small enough to stow on
board and thereby provide a way to bring them along collapsed or in
place and remove or install them as needed without retrieval from remote
storage.
I got
the hard bottoms rather than the fabric because I already had the soft
uppers (that came with my soft top) and this was the only combination that
would work given what I had on hand. I pulled out my brand new
soft uppers that I had assembled two years ago and was done with this
step, except for mounting the brackets that hold them!
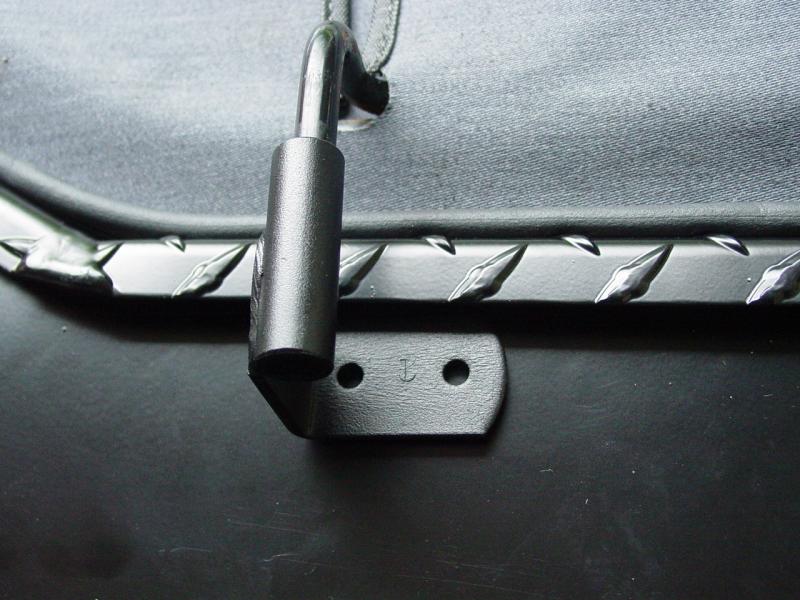
Soft
Upper Mounting Brackets
These are the
doors we installed on the 1999 Wrangler (picture may not match the product
color)
These
were sold
separately. These provide the
necessary hardware to hold the upper doors in place.
Mine
came inside a separate box with no instructions of any kind. The
doors are not marked or drilled (no surprise since some folks won't
order these brackets and would not want holes or marks). This
leaves those of us who do want upper door brackets to locate and install
the brackets, with some holes to drill.
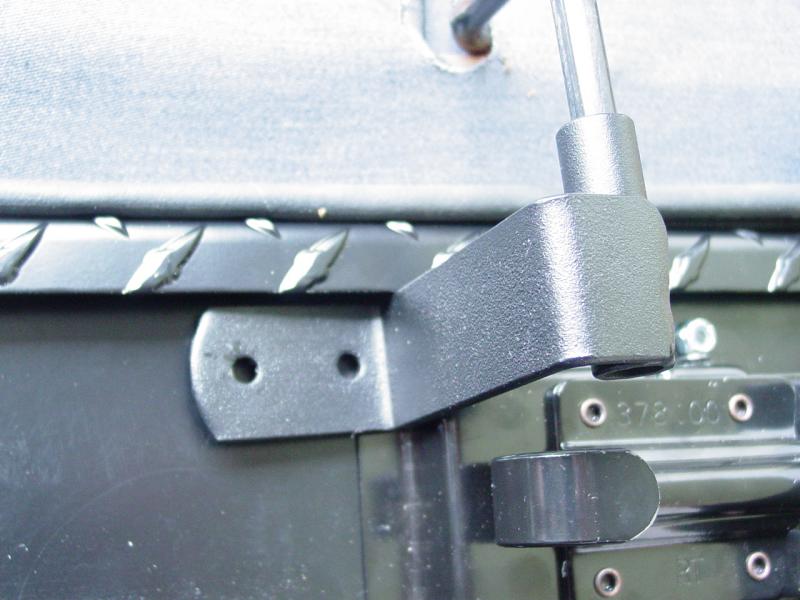
First, I
put the doors on the Jeep and held the upper doors in place to see what
took shape. I compared the images in the catalog that shows the
brackets installed to see if it matched what I was seeing.
It did,
and it helped me to orient the brackets properly. There are six
different brackets - three for each side, and they only work in one
position. So it took a few minutes to sort that out. I
believe the instructions would have provided some insight here.
 |
 |
 |
Bracket
1
Right Front |
Bracket
1/2
Right Middle |
Largest
Bracket
Right Rear |
I
aligned the upper door panel so that the edges of the panel (side to
side) matched the door panel. I pressed the rubber seal on the
bottom edge of the upper door down hard up against the upper part of the
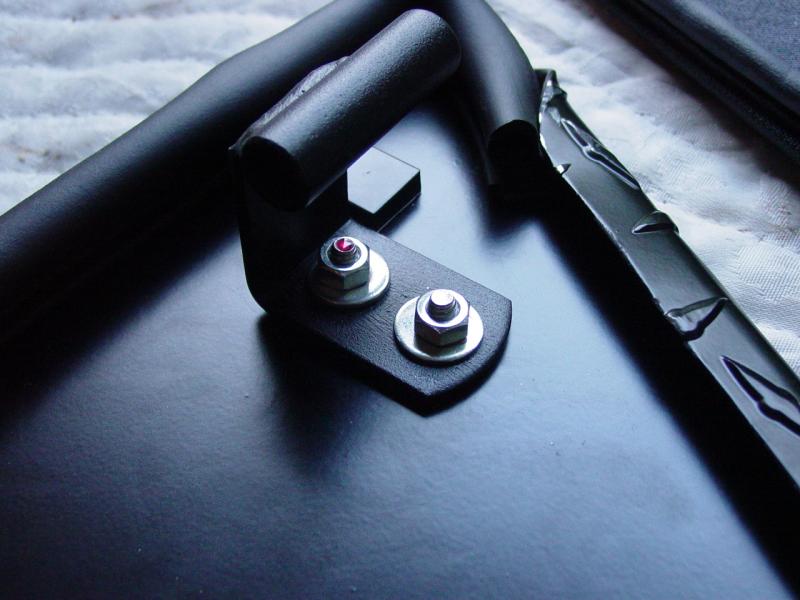
lower door. With the brackets placed as shown on the support pins on the
upper door, I got the brackets aligned.
When I
felt sure the brackets were in the right positions (I checked both doors
to make sure I was not using the wrong brackets), I used a paint pen to
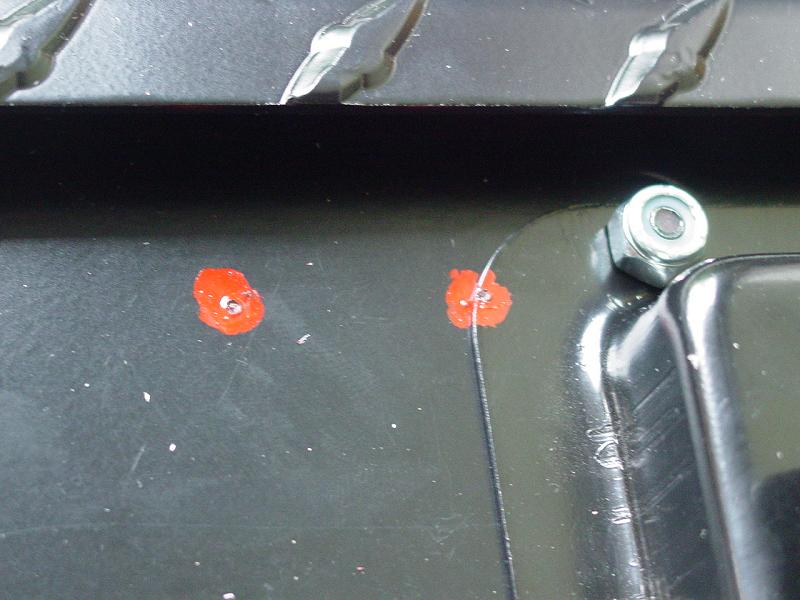
mark the exact spot that I would drill out.
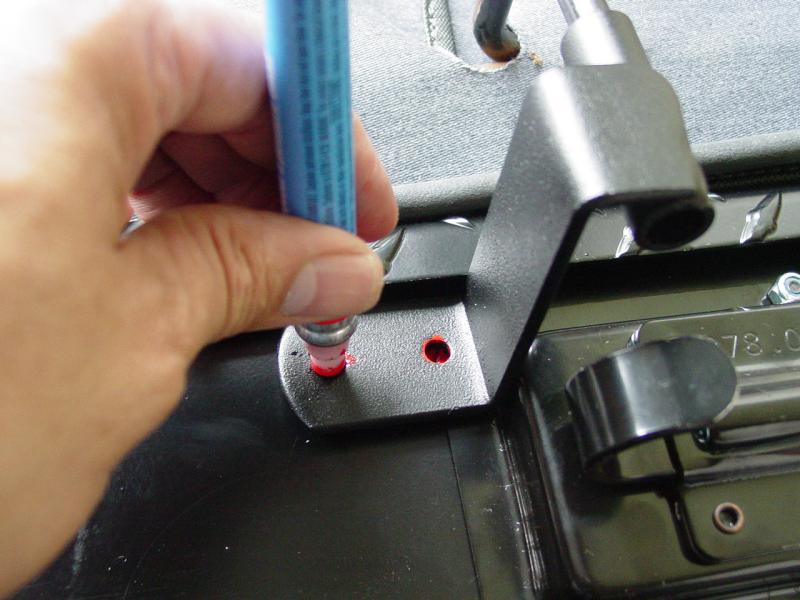

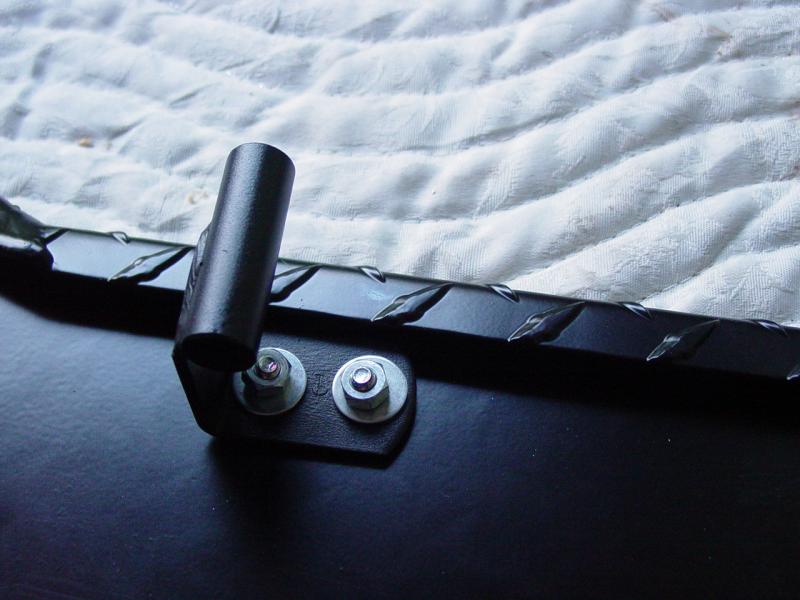
It is
important to check these marks after each bracket is laid out to be sure
that the upper door has not moved and the other brackets still match
their markings.
Next, I
used a center punch to place a dimple in the center of each mark to help
keep the drill bit from sliding around and missing the mark.
The
value of this step cannot be overstated. It is much easier to
drill in the right spot if the drill bit does not move around. One
of the holes centers on the very edge of the door latch.
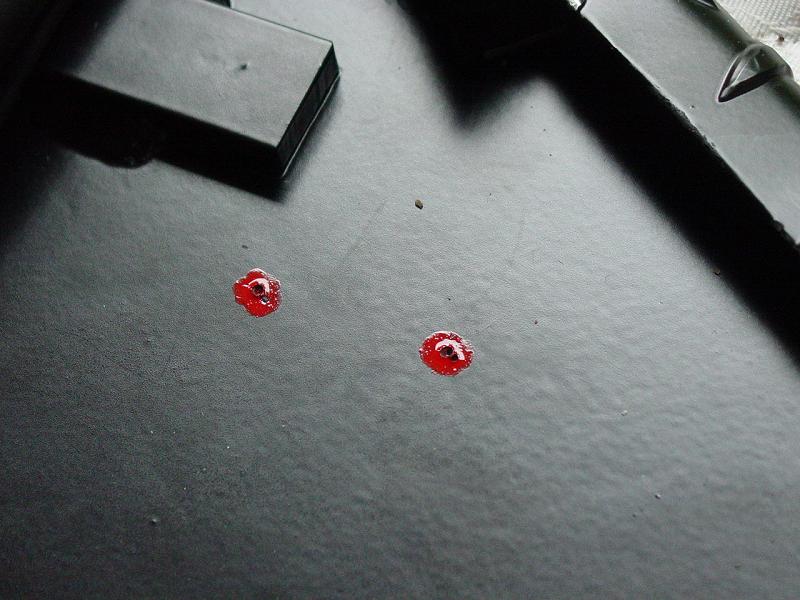

Getting
that hole right without the center mark to keep the drill in place would
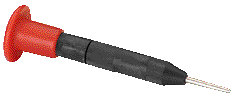
be nearly impossible. Go buy a center punch if you don't have one
- working with metal requires it!
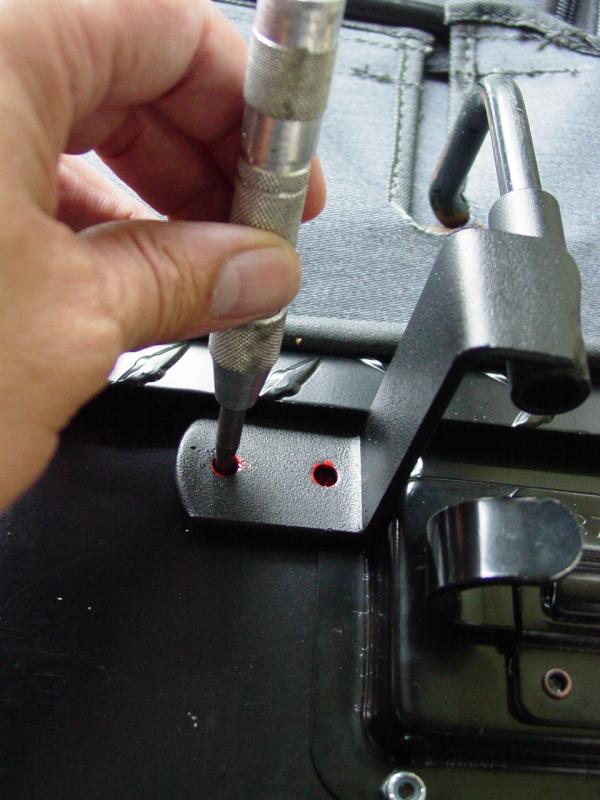
Be sure
you have the exact-sized drill bit to make a hole that perfectly fits
the brackets. This will assure that the brackets cannot move
laterally and with the fastener tightened properly will not move away
from the door panel. With the amount of pressure that is put on
the upper door panel to keep it tight against the door opening, you want
to be sure you get this right so that door panel does not wobble around.
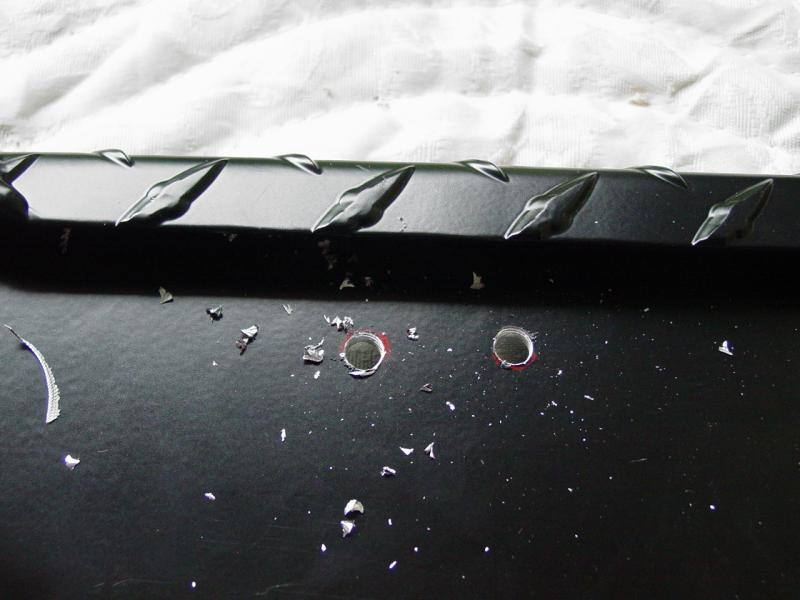
Centering the drill bit on each punch mark, drill the holes. This
image was staged to show centering the bit - be sure to drill with a
wood block you don't care about behind the panel, and with the drill bit
perpendicular to the door panel... The material is very soft and
will not take much to drill through.
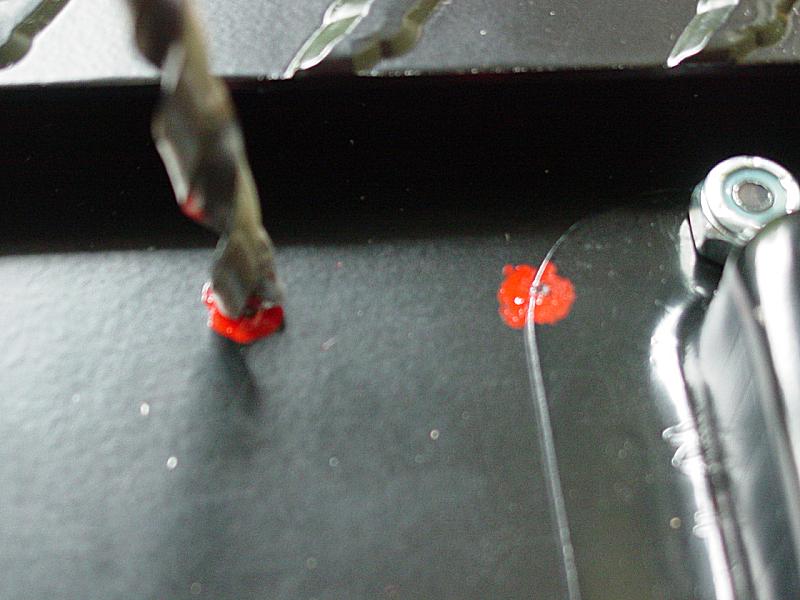
Two
holes done...
Doors | Upper Doors |
Hardware | Weatherstripping |
Mirrors | Check Straps
| Storage Bins
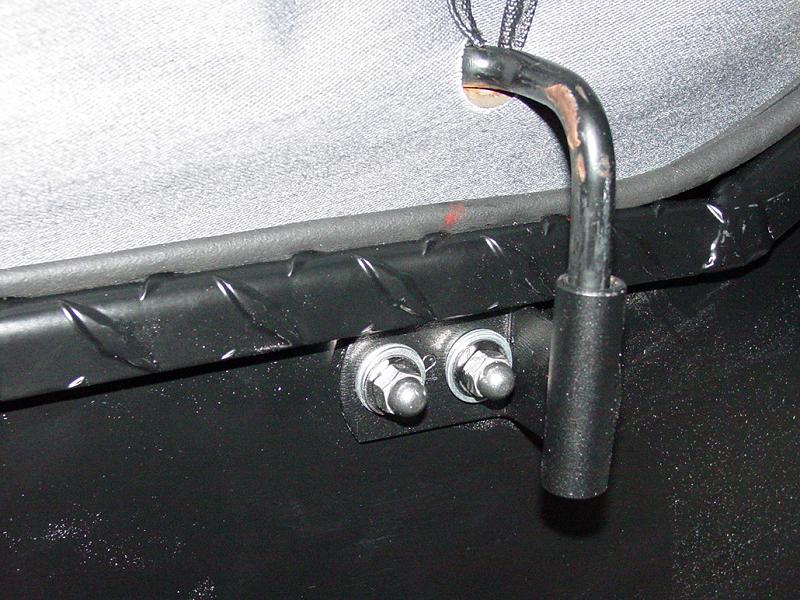
Fasteners (Nuts, Bolts and Washers)

The
hardware included will work just fine, but if you want to dress up the
installation like I did, consider using stainless steel button head fasteners,
and acorn nuts. I test-assembled the brackets with the provided fasteners
and replaced them with the button head fasteners as soon as my order
from Bolt Depot arrived.
I used
Thread Locker Red to make sure the bracket fasteners would not come
loose until I want them to - and using Red probably means I will be
breaking the fasteners off to replace them with Button Socket Head Cap
bolts (stainless steel).

I put
one extra washer under the bracket mounted next to the latch to make up
the thickness of the latch under the other side of the bracket.
Each bolt got washers on the outside of the door and three on the inside of the
door to allow the acorn nuts to properly tighten down. This distributes the load of the bolts wider on the door
panel and protects the passengers from getting cut on the bolts.
Socket Button Head
The
improved hardware I purchased does several things. It makes the
fasteners less prominent, less prone to rust, and more attractive.
The acorn nuts I installed inside the door covers the end of the bolts
reducing the risk of injury from hitting the bolt, and is more
attractive. They also match the ones on the
Sun Performance Heavy Duty Rocker
Protection and the Sun
Performance Lamp Protectors...
|
Part Number: |
92949A540 |
|
Head Style |
Button |
|
Material Type |
Stainless Steel |
|
Finish |
Plain |
|
Class |
Not Rated |
|
Stainless Steel Type |
18-8 Stainless Steel |
|
Drive Style |
Hex Socket |
|
Thread Size |
1/4"-20 |
|
Length |
3/4" |
|
Hex Key Size |
5/32" |
|
Thread Style |
Right Handed |
|
Thread Length |
Fully Threaded |
|
Head Diameter |
.437" |
|
Head Height |
.132" |
|
Rockwell Hardness |
B85 |
|
Minimum Tensile Strength |
85,000 psi |
|
Thread Fit |
Class 3A |
|
Specifications Met |
Not Rated |
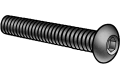

 |
 |
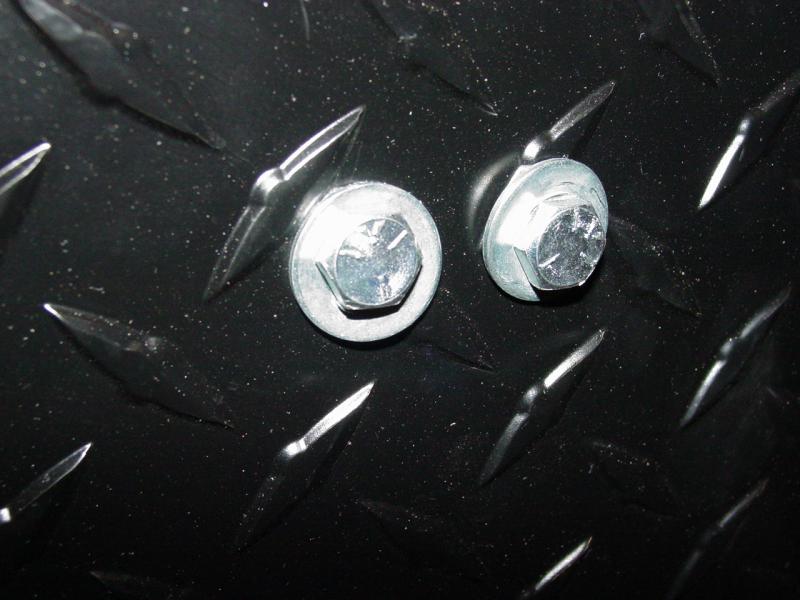
| Factory
Hardware - Good |
Replacement Hardware - Better |
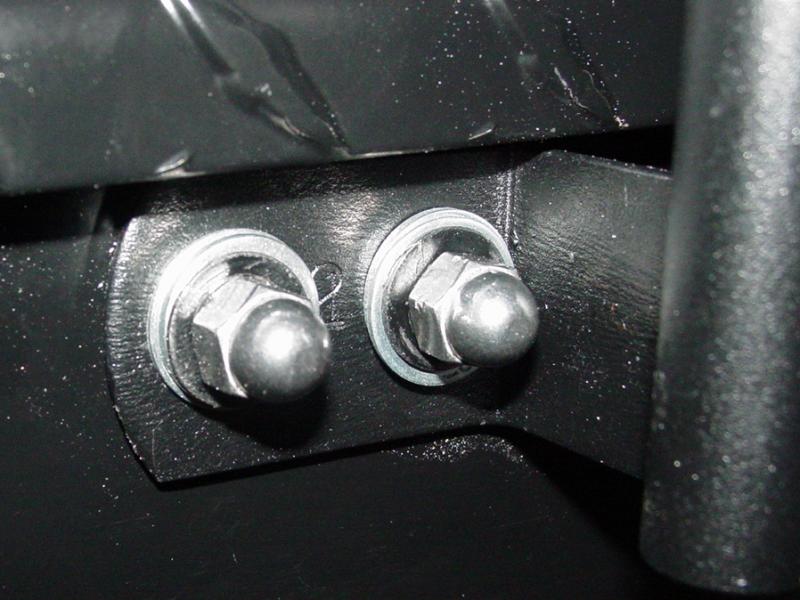
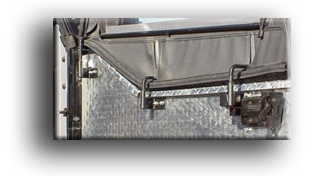
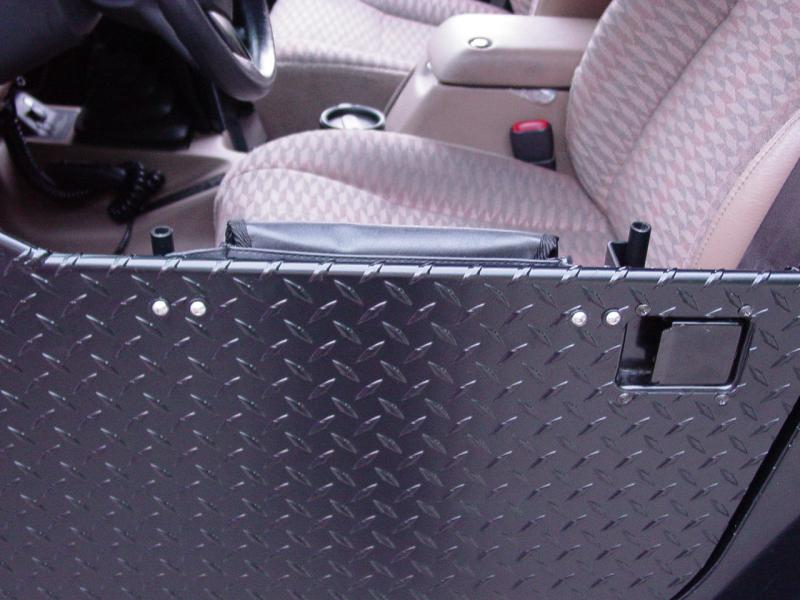
Here are the brackets bolted on (inside door panel view).
These are the
doors we installed on the 1999 Wrangler (picture may not match the product
color)
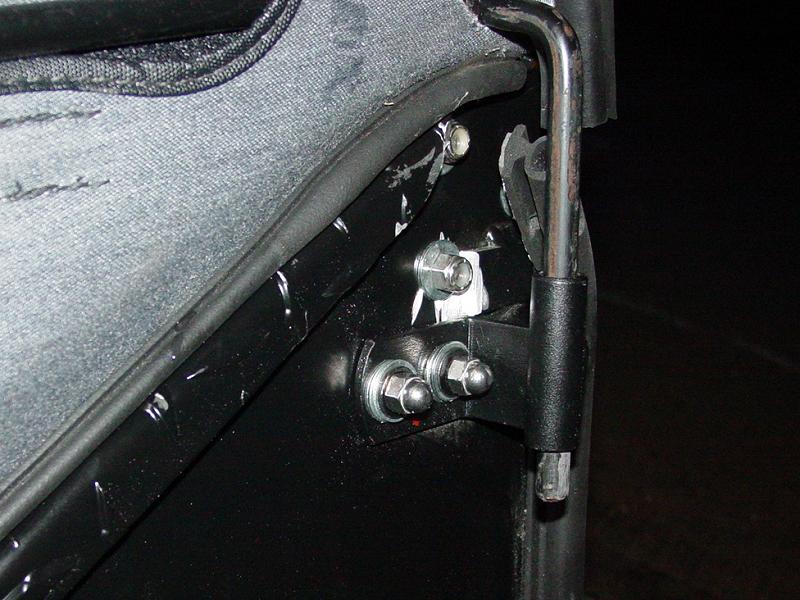
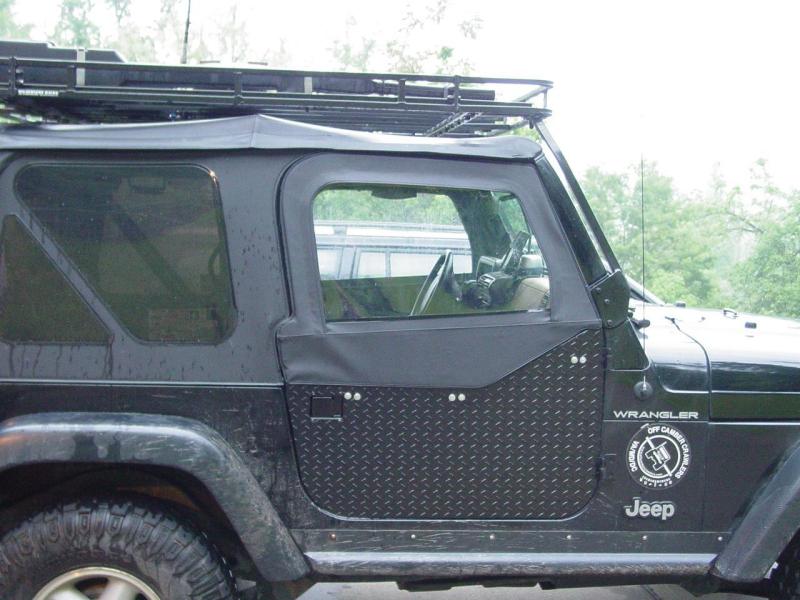
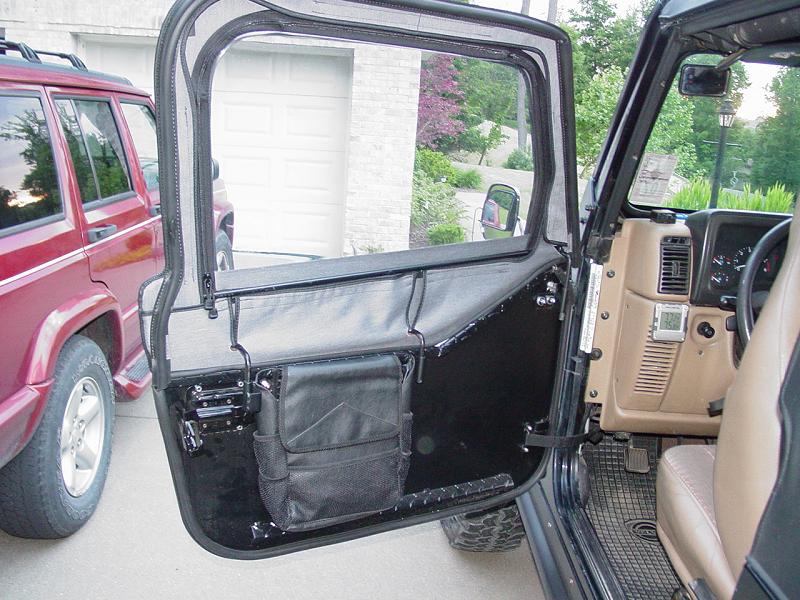
Here are
some pictures showing a second test fitting of the passenger door.
These were taken after a test drive to see how well they sealed and fit
the opening. The stock fasteners will still installed and I had
not yet installed the mirrors. I was even blessed with some rain to test how well
they keep the wet out!


A look
at the inside of the door when mounted on the Jeep.


|
Door Upper
Bracket Assembly to Door |
|
Quantity |
Part |
Size |
Number |
|
12 |
Acorn Nuts |
Ľ-20 |
Hillman
#882034 |
|
48 |
Flat
Washers |
Ľ |
Bolt Depot
#05323 |
|
12 |
Socket
Button heads |
Ľ-20 x ľ |
Bolt Depot
#4412 |
|
12 |
Hex Nuts |
Ľ-20 |
Bolt Depot
#2563 |
Doors | Upper Doors |
Hardware | Weatherstripping |
Mirrors | Check Straps
| Storage Bins
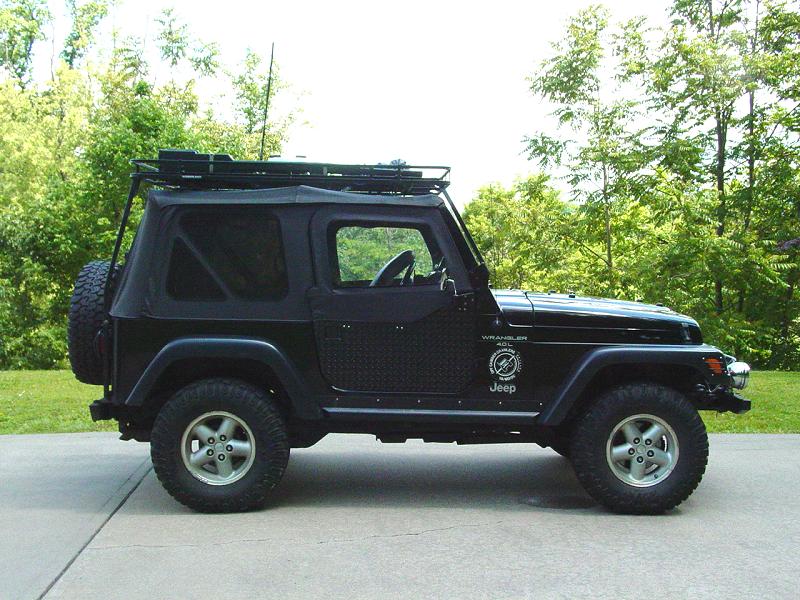
Stock Product
At this
point the stock assembly is done. Here is what it looks like.
Admittedly the Jeep is dirty but this image shows the doors with the
manufacturer-supplied hardware and prior to installing mirrors, check
straps and other customizations and hardware upgrades.
Doors | Upper Doors |
Hardware | Weatherstripping |
Mirrors | Check Straps
| Storage Bins
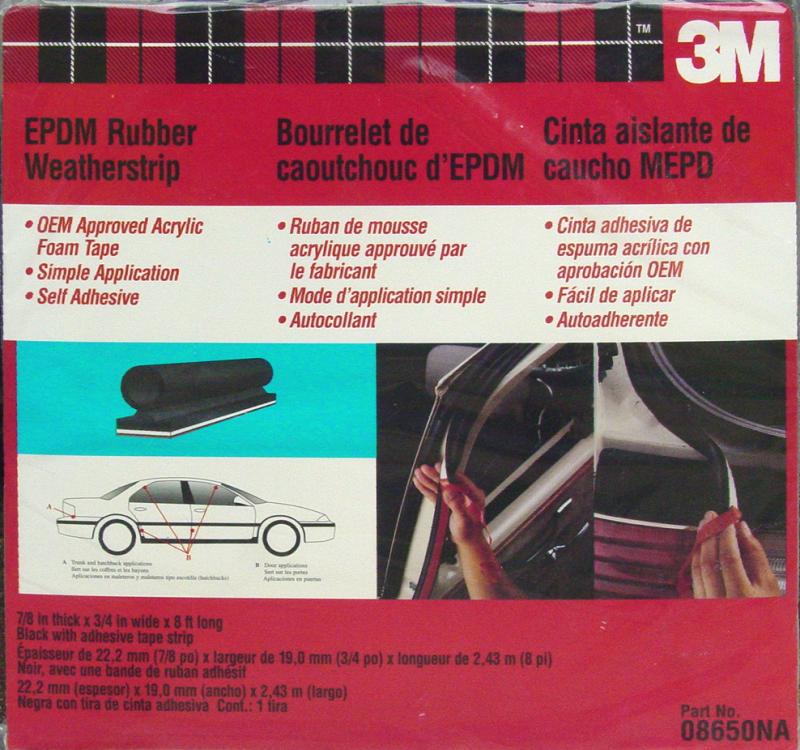
Weather Stripping

The 1/8"
x 1/16" material they included is laughable. I'm not sure what kind of
weather it's supposed to keep out, but it was not satisfactory to me. I
purchased some OEM material that will provide damping and
weather sealing properties - $40 added to the cost of the doors.
But the difference it makes is huge.
Weatherstripping Installation
Following the manufacturers instructions, I cleaned the surface on the
doors where the weatherstrip would go with isopropyl alcohol. Do
not underestimate the importance of this step. The high-tech
adhesives used for automotive products work very well, but only if the
surfaces to which they are applied are spotlessly clean and free of
dust, dirt, water and grease. Isopropyl alcohol does an excellent
job of removing these things quickly. Don't skip this step or your
weatherstrip will fall off the doors in short order.


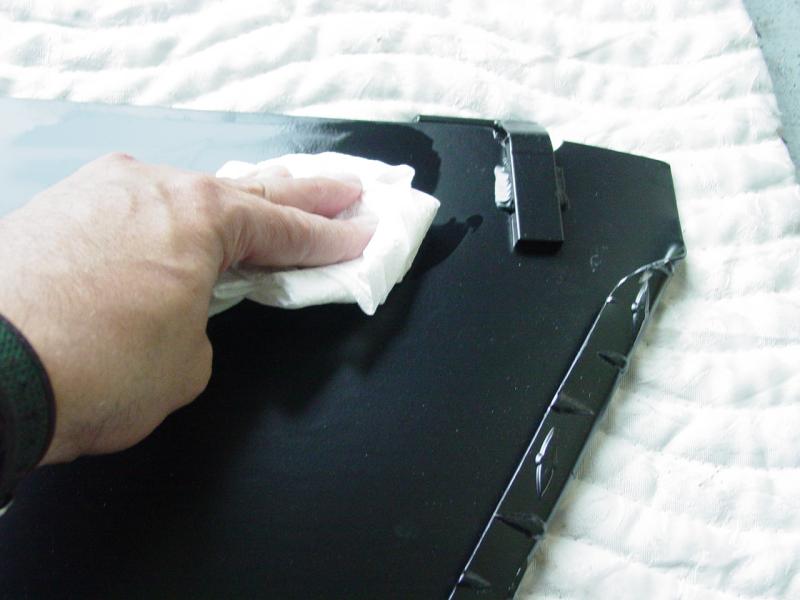
After
cleaning the door surfaces, I removed just a little of the protective
liner on the weatherstrip, then I lined up the start of the weatherstrip so that it started
under the folded down top edge of the door. This will help protect
it from being caught by passengers entering and exiting the vehicle.
Then I
slowly worked my way along the edge of the door, lining up the
weatherstrip just inside the edge of the door, then slipping more of the
protective liner out as I lightly pressed the weatherstrip in place.
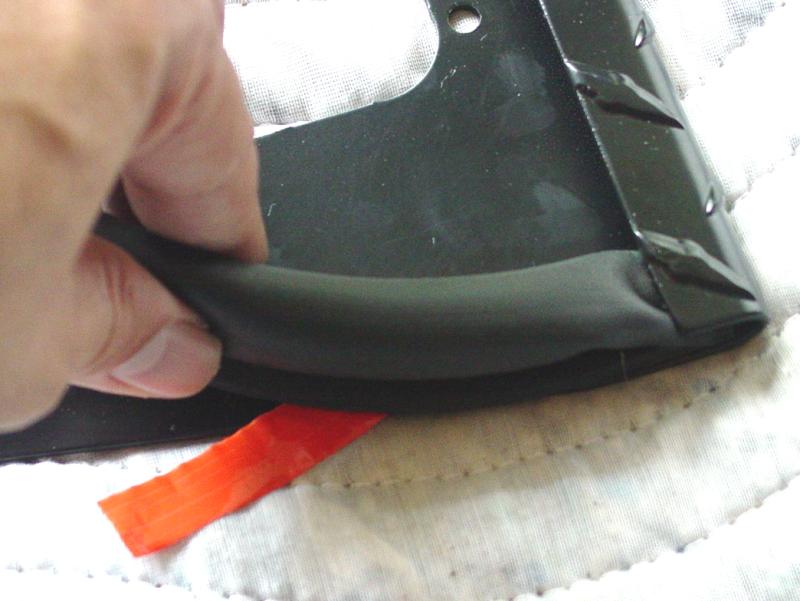
Working
with the weatherstrip, unrolling with the curve following the same
general curve of the door, made it easier to work and probably increases
the chance it will stay stuck because the rubber had already started to
take shape after being stored in the roll from the factory to the store
to me. I continued applying the weatherstrip until I reached the
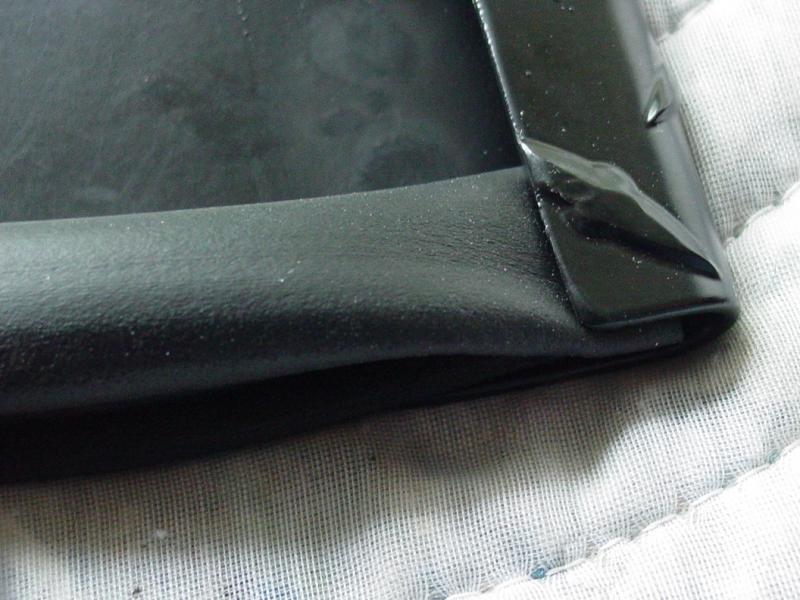
hinges.

At this
point I retrieved a new single edged razor to cut the weatherstrip.
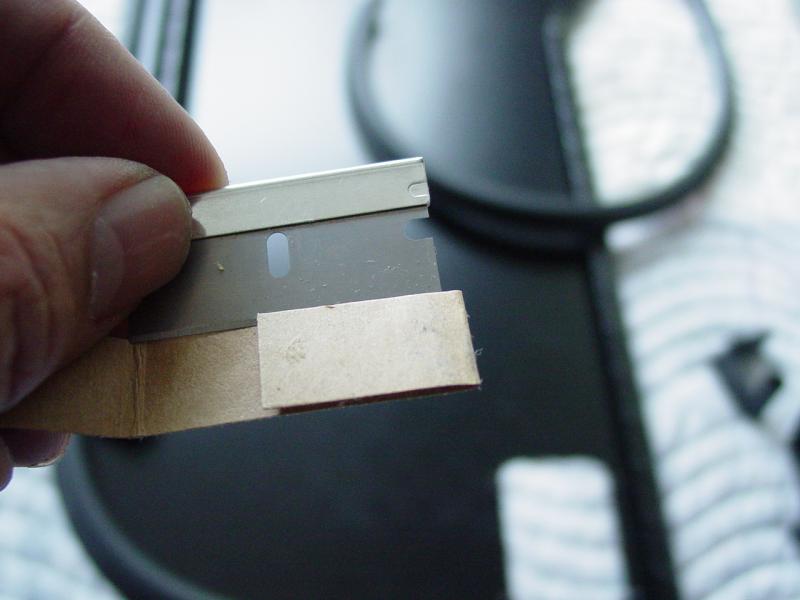
But
instead of either just running over the hinge bar which would have left
gaps and caused the weatherstrip to be thicker here, I cut into the
weatherstrip just
enough to allow the adhesive to lay flat on the hinge bar and conform
down to the door surface, but without cutting the weatherstrip surface
that provides the seal.
This
should give a better seal and allow the weatherstrip to remain stuck to
the door. Here is a shot showing the finished seal.
At
first, this is going to make the doors harder to close. But as the
weatherstripping conforms to the opening and loses some of its newness,
it will allow the door to close more easily and still maintain a seal.

Manufacturer
Instructions for Installation (not all info applies - we
did not have any old weatherstrip to deal with)
3M Part Number
08650NA EPDM Rubber Weatherstrip
7/8 thick by 3/4 inch wide x 8 feet long
http://www.3m.com/
Simple application procedure
This
supplemental weatherstrip applies quickly and easily
next to damaged weatherstrip.
For best adhesion,
application surface must be clean and dry. Remove
dirt, grease oil etc. from surface with 3M Brand
Adhesive and Wax Remover, (3M part #3607 or #08984) or
isopropyl alcohol. Dry surface completely. Recommended
application temperature range is between 60°F (15°C) and
100°F (38°C).
Note: DO NOT REMOVE EXISTING DAMAGED WEATHERSTRIP!
To apply: measure and
cut desired length of weatherstrip; remove the orange
liner (avoid touching adhesive side with fingers or
thumbs), and lightly press in place
next to damaged weatherstrip.
DO NOT over-stretch weatherstrip.
Immediately check
alignment and reposition as necessary. When properly in
place, secure by pressing firmly along entire length of
the weatherstrip. It's that simple!
  
|
Doors | Upper Doors |
Hardware | Weatherstripping |
Mirrors | Check Straps
| Storage Bins
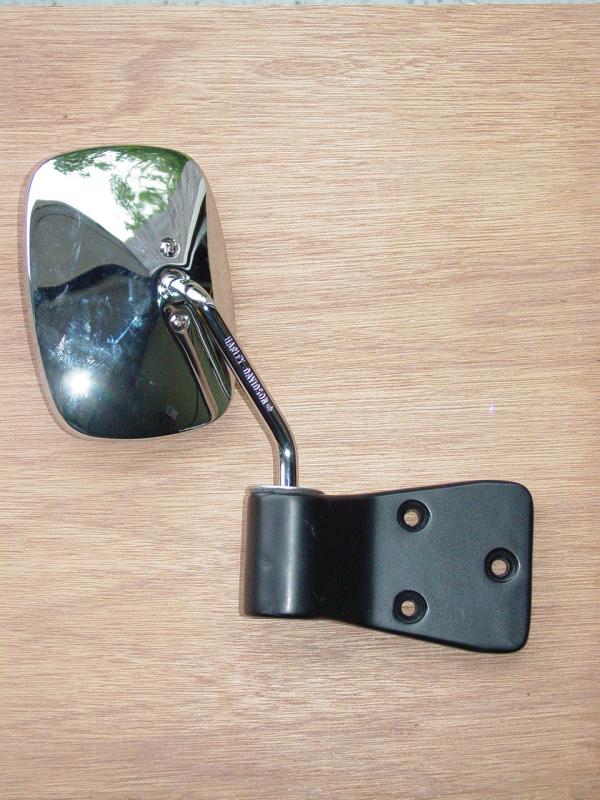
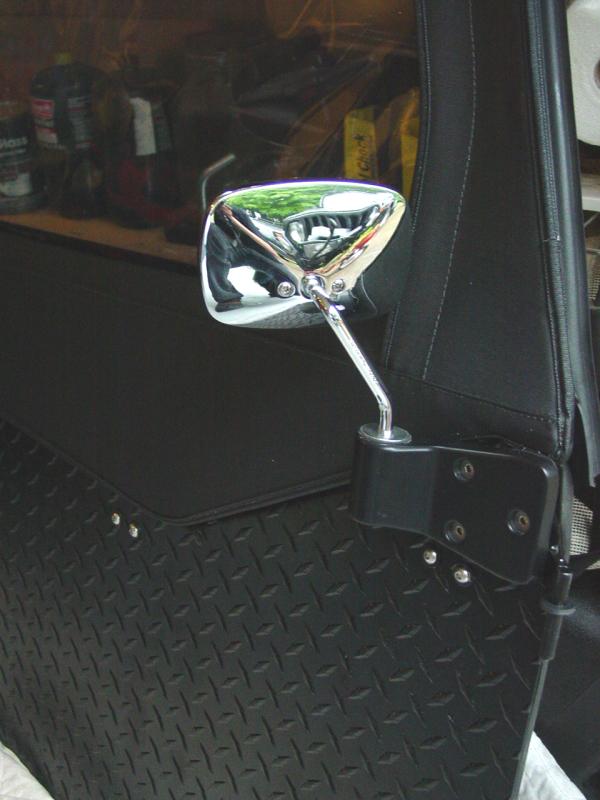
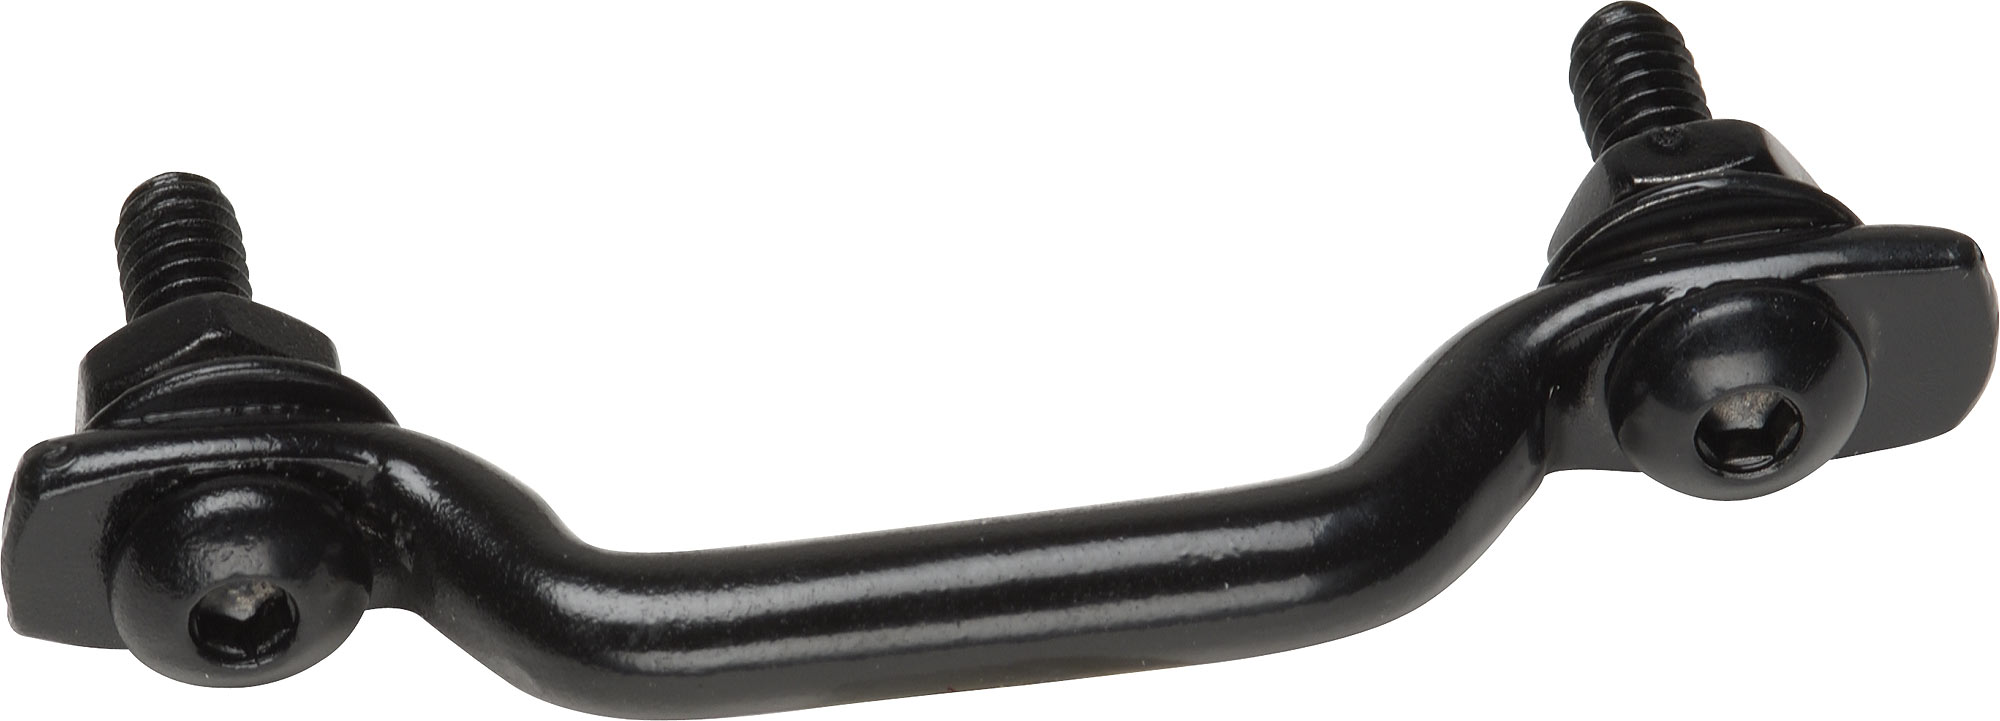
Rearview Mirrors


I have
left-over right and left factory mirror mounting plates from the
spare mirrors that I use when doorless.
I mounted them in
the proper place on the doors. The plates mount with flat socket
head cap bolts and self-locking nuts. Instead
of relocating the factory mirrors, I bought two small Harley-Davidson
Mirrors that will easily collapse for storage. The installation of
the Harley-Davidson mirror mounting the factory brackets is mildly
custom since the hardware is not a perfect match. Here is what I
did.
I
purchased an assortment of hardware and special fittings from a local
Lowe's, and also from Bolt Depot. The stuff I got at Lowe's is
quite common; the stuff I got at Bolt Depot is less common. I have
listed the parts, sources, quantities and sizes below. All the
hardware except for the nylon spacers is 18-8 stainless steel.
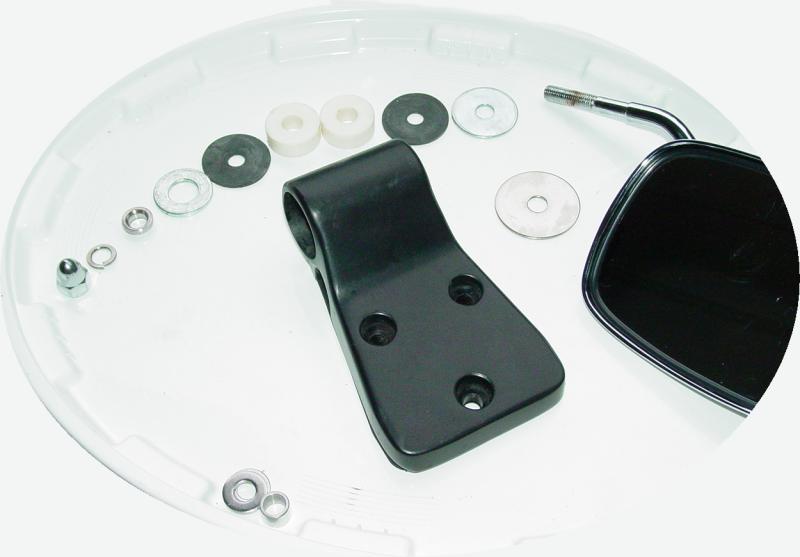


In order
of assembly working from right to left in the image above:
-
Fender Washer
-
Rubber Washer
-
Spacers (2)
-
Rubber Washer
-
Metal Washer (part number not listed, from home parts bin, but a
critical item, fits inside bracket)
-
Tapered spacer (included in Harley-Davidson mirror kit)
-
Nut
(acorn nut shown, used lock nut also supplied with mirror kit)
-
The
fender and rubber washers are slipped onto the mirror arm, then the
arm is inserted into the bracket (the opening of the bracket faces
downward).
-
The
two nylon spacers are slipped inside the bracket and onto the mirror
arm.
-
The
other rubber washer is inserted inside the bracket and onto the
mirror arm.
-
The
metal washer is inserted inside the bracket and onto the mirror arm.
-
The
tapered spacer is inserted inside the bracket and onto the mirror
arm, centering itself into the hole on the washer - this centers the
bottom of the mirror inside the bracket.
-
The
nut is inserted inside the bracket and threaded onto the bottom of
the mirror arm. It will just thread to the point where the
bottom of the mirror arm is flush with the shoulder of the nut.
The top washer outside the mirror bracket will become slightly
concave, indicating a good tight fit.

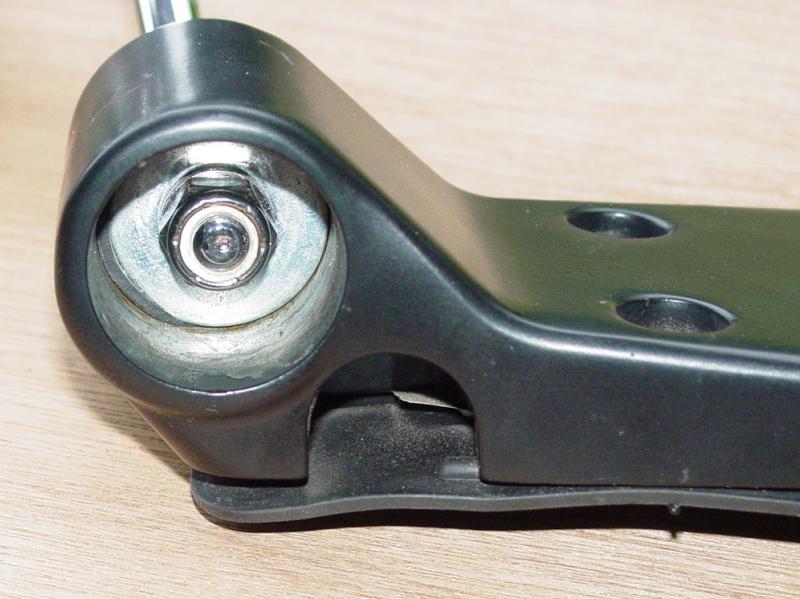
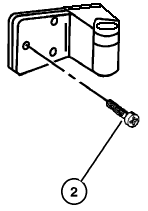
The
bracket is mounted to the doors at the very top leading edge. This
causes slight interference with the bolts that hold them on and the
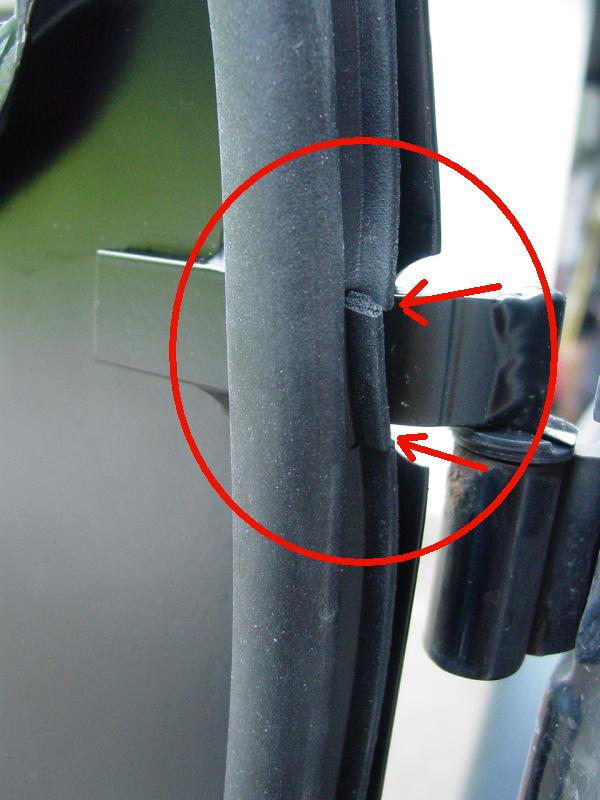
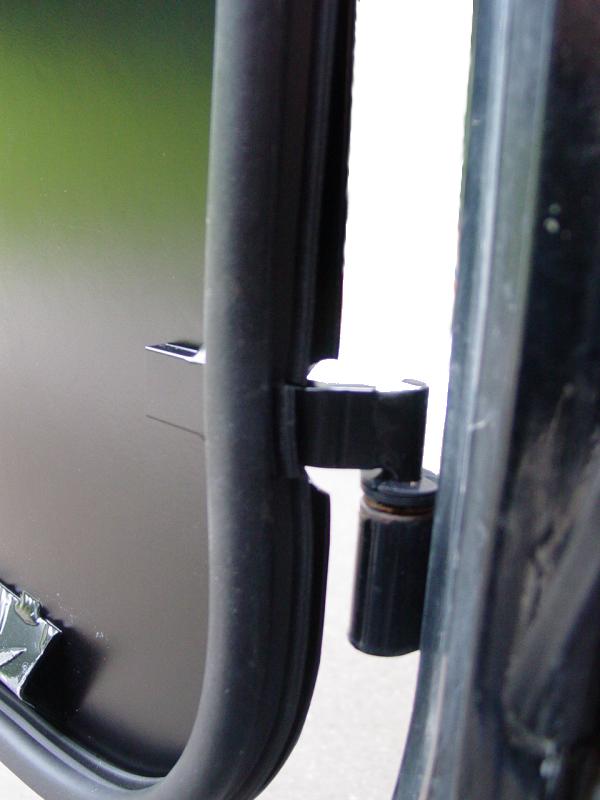
hinge bracket. I used a hand grinder to produce some clearance.


91875-82TA - Right
Side
91892-82TA - Left Side
Flat Socket Head
Bolts for mounting bracket
|
Part Number: |
92210A542 |
|
Head Style |
Flat |
|
Material Type |
Stainless Steel |
|
Finish |
Plain |
|
Class |
Not Rated |
|
Stainless Steel Type |
18-8 Stainless Steel |
|
Drive Style |
Hex Socket |
|
Thread Size |
1/4"-20 |
|
Length |
1" |
|
Hex Key Size |
5/32" |
|
Thread Style |
Right Handed |
|
Thread Length |
Fully Threaded |
|
Head Diameter |
.531" |
|
Head Height |
.161" |
|
Rockwell Hardness |
B70 |
|
Minimum Tensile Strength |
70,000 psi |
|
Thread Fit |
Class 3A |
|
Specifications Met |
Not Rated |

|
Mirror
Assembly to bracket and door |
|
Quantity |
Part |
Size |
Number |
|
2 |
Fender
Washers |
5/16 x
1-1/4 |
Hillman
H#880345 |
|
4 |
Rubber
Washers |
5/16 x
1-1/4 x 1/16 |
Hillman
H#880375 |
|
6 |
Socket
Flat Head Bolts |
Ľ-20 x 1 |
Bolt Depot
#4484 |
|
4 |
Nylon
Spacers |
1 x 3/8 x
3/8 |
Hillman
#880448 |
|
6 |
Lock Nuts
Nylon Insert |
Ľ-20 |
Hillman
#882040 |
Doors | Upper Doors |
Hardware | Weatherstripping |
Mirrors | Check Straps
| Storage Bins
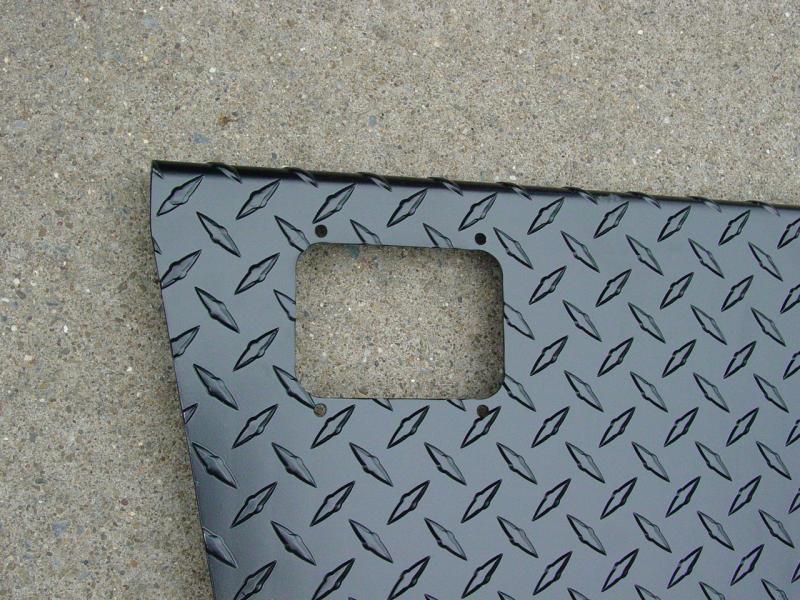
Edging
The
doors are cut from flat stock and while the edges appear to have been
burnished to remove sharp edges and burrs, they're still a bit sharp and
unfinished looking. $2 worth of 1/4" vinyl tubing and $5 worth of
industrial adhesive should give me a nice black edge (cut the tubing
neatly to create a channel, then glue it on) I will write this up
when I have finished doing it.
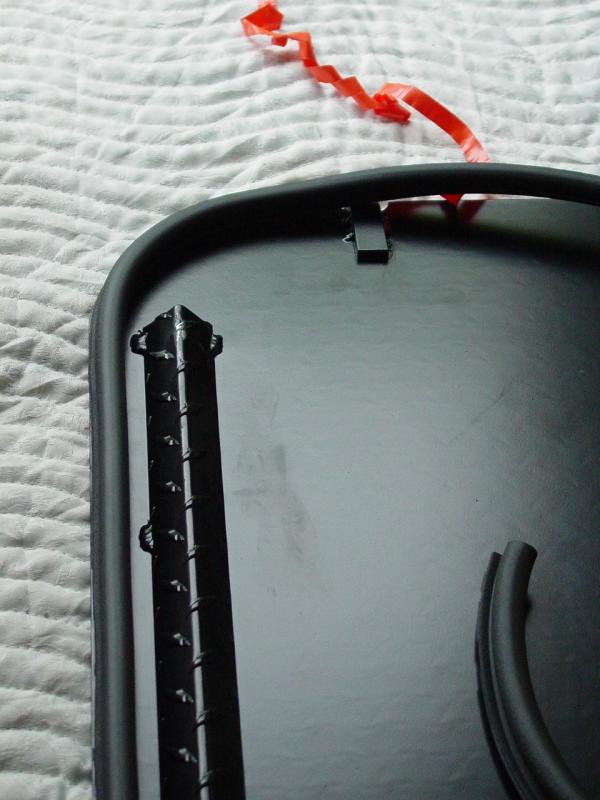
Inside Door Panel Lining
The
inside of the doors are simple flat metal plates with the top edge (the
window sill, if you will) simply rolled over to form a ledge. Three
brackets (sold separately) bolt to the metal door to accept the upper
door mounting pins. The pins simply insert to the brackets. This leaves
the three brackets and the three pins exposed to the interior and
looking like a great place to get raked should I abruptly be forced into
the door during a crash or sudden stop (seatbelts and airbags
notwithstanding). So I am planning to cut some material (wood or
plastic) to countersink these brackets and form a ledge that will
double as an arm rest, while putting the brackets safely below a smooth
surface that would be less risky to rub against.
Inner
Door Panel
One
detail that is vexing is the inner surface of the door
plate. I checked price for sound deadening material. HiFi material
for doors was prohibitively expensive ($100 for a package of
self-adhesive rubber tiles with fancy metallic logo-clad exposed
surfaces); weather guard roofing (used for the roof-edge near the gutter
to protect against frozen water from rotting the roof deck) which was a
relative bargain in terms of price ($59) and quantity, but still too
expensive and textured like roofing shingles, which was unacceptable.
The one thing left that might work is the material used to seal
stand-alone constructed showers - a self-adhesive, rubber material in
thick sheets - but I got distracted at the home supply store and
neglected to price it. Stay tuned...
Doors | Upper Doors |
Hardware | Weatherstripping |
Mirrors | Check Straps
| Storage Bins
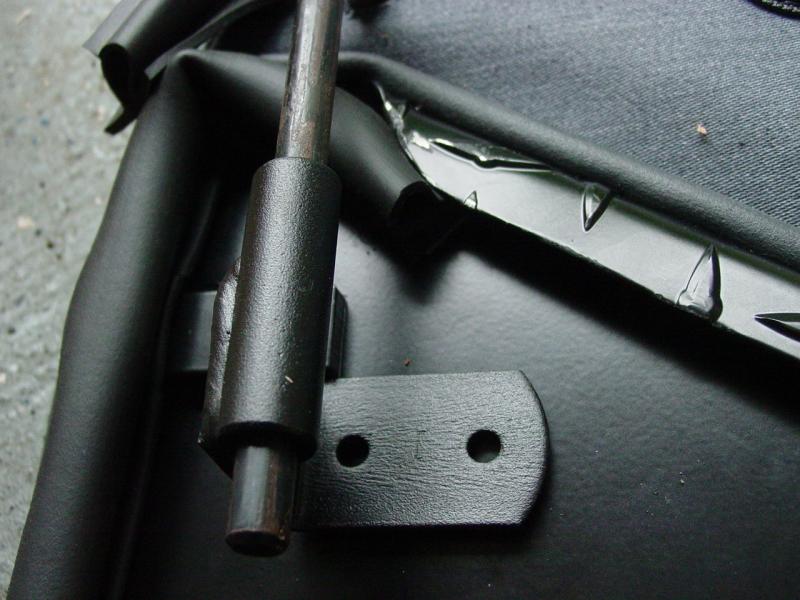
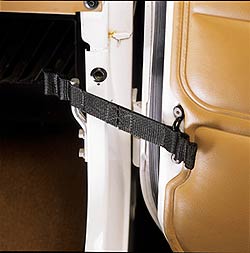
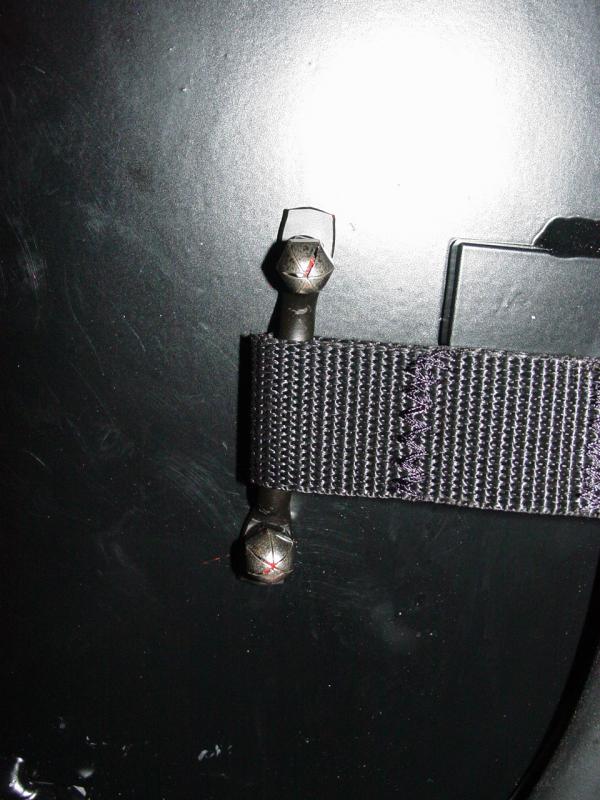
Check
Strap

Two more
things actually - the catch-strap that keeps the door from
swinging wide open and hitting the Jeep. I need a couple pieces of
webbing and a couple footman loops. On order...
 |
 |
|
Footman Loop and Finish Nuts |
Button Head Stainless Steel Allen Bolts |
 |
1
13029+00 Smittybilt (769401) ADJUSTABLE DOOR CHECK STRAPS (PAIR) 12103.01 $7.99 $7.99

2
23017+102 KENTROL FOOTMAN LOOP 55-86 CJ SS BLACK 50423 $3.99 $7.98
Inside Handle
I may
add some sort of loop handle to use to close the door from inside
as there is no handle or grip of any kind. Presently I use one of
the legs of the upper soft door as a handle to latch the door from
inside.
Dome
Light shut off
The pin
that activates the dome light switch is not activated by the doors.
I may add a tab that will shut off the dome light when the doors are
closed. I can use
the switch I put in but this would disable the
key and light warnings that have proven so useful to me in the past.
Doors | Upper Doors |
Hardware | Weatherstripping |
Mirrors | Check Straps
| Storage Bins
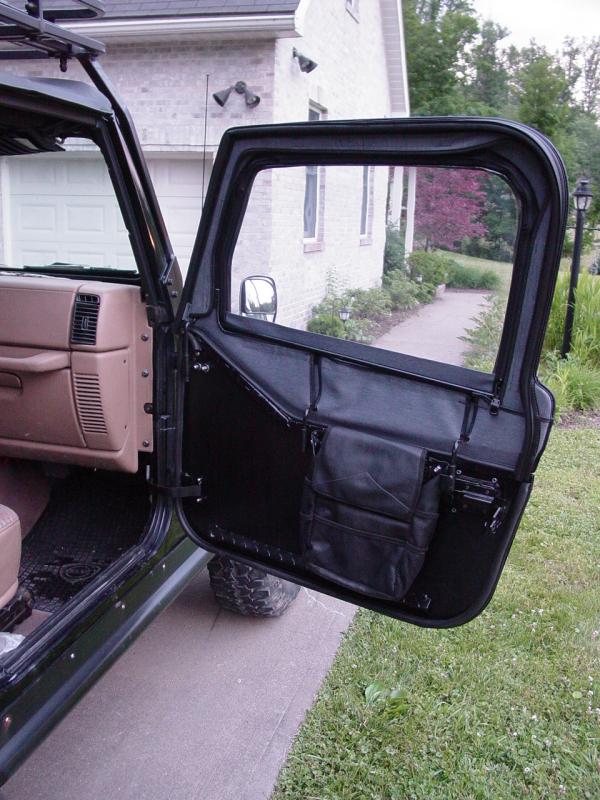
Storage Bins
I wanted some pouches for
storing the stuff I keep on my doors. I found a couple Back Seat Storage bags that
looked like they might work as storage on my half-doors.


So I purchased them and
brought them home. On the way, I picked up some larger stainless steel washers.
I took off the acorn nuts
on two of the bolts that hold the brackets in place. I made holes in the bags to go
onto the bolt, then glued a washer on each side of the hole in the bag to provide strength
to the bag where it is bolted to the door. Then of course, I bolted the bags to the
doors.
I put them so they'd
remain below the top edge of the door even when the door uppers are removed.
Here's what it looks like with the uppers
off...

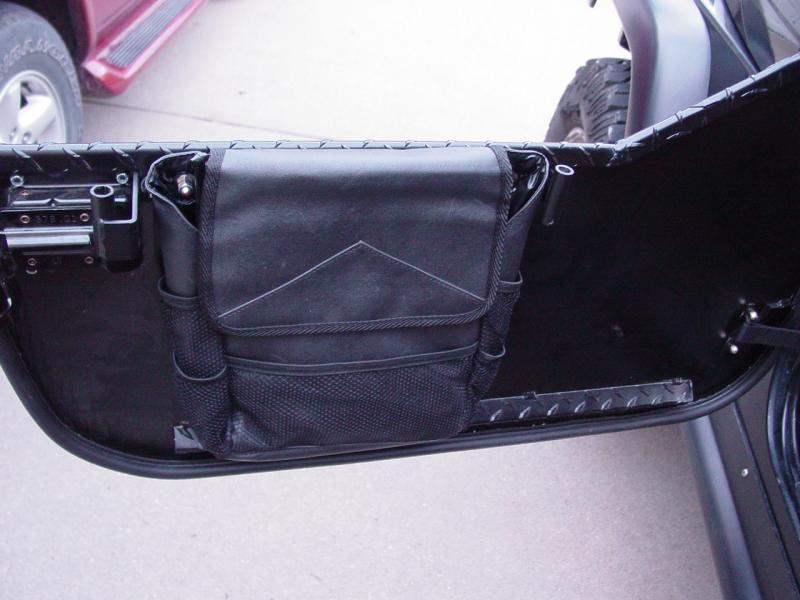
The passenger side...


With the uppers installed...


Doors | Upper Doors |
Hardware | Weatherstripping |
Mirrors | Check Straps
| Storage Bins
Summary
It will
take lots of details to work before it is done, but this is an
interesting project. What will be funny is when people see them and like
them so much they go purchase them and then find out what really comes
out of the box! To finished all the modifications described here,
plan on spending another 25-30% of the cost of the doors on the upgrades
described here. And that does not include the soft upper door
frames and coverings! In the end it's not much cheaper than some
used 1/2 doors that need to be painted or the Bestop plastic doors that
come with speakers. But these doors can be stashed on board if you
don't need them and this was the primary reason for choosing this
approach. If you don't want to remove your doors while you are on
the road, those options are probably a better value proposition for you.
Comments
A kit of
the upgrade stuff would make an interesting product. It it does
disappoint that the manufacturer would not have thought of it and
offered it as an option.
Also I
will probably replace all the hardware with Allen head stainless button
fasteners to stay consistent with the other fasteners used on things
bolted to the Jeep so far.
A nod to
style I guess...


Doors | Upper Doors |
Hardware | Weatherstripping |
Mirrors | Check Straps
| Storage Bins


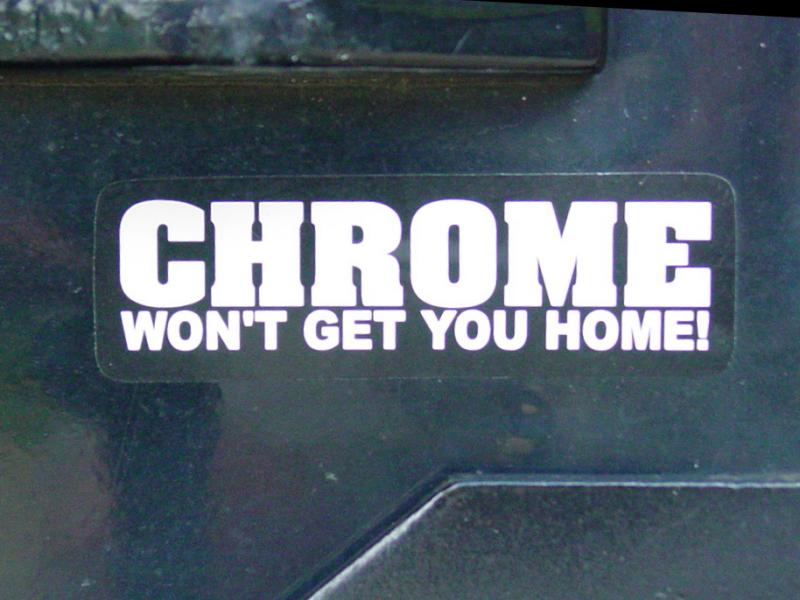
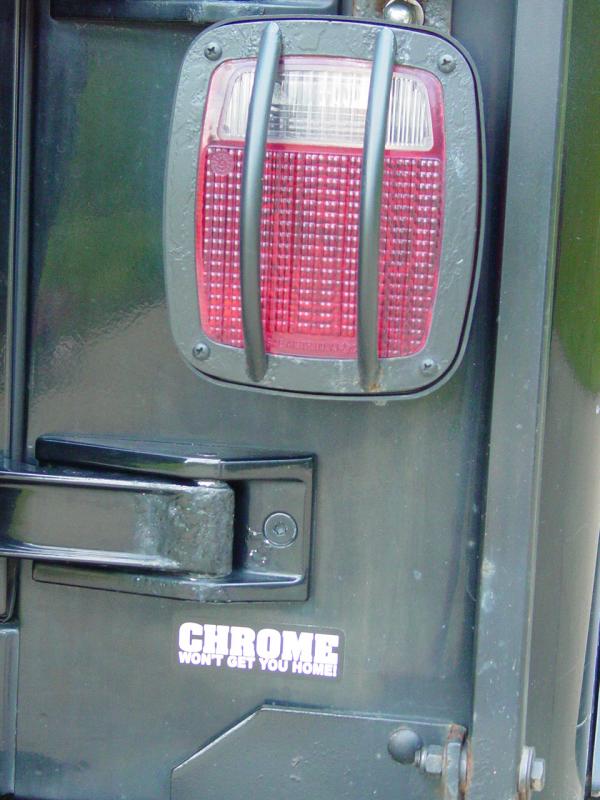
Chrome Won't Get You Home
I've heard it said many
times, and it's true. Words to live by...
Doors | Upper Doors |
Hardware | Weatherstripping |
Mirrors | Check Straps
| Storage Bins
These are the
doors we installed on the 1999 Wrangler (picture may not match the product
color)