4X4 ICON 2000 - 2003 The CD!
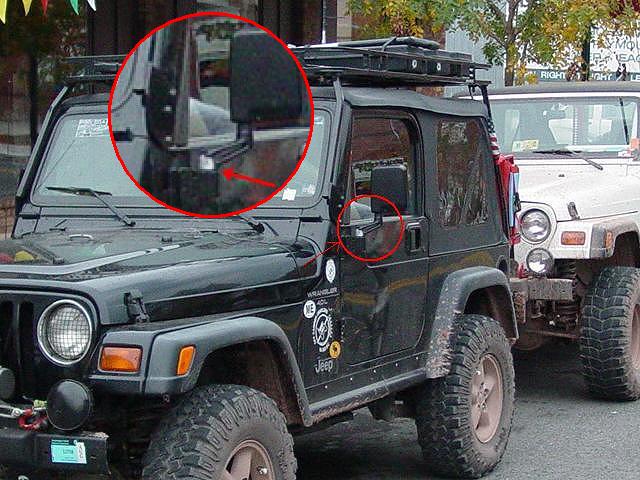
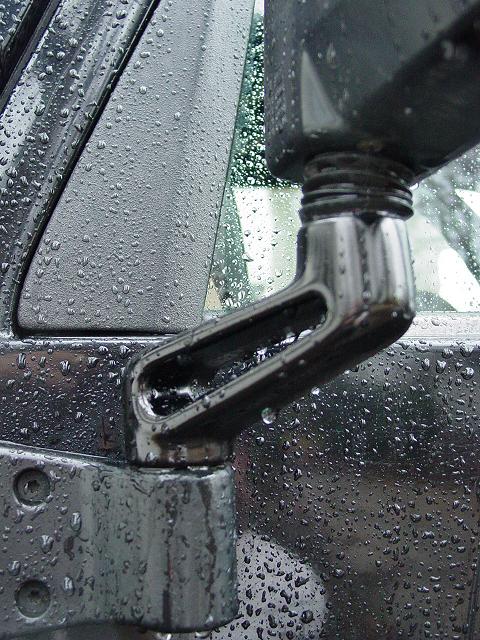
I had to go back quite a ways to find a
picture that showed the mirror holder before I repainted it. Even then, the picture
was taken from some distance and the real problem is hard to see. But anyone who
owns a Wrangler will undoubtedly recognize the dreaded "white powder and cracked
paint" damage on the mirror mounting arms.
If the paint is chipped through to the
bare metal, and the chip is allowed to remain exposed to the elements, the paint finish
separates from the metal and moisture gets trapped inside. Eventually, the paint
chips off to reveal a white powdery substance, aluminum oxide, which is very unsightly.
If you just wipe it off and casually repaint the arm, it is not going to last long
and will not look good even initially. More extreme measures are called for.
I had been neglecting the development of
this problem on my driver's side mirror arm. It had been there since last fall, but
with my schedule and priorities, it fell to the bottom of my list of things to do. I
knew it would keep. Eventually it bothered me enough to do something about it.
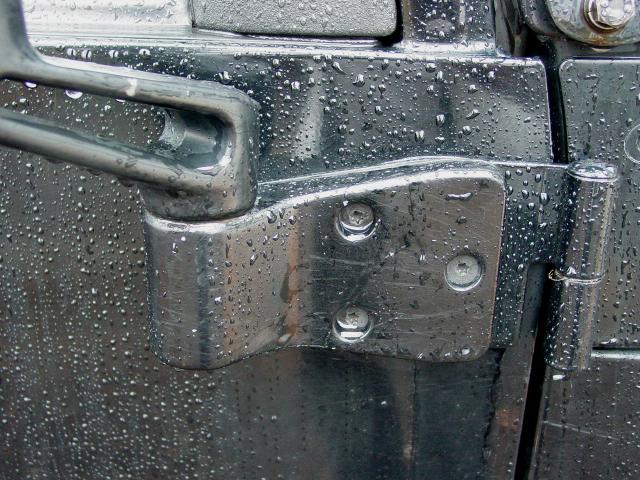
I removed the nut that holds the mirror
arm onto the bracket bolted to the door. I had to leave the nut on the bolt loose,
and tap upwards gently using a socket as a drift. The mirror came free gradually and
I was able to bring it in the garage to refinish. I would recommend removing them
because the paint failure often goes into the gap between the arm and the mounting
bracket, and would be difficult to repaint in place.
I used some duct tape to cover the mirror
and rubber boot. This would protect from overspray, and any stray swipes with the
wire brush and sandpaper. Did I say wire brush? Yes I did.
Many years ago I went through a rapid
succession of steel wire brushes. One day I found a place that sold stainless steel
wire brushes. I bought two and have had them ever since. One lives on my gas
grill and the other lives in the garage. No more rusted useless wire brushes for me!
I took to the mirror arm with the wire
brush and methodically polished off all the loose paint chips, white dust (I didn't
inhale), and other loose particles. When I had gotten the arm down to bare metal
everywhere possible, I used some 120, then 240, then 320-grit wet sanding paper.
This gradually removed the scale and deeper white oxide areas. Finally, after about
1/2 hour, I had a nicely cleaned up, bare metal arm.
Next, I applied some bare metal prep.
This removes dirt and grease, and also etches the bare metal in preparation for
painting. It is an industrial product, capable of ruining your liver in one gulp, so
it is not to be trifled with. But it sure does put a nice tooth on bare metal.
From this point on it is a straight paint
job for bare metal projects. Self-etching, sandable primer was applied in thin
coats, building up to a nice smooth finish. The fan-pattern spray tip helps get the
paint into the space between the two sides of the arm.
Once the primer is dry, I used a can of
Dupli-Color Vinyl Color Paint. Now you may be wondering why I used this particular
type of paint. It sounds like snake oil. After all, the idea of painting vinyl
seats or other interior parts a different color sounds pretty low-rent.
"Paw, my pick-em-up truck seat done
got all messed up, whattamahgonnadooo?"
"Son, git dat tan seat righchere in
da junk pile and paint it up wid dat black vineel spray, uh huh!"
OK, with no slight meant to any
particular demographic, that was my first impression. But I have actually painted
some vinyl seats in a car, and also some interior door panels that could not be sourced,
but had to be matched to the rest of the interior. I was amazed by this paint.
I drove that car for four years and the paint never wore off the seats, and never
discolored, scratched, or in any way failed. You simply could not tell the vinyl had
been painted. I should note that the instructions for using the paint are detailed
and must be followed to the letter for successful application.
Not withstanding great care in
application, this vinyl color paint sticks and is very durable. I started using it
on things like windshield wiper arms, trim, small body panels, just about anything where I
needed a very durable semi-gloss black finish. In all cases, the paint gave superior
service.
Most recently, I painted the mirror
bracket on the other side of the Jeep. It has been painted for a year and a half and
still has not failed. It has some fine Virginia pin striping on it, but so does the
rest of the Jeep.
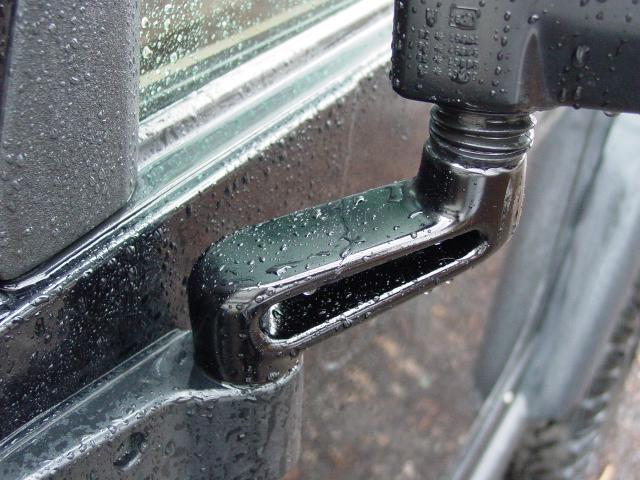
So I painted the arm with the vinyl color
paint making sure to build up several thin coats, and again using the fan-pattern spray
nozzle to get the paint in between the sides of the arm. Once I had built up a
good coat, I removed the duct tape from the bolt end, put some anti-seize compont on the
bolt, held the assembly by the mirror, and re-installed it onto the bracket, still on the
door of the Jeep. I threw a little heat on it from a hair dryer to cure the outside
, then left it to dry overnight.
In looking at the final result, I am
happy, but have noticed that I need to touch up the roof rack supports....