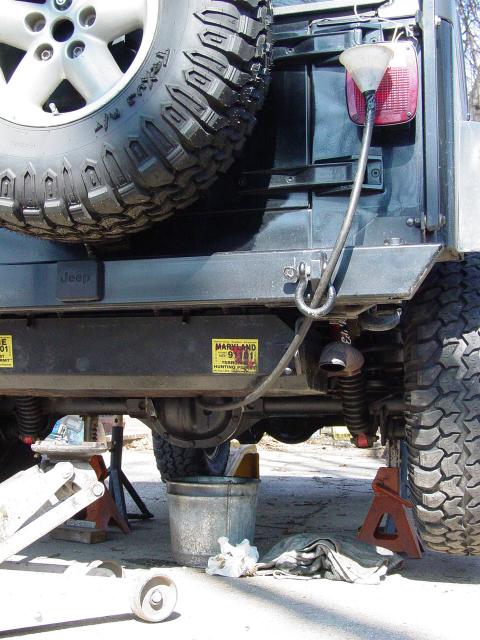
My rear axle had developed a leak on the driver's
side. Gear oil was leaking out of the axle end and running down the inside of the
tire. I had taken the wheel and brake drum off to
investigate and found bent brake shoes. I took them off and straightened them
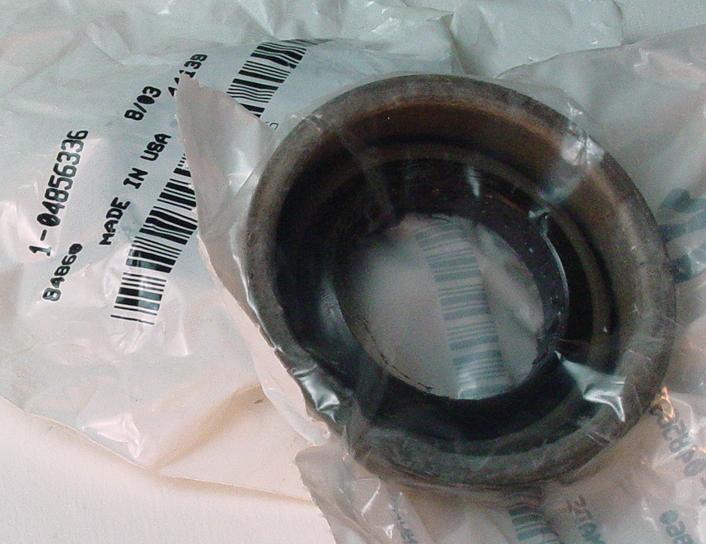
out. I also noted the leaking axle bearing oil seal and ordered new seals and
bearings.
When I got the parts and Saturday came around, I put the
Jeep back up on stands and got started.
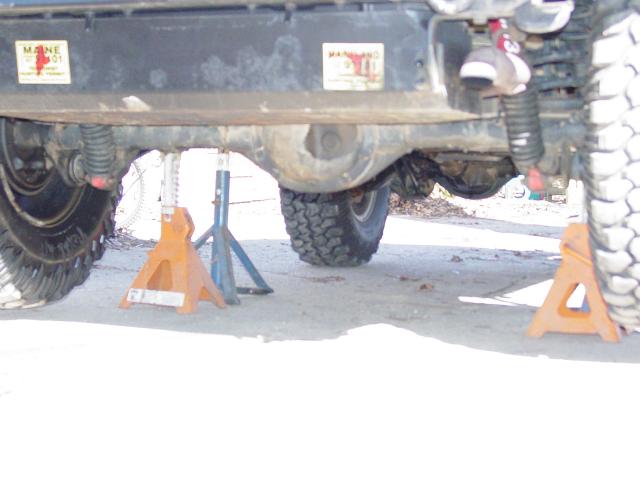
I planned to remove the axles and replace the bearings
and seals then put it back together.
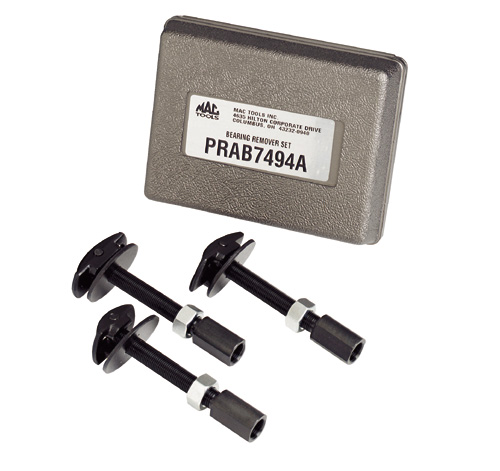
The steps are pretty simple and only a couple
special tools are required to do the work right.

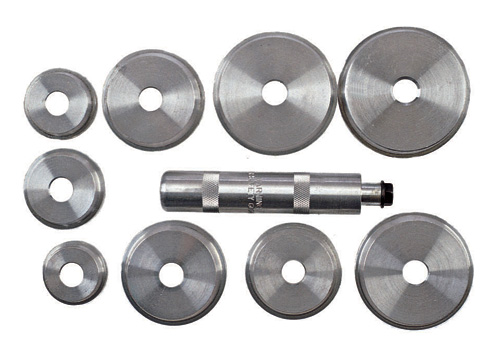
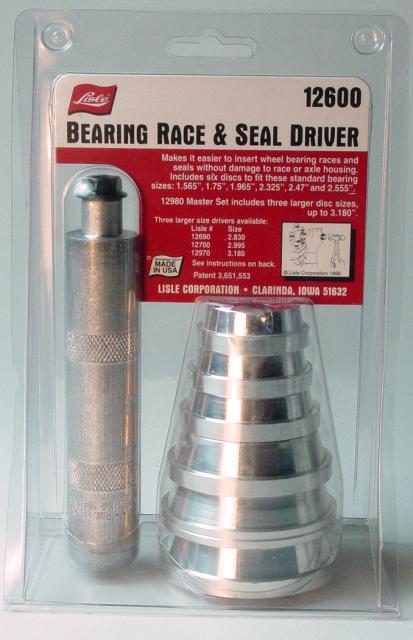
I bought the bearing and seal installer tool at Pep Boys
for about $35.00 I borrowed a slide hammer from a fellow club member.
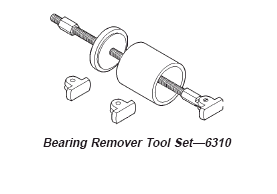
I borrowed the bearing puller from a fellow club member.
I bought cleaning supplies, grease, gear oil and thread
locker at Pep Boys.
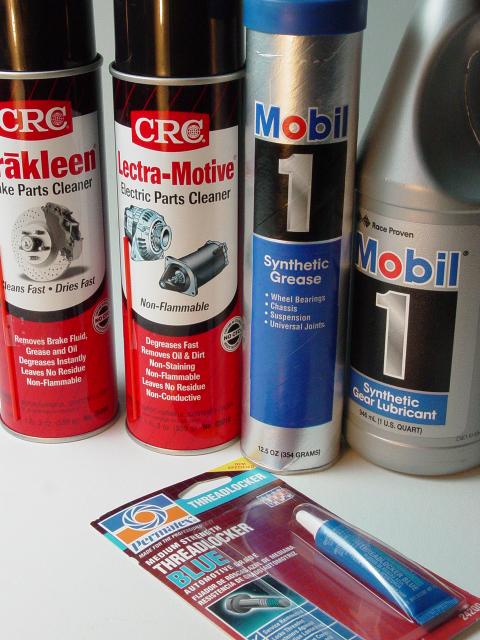
I bought the bearings, seals and other parts from the
dealer. I like the gear oil resistant RTV that the dealer sells so I bought that
there as well.
I printed the pages from the factory manual and brought
them outside with me.
The basic steps include:
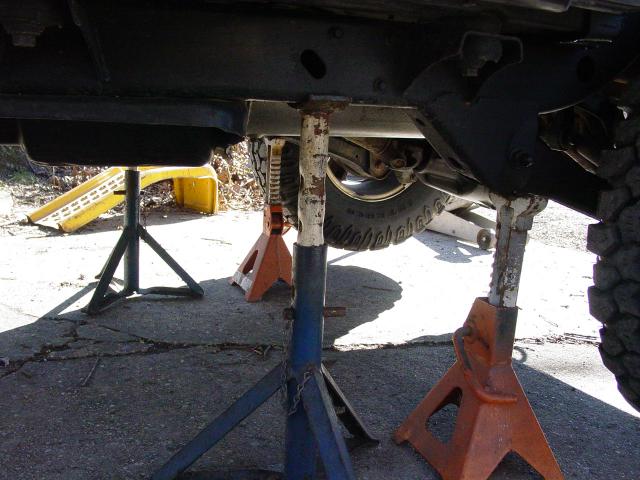
- Raise and support vehicle. Ensure that the transmission is
in neutral.
- Remove wheel and tire assembly.
- Remove brake drum.
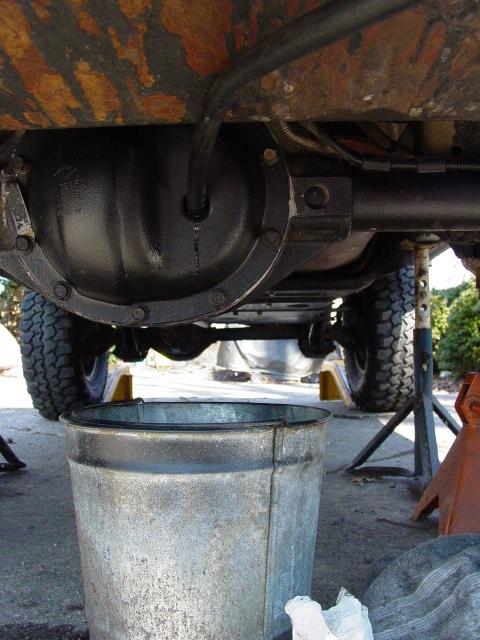
- Clean all foreign material from housing cover area.
- Loosen housing cover bolts. Drain lubricant from the
housing and axle shaft tubes. Remove housing cover.
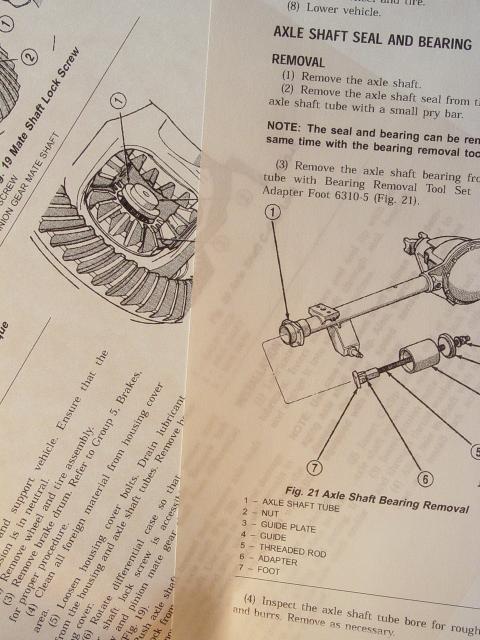
- Rotate differential case so that pinion mate gear shaft
lock screw is accessible. Remove lock screw and pinion mate gear shaft from differential
case. (I had to remove the right carrier bearing cap because it stands in the way of
removing the screw that holds the center pin)
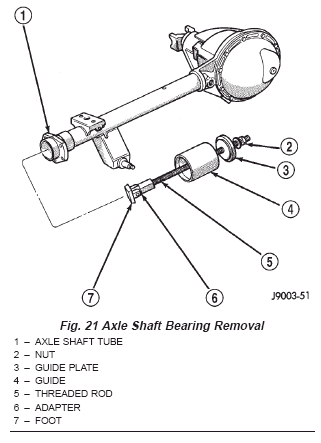
- Push axle shaft inward and remove axle shaft C–clip
lock from the axle shaft.
- Remove axle shaft. Use care to prevent damage to axle
shaft bearing and seal, which will remain in axle shaft tube. Also, exercise care not to
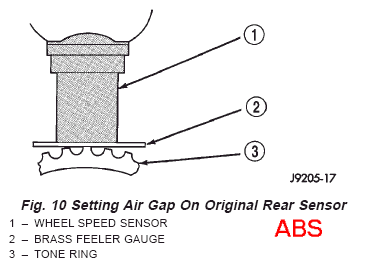
damage the wheel speed sensor on vehicles equipped with ABS brakes.
I went through all the steps and got the passenger side
axle shaft out.
It looked healthy so I set it aside and started on the
driver's side. When I got it out, I discovered that the axle shaft was
trashed.
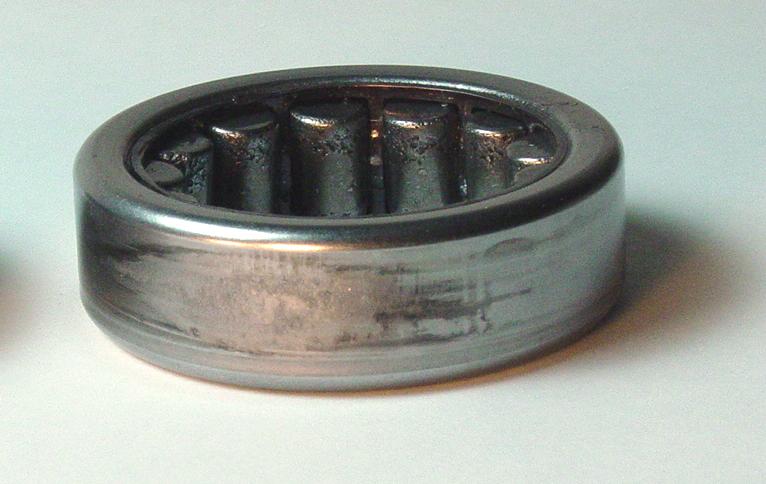
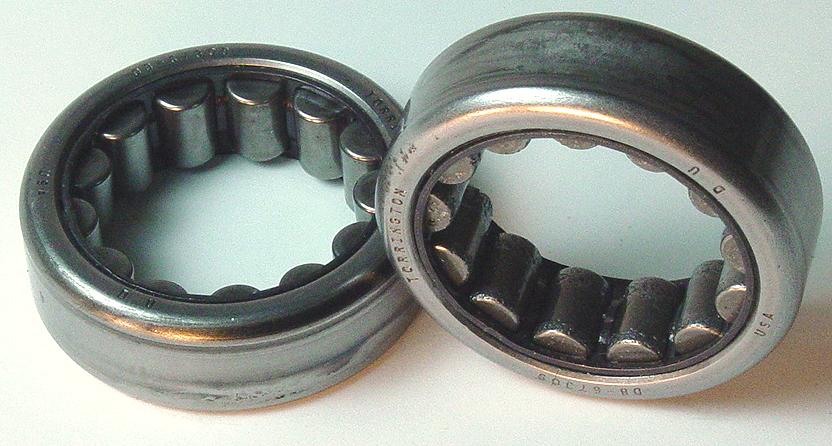
The bearing rollers had cut a groove in the axle and it
would need to be replaced. Crap!
It was 2 in the afternoon on Saturday and at a minimum I
needed a Superior 30-spline shaft for a Dana 35c. Yeah, Pep Boys will have one of
those... Not!
I called my supplier and put in an order that would not
get processed until Monday morning. Clearly, the bearing had failed and there would
be no warrantee replacement here. I asked for the shaft to be shipped over-night.
Then I went back to the work at hand. I still had
the new brakes to install so I went ahead and did that. It was pretty gloomy work
except that I had to be thankful that the damaged axle had not failed. That would
have been disaster, especially if I had been cruising down the highway, loaded up with
wife and kids...
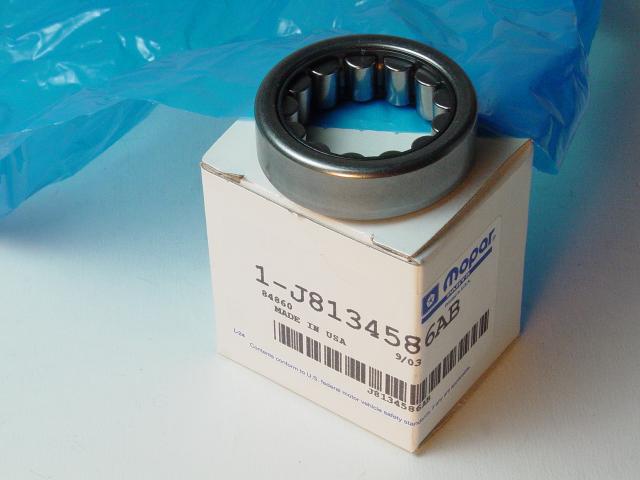
Here's a look at the bearings. The one to the
right, or on top in the photos is the bad bearing.
So now I am going to be stripping the
housing down to bare case, cleaning out all the metal particles, then completely
rebuilding it by replacing all the bearings and then reinstalling the carrier and axle
shafts.... More when the parts arrive...
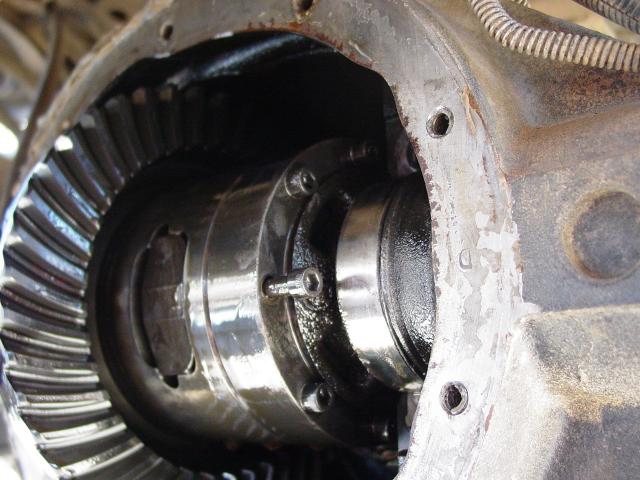
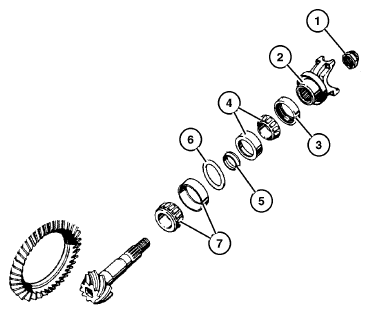
The axle bearings and pinion bearings are factory
standard; the carrier bearings are special because of the larger splines, so I ordered a
rebuilt kit to include those bearings.
3/2/04
Hurry up and wait... Basically, the axle shaft and
bearing kit for the oversized carrier splines are not a dealer item, so they must be
ordered in. The axles comes from California and the bearing kit from Tennesee.
I paid for overnight service on the shaft; called the manufacturer to
"remind" them to over-night it, and found when I had hung up the call that my
shafts were reported by UPS Tracking to be sitting on my front porch. Doh! And
indeed, when I got home from work that afternoon, there was a beautiful Superior Axle and
Gear box sitting on my front porch. I needed to reassemble everything temporarily so
I could transport the vehicle to a shop to have the carrier removed and the carrier and
pinion bearings replaced, and the whole thing put back together, after first flushing out
the housing.
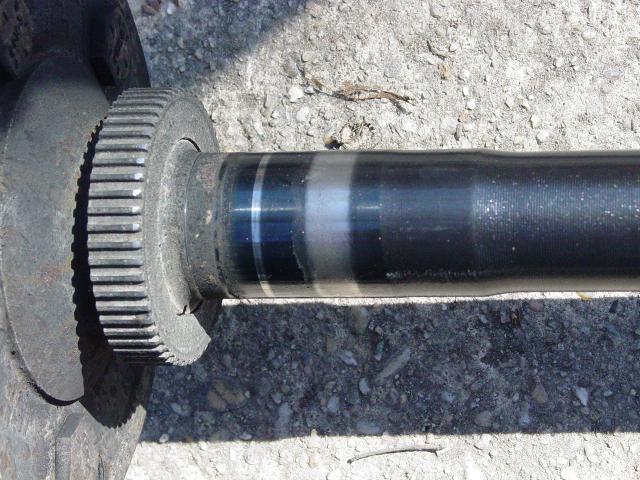
I took the new shaft out of the shipping carton and stood
it up next to the old one. They were the same size in all regards, so I installed
the lug bolts that I had removed from the old shaft, after cleaning them and applying some
blue thread locker. I stood the axle up on the back of the wheel and used the wheel
for leverage to tighten down the studs.
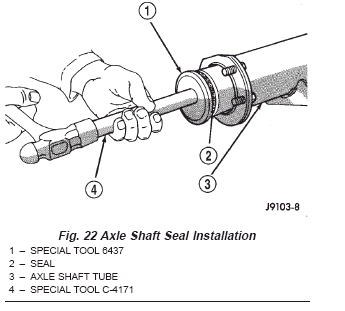
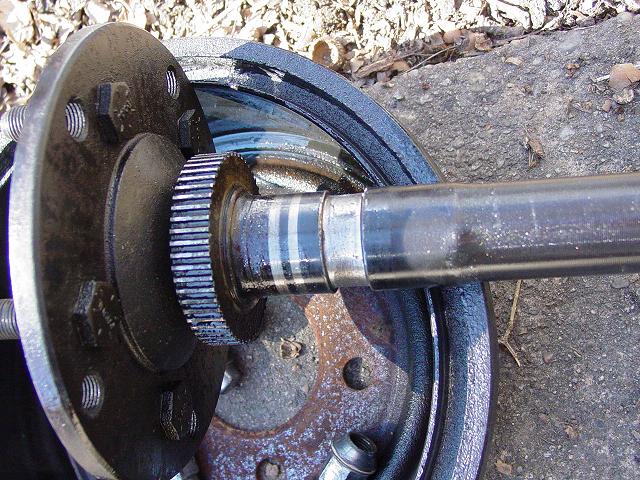
Next I put some bearing grease on the oil seal and the
bearing surface of the new shaft and carefully guided it into the axle tube and found the
alignment with the splines. Then I gently sent it all the way home. I checked
and found the C-Clip groove just shy of being exposed so went back and lightly tapped the
end of the axle with a block of wood. The shaft slid in willingly and I placed the
C-Clip so the opening was facing downward. Then I went back to the axle end and
pulled it back out. It came easily and a quick check confirmed that the C-Clip was
now recessed inside the carrier as intended.
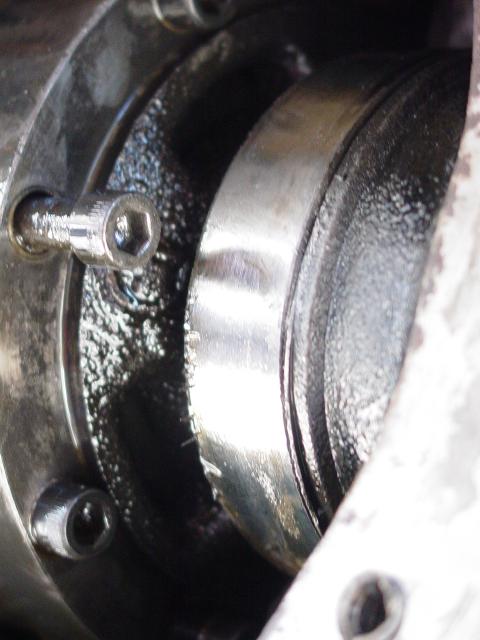
I cleaned up the bolt that holds the center pin in place
and threaded it back together. Then I made sure the bearing race was clean on the
carrier, and wiped clean the bearing cap. I cleaned the bolts and put some blue
thread locker on them. Then I tamped the bearing cap into place making sure to
orient it the same way around as it was before I removed it. Then I threaded the
bolts in and tightened them to spec. I was surprised and concerned that it did not
feel very tight but have learned to have faith in the torque wrench...
I installed the wheels after rechecking the brake
adjustment and installing the brake drums. As it had gotten dark, I left the case
open and will finish up tomorrow evening.
3/3/04
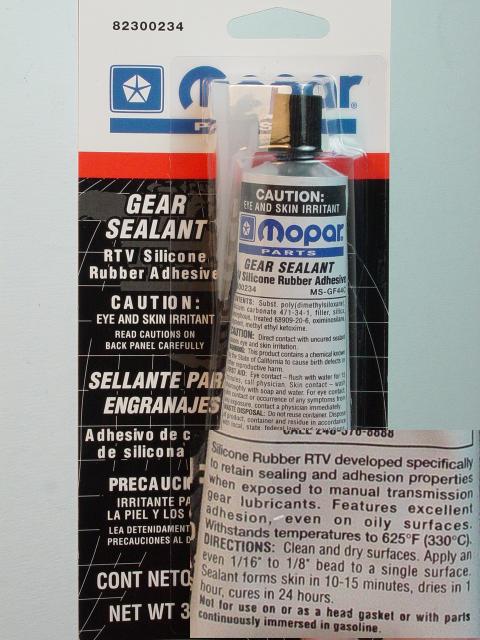
I got started in the morning by cleaning
up the bolts that hold the cover on the differential. I cleaned up the surfaces to
be sealed. Then I put some oil-resistant RTV sealer on the cover. I made a
seal around each bolt hole and ran two beads around the circumference of the cover.
Then I put the cover in place and threaded in the bolts.
With the bolts tightened down, I measured
out 1.5 quarts of gear oil and drained it into the differential. Since it was cool
out and the hose is small in diameter, it took quite a while.


I cleaned up my tools, put everything
away, emptied out the Jeep for the trip to the shop, and had breakfast...

With that out of the way, I confirmed
with Jeff and drove over to his house and dropped off the Jeep. The Jeep drove fine
with no noises. Naturally it rode much smoother than it had with the bad shaft.
When I got to Jeff's house I checked the wheels, brake backing plates and axle and
did not find any leaks. Small consolation as Jeff will be tearing down the whole
housing to install new carrier and pinion bearings, and to replace the axle bearings and
seals that I installed purely for the purpose of driving it to his house!
I brought along the old shaft and
bearings so he could see what they looked like. I also brought the parts I had, and
my detailed list of activities... I took a couple pictures and left it in his
capable hands. More later..
3/4/04
Long day... I had lots to do.
By the time I got up in the morning I had decided that I needed a new housing,
located a housing, claimed it and made arrangements to pick it up. I was fortunate
that I still had Bills truck so getting it to Jeff was not a problem. But my
schedule was shaping up a real nightmare.
I brought Teddy to school and Tommy to
the babysitter. I went to work and got caught up with everything and then at
lunchtime I drove to Purcellville to pick up the housing at Jimmy's place. I hustled
back to work and got there a little after lunch was done. I worked for a few
more hours and then plugged into my cellphone/blackberry/internet mobile mode and headed
for Jeff's. Along the way I continued to do business and got more work done. I
got to Jeff's around 2:30 and dropped off the housing. He had concluded the same
thing (old housing rubbish) so the new housing was music to his eyes...
Then I headed back to my house to work
for a couple more hours. Around 5:30 I met up with Carl and we went over to Bill's
house to drop off the Suburban. I loaded all my stuff into Carl's Jeep and we drove to
Jeff's.
Once there we tore into the old and new
housing, swapped out backing plates and brake parts, breather hose, some retainers and all
kinds of little stuff, including the bolts that hold the backing plates onto the housing.


Meanwhile, Mitch was getting the new
housing ready to take the internal parts.


One of the things I asked
Jeff and Mitch to do was move the ABS tone ring from the old shaft to the new one.
They did, once some heat had been applied to coax it into submission. Jimmy had
trouble with them last time too.
They commented that the
pinion didn't look too bad but did have a couple nicks, lots of scratching from the loose
metal particles in the oil. And they noticed a manufacturing defect in the metal,
something that looks like a bubble that can be seen in the photo.

While they were working I
had occasion to take a look at my tires that were sitting on the side. There was
some chunking which undoubtedly occurred on the trip
to Green Ridge...

Carl hung around until 9:00pm and then
headed home. Mitch lives around the corner from me so I decided to stay until we
either finished, or 11:00pm, whichever came first. We worked through getting the new
housing fitted with all the necessary parts from the old housing, hanging it up under the
Jeep, and getting the ring and pinion and carrier in place.
While the new housing was
easy to work on, Carl suggested I drill holes for the air suspension bags. It made
sense to do that now, even though I am not sure I will get the bags. If I do, this
tough part of the job will be done!

The new housing didn't have the plastic
parts for the spring pads, breather nipple, brake lines, ABS wire loom holder or brake
line bracket. So I moved the parts over from the old housing.

About the time that Jeff and I had
finished reassembling the brakes, Mitch had finished putting the ring and pinion back
together. He put some paint on the gears and checked the pattern.


He wasn't happy with what he saw and it
was 11:00 so we called it a night. Mitch had the same reaction that I have to lots
of dilemmas - he wanted to think about it and I could tell he even wanted to keep going
but we all had a long day so quitting was a good thing... More tomorrow!
3/5/04
Time for a new Ring and Pinion...
The damage was just too advanced - it will be noisy. The gearset is used and no
matter how much skill is applied to the setup, it will be noisy. What's the point in
installing it, knowing that will be the case? It is going to be sub-optimal, so for
the cost of a new ring and pinion, and almost no extra cost in labor, it is, like the new
housing, a no brainer. I decide to go ahead and order a gear set.
At this point, what remains of the
original axle assembly is one shaft, the backing plates (because the new housing is not an
ABS unit), the Detroit locker (that's something to be thankful for...) and the smoldering
hole in the ground that used to be my wallet. This is the last time a Dana 35 will
propel this vehicle! Now I need to start a savings program for my new "rear
end".
Late in the evening, I got a message from
Jeff:
"Just
washed my hands it is done! The gear setup came out perfect. I have a pile of used
parts for you we noticed your RF axle u joint is bad. The rear is very quiet no ABS
light and besides that backing plate we are very satisfied with the job. I am going to
make you an invoice before I keel over that coffee kept me up all night. We also noticed
some antifreeze on your radiator drain plug did you just change the coolant? If not you
may want to get a new plug that radiator is not the original radiator it is out of a newer
model.
"I am headed to VA around lunch time to get my bumpers.And will
be there for several hours as we need to finish them up."


