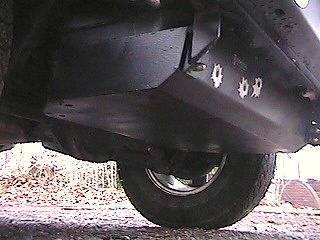
If you have not removed your
Tomken Gas Tank skid plate lately, I suggest you do
so. If you go wheeling where there is mud, dirt, rock or other debris, you can be
pretty sure you will find plenty of stuff trapped that needs to be removed. The factory
skid plate has bands that support the gas tank. I imagine that if they remain wet long
enough, they would corrode and fail. Dirt traps moisture and will accelerate the rusting.
Some kinds of dirt and mud are quite corrosive so this can present an additional risk.
This whole activity, including the addition of new drain holes took about 1 hour
from start to finish and should prolong the life of the skid plate, not to mention the
improvement in looks and drainage function.
Disclosure (What
led me to do this in the first place?)
On the
2002 Jeep Jamboree trail guide pre-run, I got
caught off-guard for a moment and found myself sliding backwards off a wet clay hill. I
didn't have time to get it into reverse and crawl, and the brake just didn't help.
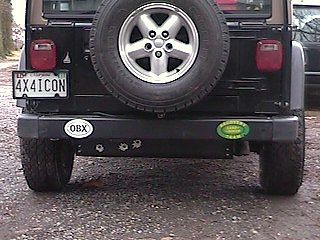
Ka-THUNK! D'Oh! My stock rear bumper did its job and sacrificed itself in the name of my
frame and body (you've heard the term crumple zone? It starts with the bumper...)
There was no damage other than the stand-off that holds the bumper onto the frame,
and the bumper face was dented and slightly twisted. Oh, my on-board air quick release was
jammed up against the spare tire so I couldn't use it at the end of the day.
My good friend
Carl was kind enough to let me have his
factory bumper in exchange for a
tire he
needed (we sort of traded a $20 back and forth). When I took the damaged bumper off,
it involved removing the rear brackets of my
Tomken
Gas Tank Skid Plate. So I thought this would be a good time to rinse out the
inside and maybe do some touch up.
Maintenance
Operation
Like many projects, it turned into more
than I planned. When I was rinsing the inside of the skid plate hanging down, the
mud and little pebbles just kept coming. I was half expecting to see all of Virginia come
out so I finally resigned myself to removing the skid plate to do it right. The fact that
it wouldn't go back on unless I did pretty much cinched it... I removed the skid
plate by loosening the two bolts that doubled as bumper bolts. The rear of the skid
tips away from the tank. I supported the skid with my floor jack and climbed under
the Jeep (rear wheels on ramps). I removed the two bolts that hold the front of the
skid to the bracket bolted to the floor of the Jeep. I did not remove the bracket
from the Jeep. (I would have if it appeared to need refinishing - it did not, and
it's not necessary to remove them - just lever them away from the bolts).
Rubble removed
from inside Skid Plate


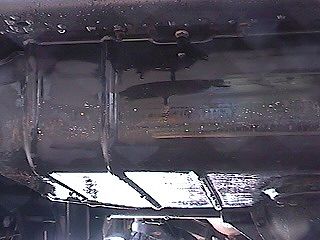
I wasn't too surprised to find that the
inside of the skid plate resembled a sand box. Even though I compulsively
wash the Jeep after every outing, often
before I even get home, this part is hard to rinse inside and hard to know if you got it
all. In addition, the skid, as supplied from Tomken, only has two holes, making good
cleaning pretty hard. The picture below shows the skid plate removed after being in
service for about one year (debris removed).
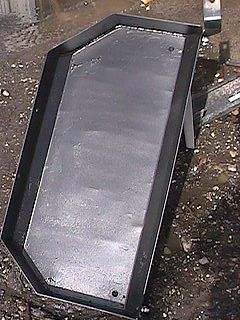
Skid Plate ready
for cleaning and refinishing
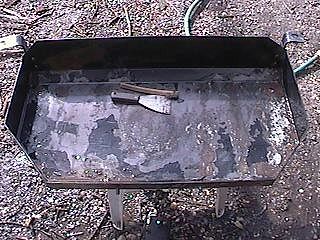
Once I got all the sand and pebbles
rinsed out, I found that the powder coat had separated from pretty much the entire inside
of the skid plate. I'm not too surprised because the plate sees a lot of action.
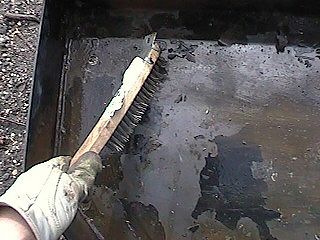
I used large and small steel brushes to
grind off all the loose paint and rust. This went pretty fast since there really wasn't
that much rust and it wasn't that deep.
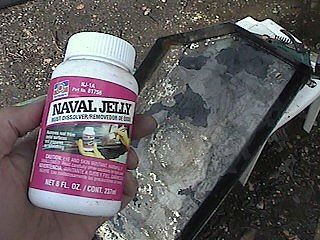
Once most of the rust was off, I used
some naval jelly to neutralize the remaining rust. I applied it liberally then after
letting it sit for a little while, rinsed it off with water and dried the skid plate.
Then I applied some bare metal
conditioner, used to etch the finish and prepare it for primer. It also removes any oils
that might be present. This removes any remaining moisture and prepares the metal for
painting. It is only sold in auto body paint supply shops and is quite poisonous.
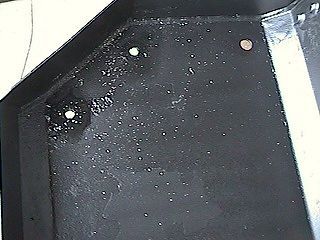
But it works well for its intended purpose. In the picture below you can see
the evidence of a years worth of "wheeling" in the slightly less than flat
bottom of the skid.
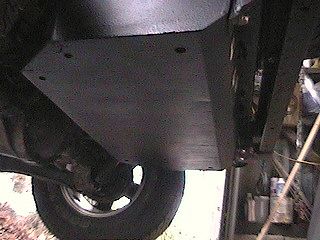
Inside Refinished
I had previously found that some spray-on
truck bed liner that I got at Wal*Mart was pretty resistant to rough use and didn't flake
off if the surface is properly prepared. It also seems to be holding up pretty
well in the spots where I used it to touch up the skid plate last month. So once the
skid plate was dry and free of all loose particles, I sprayed the inside with the truck
bed liner paint. I applied two or three coats.
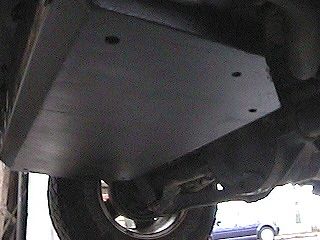
New Drain Holes
Added

Next I grabbed a 1/2-inch drill bit and
made four new holes spaced around the edges of the skid plate. I let the bit do the
work and I finished without any trouble about 15 minutes after I started. My helper
(see inset above) wore hearing protection and safety glasses. I left enough solid
metal around each hole so that I don't lose strength. I painted the new holes to prevent
rust, retrieved the metal filings with a powerful magnet, and flipped the skid plate over.
I have been maintaining the outside of
the skid plate so there wasn't much to do. I cleaned it off and roughed up a couple spots
that needed attention (the leading edge that faces the differential is hard to reach when
the skid plate is installed but was in pretty good shape). Once the surfaces were prepped
as for the inside, I sprayed the outside.
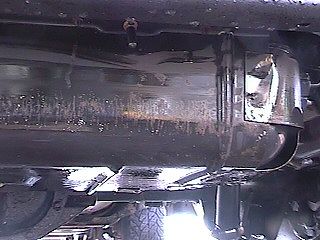
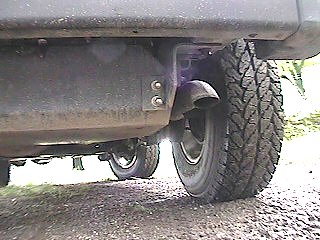
Factory Skid Plate
Maintenance
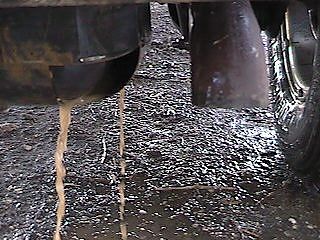
While the paint was drying I turned my
attention to the factory skid plate, still on the Jeep. I rinsed the whole thing and
flushed out plenty more dirt and a few pebbles. The photo above shows the water
running almost clean. It took several minutes of flushing to get the debris out.