After installing a new head
unit and upgraded speakers, I found the improvement over the factory stereo to be very
worthwhile. But I soon realized I was missing something: Bottom End.
The tweeters and midranges are great but without solid bass, it just wasn't
complete. My home system has a full range of sound, and the bass is so solid you can
feel it. I needed this in the Jeep!
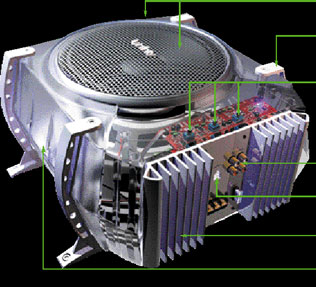
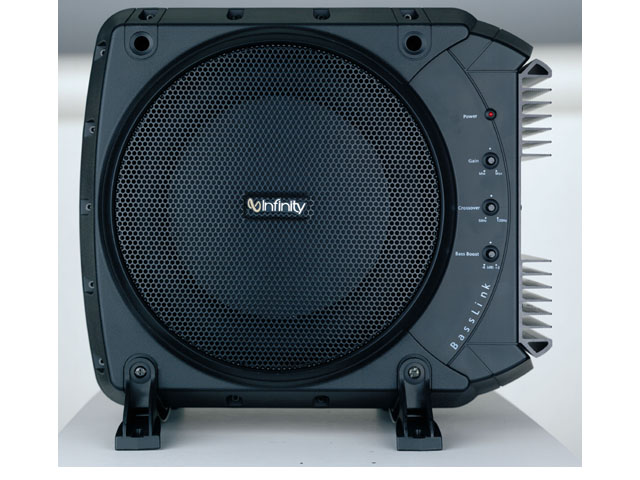
Asking around, I learned that enclosed, self-powered
subwoofers are a good choice for Jeeps because of the space-savings. One name kept
coming up - Infinity Basslink.
I took a look on the web and found plenty of information.
The specs are good. The price put me off initially. I couldn't find a
good discount until I checked eBay. I found several sellers offering them for less
than half off suggested list price. That changed everything.
Next began a waiting game while some household economics
got attention. Finally the taxes were done and a little extra money surfaced.
My wife got some porch furniture and carpeting, and I decided it was time to claim
some Willys Points and get
the subwoofer.
I had been watching one seller in particular because his
shipping was significantly cheaper than the others offering the unit. I managed to
win one of his auctions and, after some mild thrashing around with Pay Pal, got it paid
and in the mail. Incredibly, the next morning after paying the seller, my son Teddy
came to me and said that there was a speaker sitting where we get our packages. Huh?
Thinking his mother had put him up to it as a way to taunt me, I told him he must
be mistaken, but ultimately could not resist taking a look. Much to my surprise,
there was a speaker sitting there! Sometimes I am amazed at the speed that things
can happen on the internet. Maybe it's the broadband I installed a couple months
ago?
I retrieved the package and went about my day, looking
forward to installing it at the first available opportunity. Of course, that meant
running an errand first. A quick read of the installation instructions showed that I
would need to get some 12-gauge wire for the power lead. I also needed an inline 20
amp fuse for the power lead. And not least, two long leads to connect the pre-amp
outputs to the subwoofer. I already had some wire sufficiently large enough for the
remote shut-off lead.
What I hadn't counted on was the size of the unit.
I found that it fits in my Add-A-Trunk space in the back of my Jeep - JUST...
I don't think I will be able to use the mounting brackets that come with the unit
unless I remove the Add-A-Trunk. And I am not sure I want to do that... After
getting all the wiring parts from Radio Shack, it was cool and dark outside so I covered
up the Jeep and left the fun for first thing in the morning.
The wiring layout is pretty simple:
Connect the pre-amp outputs from the head unit to the
subwoofer.
Run a power lead to the battery with the inline 20a fuse.
Ground the subwoofer to the body.
Run the remote power relay lead from the head unit to the
subwoofer.
The drawings might make it look more complicated than it
really is, but I provide them for my own future reference...
Wiring
The only thing that
disappointed me about the Infinity Basslink package was the lack of power leads and the
assumption that people would be using speaker-level output to connect to the subwoofer.
I guess that must be the most common configuration. As such, there was a
whole bunch of wire and connectors that I could not use. And I would have to make up
(or purchase) my own power leads. Here is what I ended up using to make the
connections:
(2) 20-foot, 12-gauge
power and ground leads
(2) shielded, 12-foot
leads with RCA connectors on both ends
(2) shielded, 6-foot RCA
extensions
(2) lug connectors for
battery (+) and (-) (to fit 12g wire)
(1) 12-gauge, 20-amp
inline fuse holder
(1) 14-gauge, 20 foot
remote power on lead
(1) spade connector (male)
(to fit 14g wire)
(1) spade connector
(female) (to fit 14g wire)
loom covering (3/8")
for power leads
loom covering (1/4")
for signal leads
wire-ties
electrical tape
(1) 18-foot RJ-11 lead
(provided in Infinity Basslink kit)
In actual practice, the wiring was fairly
time consuming. The wires needed to be routed from the front of the vehicle to the
back, through all manner of obstacles. My goal was to make it as clean as possible.
I also wanted to choose a path that avoided passing things that generate electrical
interference (noise), like fan motors, my air compressor, the fuel pump, stuff like that.
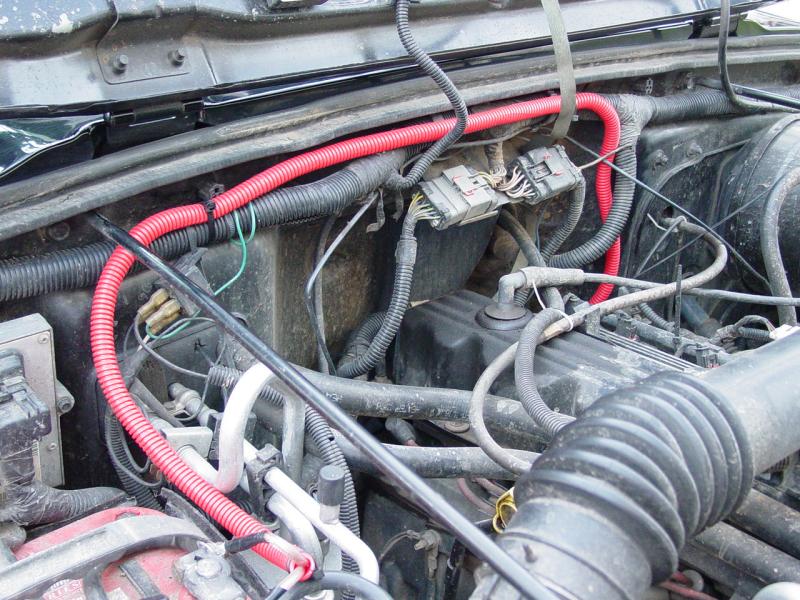
First I put connectors on the power and
ground leads. On the plus (+) lead, I installed a fuse holder and 20-amp fuse.
I decided to install a floating ground. I did this mainly because I didn't
want to drill any holes in the floor of the vehicle, and the grounding of the remaining
items (primarily the Add-A-Trunk) were dubious at best. Once the connectors were on,
I ran the wire across the firewall, next to the main wiring harness, then down and through
the same large hole that I have run everything else, coming through in the passenger
compartment just above and to one side of the gas pedal.
From there I routed the pair underneath
the driver's side edge of the console past the driver's seat to where the main part of the
console goes up to the armrest. There I threaded the lead under the console and out
the other side, adjacent to the passenger seat about where the jack is stored. I ran
the leads under the seat rails and out of the way of moving parts, to the outside edge of
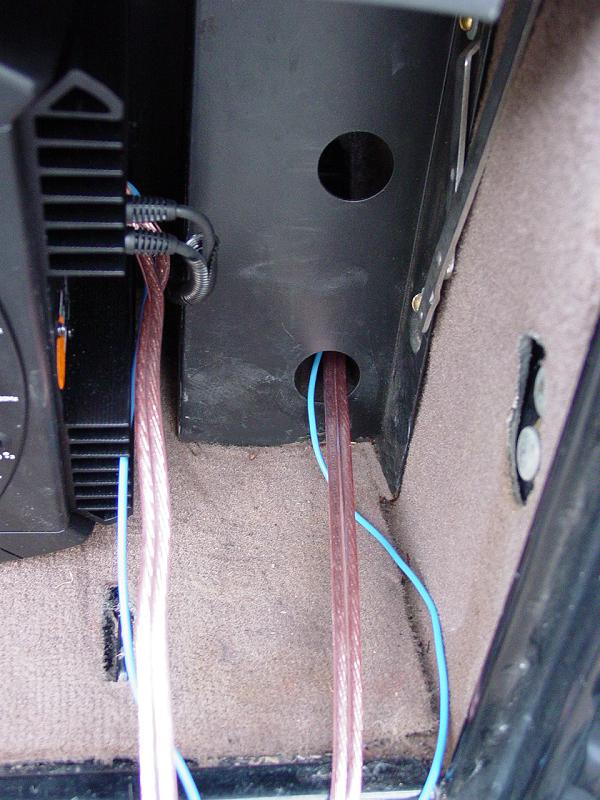
the tub near the main sport bar vertical that runs from floor to roof-height. There,
I ran the leads along the outside edge of the floor under the carpet, up onto the floor
and along the rear edge to the corner where the Add-A-Trunk has holes leading to the rear
compartment. I passed the leads behind the seat mounting hardware so that it would
not get caught on the seat, and through the bottom hole into the rear compartment.
Next I remove the snap-on panel that
covers the top of the dash, then the two screws that hold the top of the center dash
fascia. The screw behind the ash tray was next to come out. Then I removed the
faceplate on the stereo to make it easier to remove the dash center portion. With
this out, I removed the radio after the two screws that hold it in place.
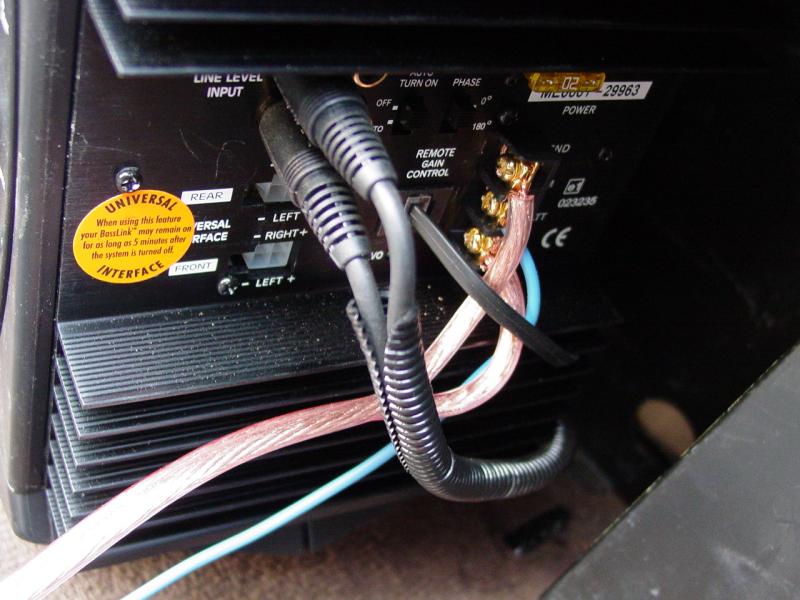
On the back of the radio are two
line-level subwoofer outputs (RCA plugs). There is also a remote relay lead that is
used for things like subwoofers and power radio antennas. I put a connector on the
remote relay lead and it's companion coming out of the head unit. Since it was
included in the harness but lead to a dead pin slot (no surprise, there is no factory
power antenna on the Wrangler), I had to remove it from the harness before putting the
spade foot connector on it. My reasoning was that I may want to remove the radio and
the connector would make it easier. I used the same blue lead (14g) as the one
coming off the head unit (why not?). I routed it down into the dash and along the
same path as the power leads.
The RCA leads from the pre-amp subwoofer
outputs were next. Due to the RCA connectors on the shielded leads, they would not
fit through the same path as the power leads. I don't know that I would have routed
them that way anyway since it is generally not a good idea to associate power leads with
wires carrying program signals. Instead, I dropped them down through the dash, along
the bottom edge of the dash to the factory loom that runs along the driver's side, below
the door, then up to the top edge of the tub. At the back corner of the tub, I ran
the wires under the seat belt winder, and down to the floor, through the hole in the
Add-A-Trunk to the rear of the Jeep. I used 12-foot shielded leads that got as far
as the Add-A-Trunk, then six-foot extensions to give me some extra inside the rear
compartment.
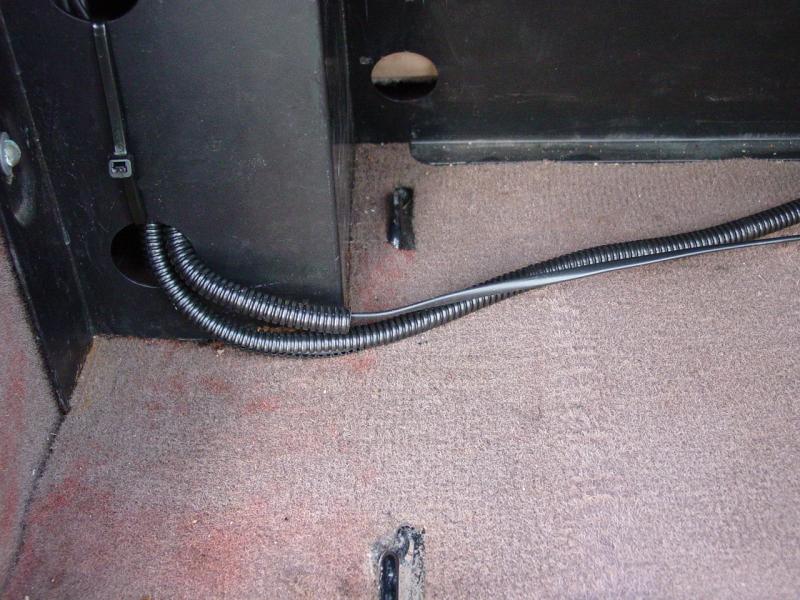
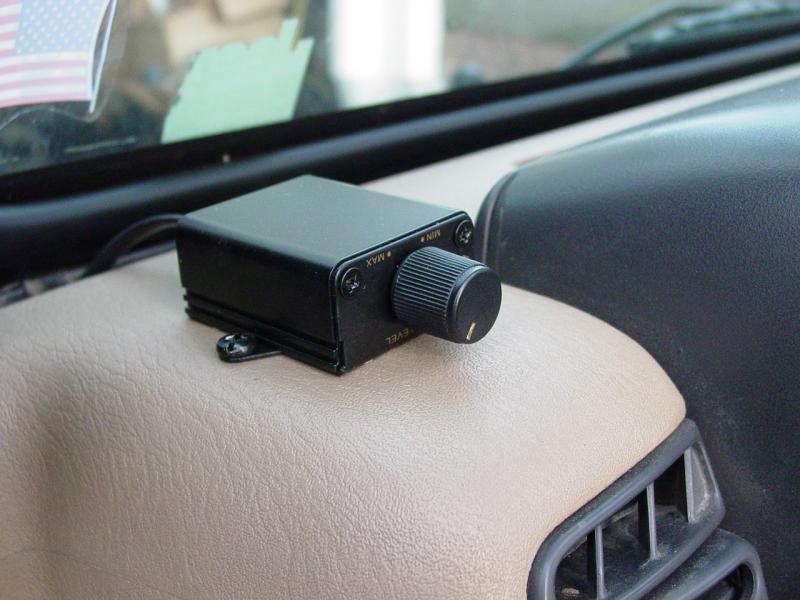
Last, I ran the Remote Level Control wire
(an RJ-11 lead!) along the same path as the subwoofer pre-amp outputs. I fished the
end that plugs into the knob up through the driver's side corner of the dash, coming out
near the windshield. I contemplated mounting the knob into the panel next to my
headlight switch but changed my mind. Even though the instructions recommend this
option, the knob is mounted on a small circuit board that gets its strength from the
enclosure it comes in. Once removed from there, it is quite vulnerable, and appears
to be easy to break. Also, the knob would have fallen to where my knee is when I get
into the Jeep. I don't need to break the knob (or bust my knee), so instead I just
put the knob on the top corner of the dash and screwed it into place.
I took a break for lunch while I reviewed
the wiring schematics, and ran through my head any things I might have forgotten.
When I went back, I ran some loom covering over the wires to collect them together
and to protect them from whatever. I wire-tied everything so the wires would not
drop down from their respective paths, and also to keep them out of harms way in a couple
spots where moving parts are nearby.
Finally the moment of truth. I was
a little self-conscious about it. I must admit that I see people booming down the
road and have unkind thoughts, yet here I am installing a subwoofer and amp... My
intention is to get better bottom-end and fill in some of the missing parts of the music.
I'm not really looking to make an impression on people 50 feet away in another car.
But here comes the install instructions, telling me to crank the head unit up to
75% to do the initial calibration settings... Needless to say, with the doors off
and the top down, that's disruptive... Well, I went ahead and did it, quickly making
the settings and making sure that the servo-limiter was not kicking in full-time. I
also made sure that the alternator was not working too hard and the battery was holding
it's charge. Between the winch and the subwoofer, I'm probably going to be looking
at a Mean Green Alternator pretty soon here...
The point of all this, of course, is
better music. I am happy to report that I achieved that goal. Also, the remote
level control helps me get the kick I want without sharing with my neighbors on the road.
Well, maybe not all the time...


 © Harman International
Industries, Incorporated
© Harman International
Industries, Incorporated