After a year with
the previous iPod
set-up, I found that there were a few things that needed to be changed.
The Bracketron iPod holder was junk.
It was nothing more than a plastic clamp that used brute force to hold
the iPod in place. For sheer inelegance it gets a "10".
The swivel mount I had used to hold the
Bracketron came apart twice. Which meant I was left holding the
iPod (literally). That was easy to fix by simply making the swivel
tighter, but it was annoying since it requires disassembly from the
Panavise - not something easily done on the road.
The switch box that I made worked but
didn't eliminate the ground loop that existed so didn't solve my problem
of background hum when both the iPod and XM radio were plugged in.
So the switch fell out of use right away. It was just adding
clutter to an already cluttered environment.
And since I keep the iPod in a case, it
was a pain to control because I had to open the cover to see the display
and controls. In short, this configuration was a total failure.
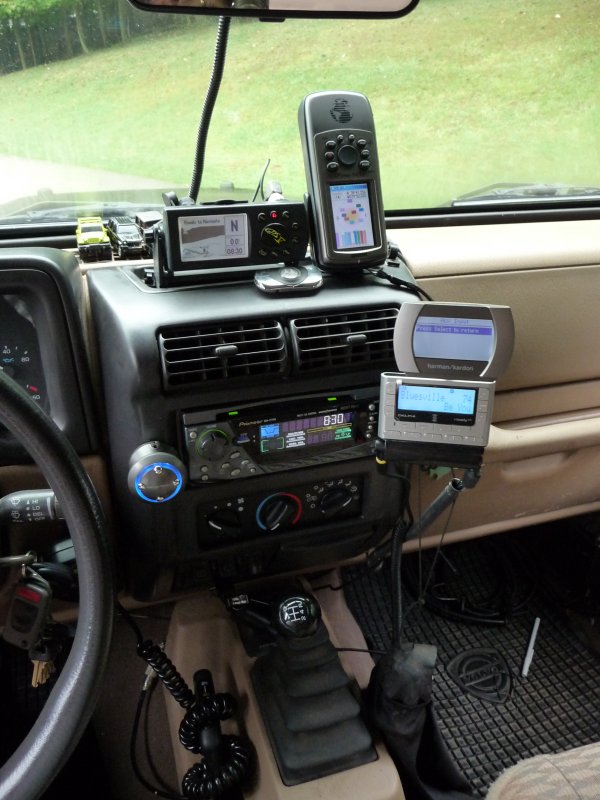
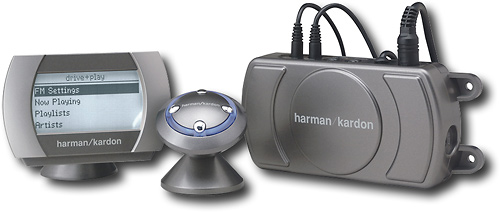
Earlier in the year, I had
removed the
harman/kardon Drive + Play from the Crossfire to make way for a more
integrated interface with the rest of the stereo. I set the Drive
+ Play aside for later installation into the Jeep. Finally I got a
moment to finish up in the Jeep, installing the Drive + Play and
simplifying the GPS array at the same
time.
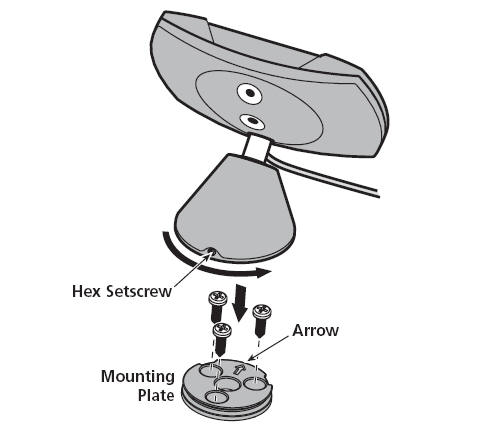
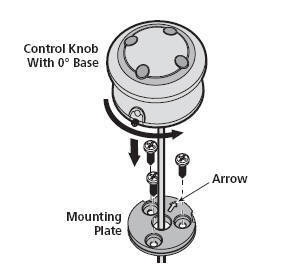
I
used the already installed Panavise bracket, then bolted the
Drive + Play bracket I had made above the XM Radio.
This involved simply
laying out the mounting of the XM radio and Drive+Play display,
cutting out the bracket from some stock, and drilling the holes
for the mounting hardware. With the finished bracket
complete, I cleaned it and painted it satin black to match the
rest of the bracketry, then reassembled the components. I
did not use self-adhesive tape for this install. All
components are screwed or bolted to the mounting surface.
The remote knob and display are both sufficiently heavy and will
receive sufficient use that sticky tape would not cut it.
I drilled holes for and mounted
the control knob on the face of the dash next to the head unit. This provided me a path to conceal the control
knob lead and to mount the control knob out of the way of my
shifting arm and clear of the emergency brake.
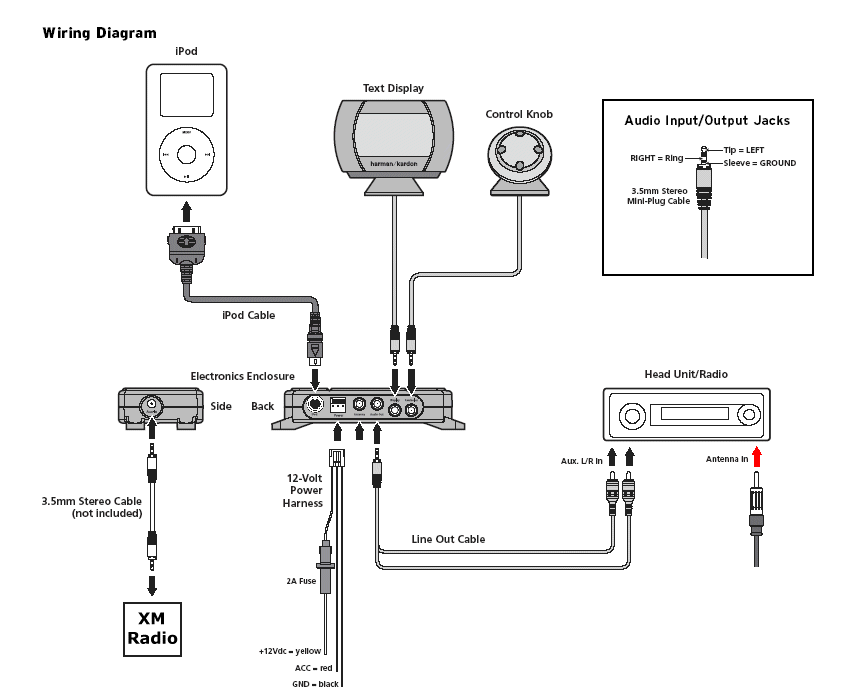
I plugged an output to the head
unit and ran it to the Drive + Play. I wired the power connections
for the Drive + Play into the Jeep AUX switched and un-switched
connections with a ground to the metal under the dash. I ran the
display and control knob wires inside the dash and emerging at the
appropriate points.
I put a right angle adapter on the XM
radio signal output and ran a 6-foot extension cable to the auxiliary
input connection on the Drive + Play giving me control over the XM radio
through the Drive + play.

I already had a host of left-over parts
(primarily nylock nuts and machine screws) from the installation of the Roady XT XM Radio, and had purchased some
other bracket parts when I installed the GPSMap76CSx (swivel head) into the Crossfire.
From all this I assembled the bracket and put it with the existing XM
Radio.