 |
|
11/28/04 | Update: 11/12/05 | Update 6/30/07
![]()
Specifications | How to Calculate Winch Loads | Winch Load Calculator (Excel Spread Sheet)
Winch Plate | Install | Front Number Plate Holder | Remote Throttle | Winch Kit | Winch Instructions | Battery | Cover
Understanding the DC electric-powered WINCH
| Background | |
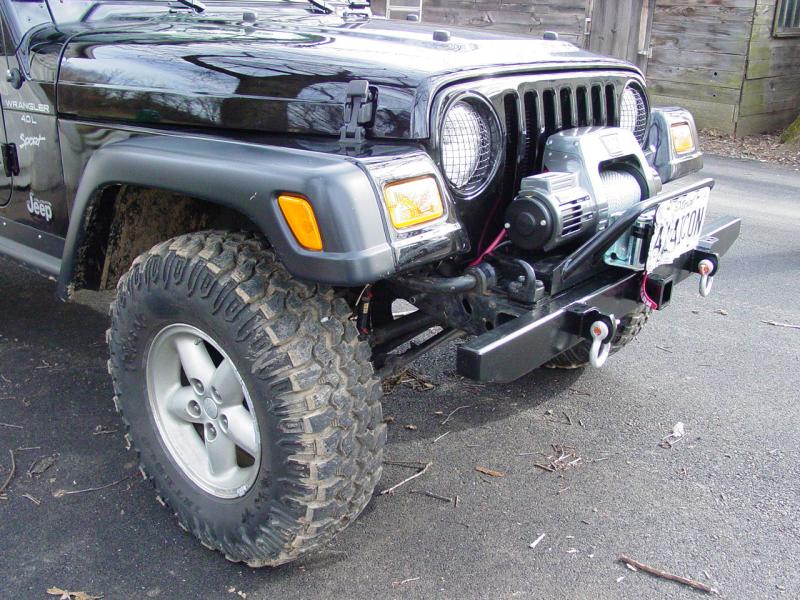
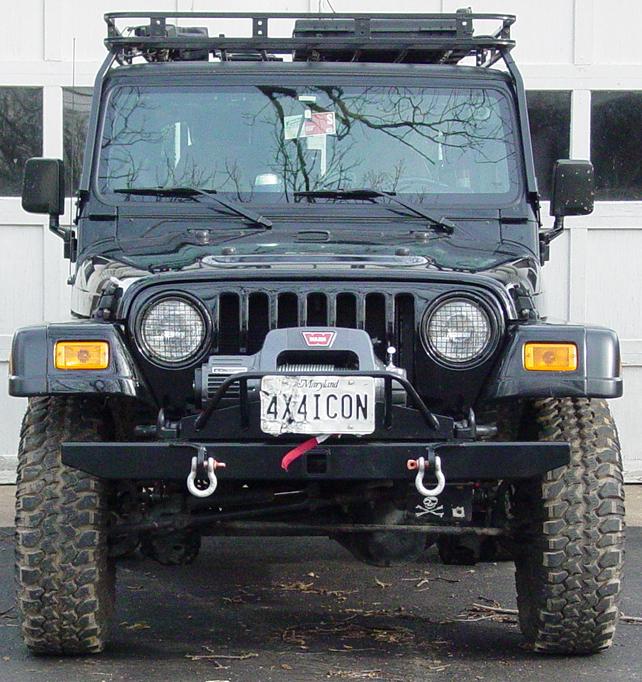
I had a car crash that did extensive damage to the front of my Jeep. Ironically enough, the winch survived without a mark even though the winch plate was damaged badly enough to require replacement. When I went to pick up the Jeep after the repair, I discovered the winch mounted on the vehicle backwards. That was dumb but no big deal. However, when I looked at the winch I discovered that the front of the winch had been deeply gouged! Referring back to photos taken after the accident but before leaving the Jeep at the body shop, I was able to show that the damage occured at the shop. To their credit, the shop agreed to replace the winch. |
 |
|
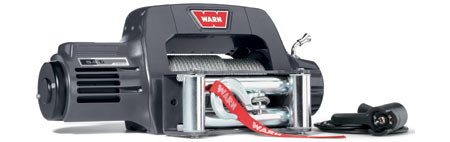
I referred them to the Quadratec web site for a price that included shipping and tax. They cut me a check for that amount and I contacted Quadratec to replace the winch. I decided that since I had an opportunity to reevaluate my choice of winches without losing any money, I should check to see what I might like instead of the x8000i. Even though the x8000i had served me well without failure, I was forced to admit that there were times when I would have liked to have a faster line speed, greater capacity, and more cable. Also, a couple times, the bail lever had gotten a little stuck in wet cold weather and I though better waterproofing might be useful. So for a few more dollars out of my own pocket, I ordered the 9.5ti. I was able to invoke the Quadratect price-matching and get it down a few bucks, and soon it was sitting on my door waiting to be installed. |
|
|
|
|
|
Winch Plate | Install | Front Number Plate Holder | Remote Throttle | Winch Kit | Winch Instructions | Battery | Cover
Understanding the DC electric-powered WINCH
![]()
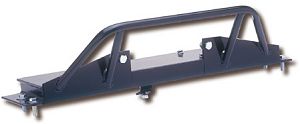
| Winch Plate | |
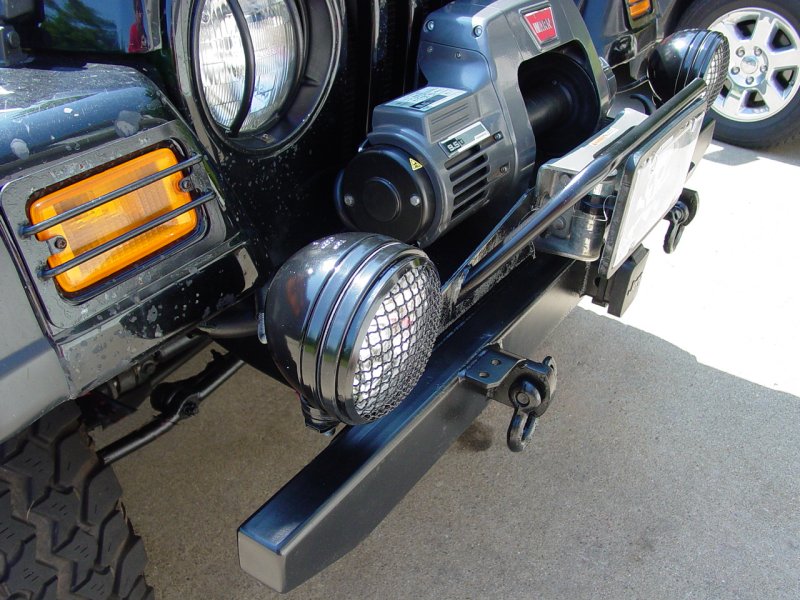
I used the same winch plate as previously. The only thing was that it was replaced because of damage received in the crash. The new plate was identical except for two things. First, it had two sets of holes for the sway bar bolts instead of the one on the first plate. Also, the reinforcing angle bar across the back bottom edge was was two pieces with a gap across the middle instead of the one piece that ran the entire length on the old plate. |
|
Tomken TMW-0924-V |
|
|
On 6/30/07 I refinished the plate as the powder coating had failed. |
 |
Winch Plate | Install | Front Number Plate Holder | Remote Throttle | Winch Kit | Winch Instructions | Battery
Understanding the DC electric-powered WINCH
![]()
| Installation | |
 |
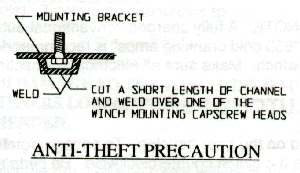
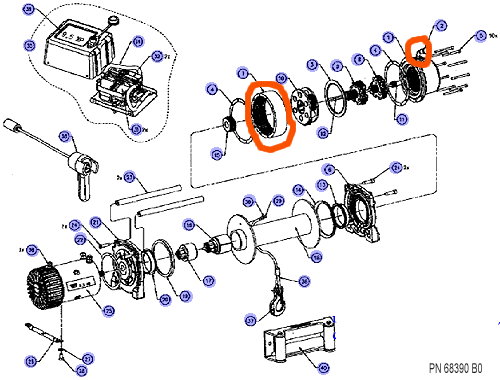
Installation is mindlessly
easy. I simply
If you need details, stay away from screw drivers - they can be dangerous... |
Winch Plate | Install | Front Number Plate Holder | Remote Throttle | Winch Kit | Winch Instructions | Battery
Understanding the DC electric-powered WINCH
![]()
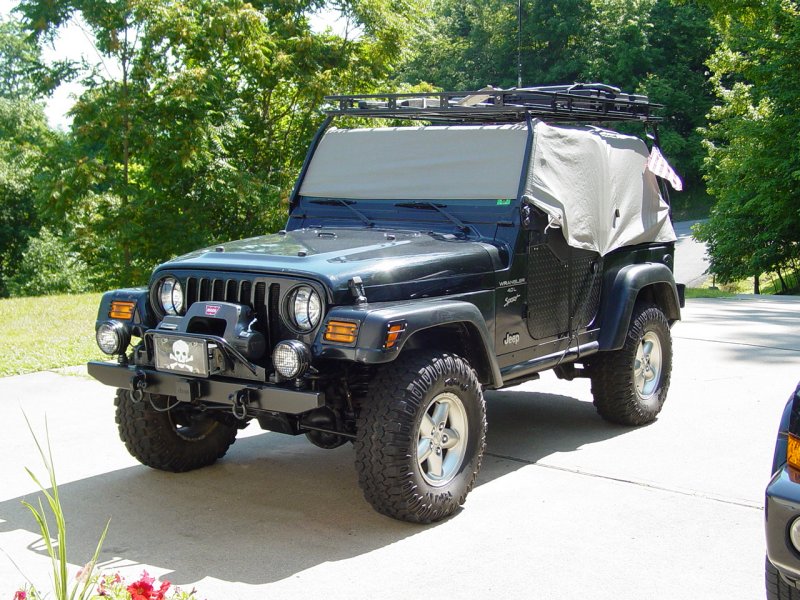
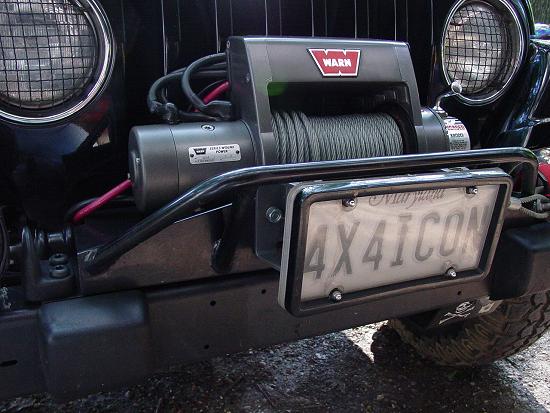
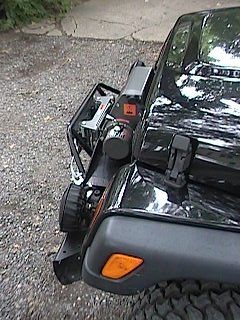
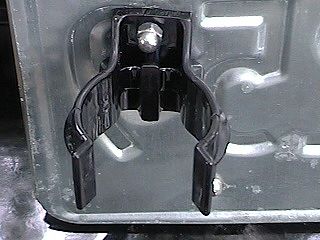
| Front Number Plate Holder with Winch (shown on old winch install) | |
|
|
Details, details... I knew that once the winch was in place, I was going to have to resolve a location for the number plate. Our fair state requires a front number plate. Running without one is looking for trouble, no matter what the excuse. I had heard people use Mag Lite flash light clips to snap the plate onto the roller fairlead so that's what I did. The clips are pretty beefy plastic so it looked like a good solution. |
 |
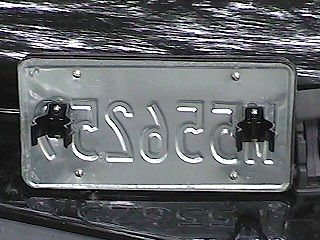 |
The only problem is that when I assembled it, I tightened the nuts and bolts too much and cracked the plastic, ruining the clips. I bought another set of clips and used some washers to spread the pressure out some, and used lock washers and thread locker to allow me to just barely tighten the bolts to the clips and to a spare number plate that I used as a backing plate. I will also have to remember to remove the license plate from the roller fairlead by releasing the ears of the clip rather than just grabbing the plate and yanking it off... |
I reattached the license plate frame, cover and license plate to the "backing plate" and clips using four stainless nut/bolts. It came out looking very clean. I may add a short length of chain or cable to tether the plate to prevent loss or theft.
|
 |
Winch Plate | Install | Front Number Plate Holder | Remote Throttle | Winch Kit | Winch Instructions | Battery
Understanding the DC electric-powered WINCH
![]()
| Remote Throttle | |
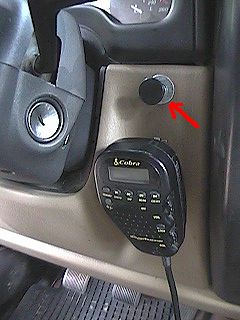
I later installed a remote throttle that enables me to run the engine at higher speeds to provide additional power and charging from the alternator during and after winching operations. |
|
Winch Plate | Install | Front Number Plate Holder | Remote Throttle | Winch Kit | Winch Instructions | Battery
Understanding the DC electric-powered WINCH
![]()
| Winch Kit | |
A winch
isn't much good without a box of things to complete the picture. Let's face it, a
spool of cable and a hook is a good start but in order to safely and conveniently connect
it to an anchor point, there are a few things that are needed. As it turns out, I
purchased a number of the necessary items as a package when I bought the Hi-Lift jack. There are only a few remaining
items that I need beyond that (marked in the list below with an asterisk)
|
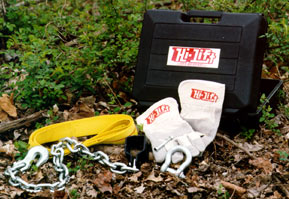 |
| The 20-foot chain is for providing an anchoring point to boulders. The
snatch blocks are for pulls when high strength or shortened/angled cable setups are
needed. The D-Rings are used as an anchor point for the winch hook, attached to
either the tree saver or the chain. In addition, I carry two medium-sized quilted
moving blankets for multiple uses, and to dampen cable whip if it should snap during a
pull. The gloves are required for handling the cable to prevent injury from loose
cable strands. The custom nose attachment is primarily intended for use with the
Hi-Lift jack when used as a winch so it may not come into play for power winching.
The case consolidates all the items needed for winching or jacking operations.
|
|
Winch Plate | Install | Front Number Plate Holder | Remote Throttle | Winch Kit | Winch Instructions | Battery
Understanding the DC electric-powered WINCH
![]()
| Instructions | |
| Although not an accessory in the strictest sense, I found that, not being born with built-in knowledge of safe and effective winch operation, I would need some instruction. I found a video from 4-Wheeling America and Bill Burke called Unstuck! that covers recovery methods and safety using a winch, Hi-Lift Jack, and nylon strap. Since my kids love to watch videos and love to go 4-Wheeling, we sat and watched the tape over and over again. I wanted to commit the advice to memory. They liked watching the recovery operations - something that they will probably be far away from in real life. And the scenery of the video is tantalizing - shot in the Colorado mountains. It's worth the few dollars it costs and is available on Bill Burke's site. And before I hit the trail with my new counter weight mounted up front, I spent some time practicing in the back yard. |  |
Winch Plate | Install | Front Number Plate Holder | Remote Throttle | Winch Kit | Winch Instructions | Battery
Understanding the DC electric-powered WINCH
![]()
| Battery | |
It finally came to pass at the end of November 2002, while traveling, that the factory battery dramatically failed and exploded. I was fortunate to find a place where I could purchase an Optima Red Top, as planned. I do not recommend replacing your battery under duress like I did, but if you find yourself in such a predicament, I wish you the same good fortune that I had that day... |
 |
|
|
|
Winch Plate | Install | Front Number Plate Holder | Remote Throttle | Winch Kit | Winch Instructions | Battery
Understanding the DC electric-powered WINCH
![]()
Specifications | How to Calculate Winch Loads | Winch Load Calculator (Excel Spread Sheet)
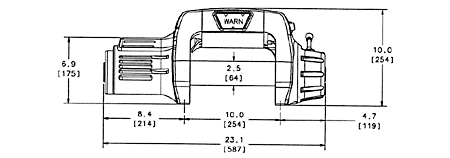
Specs
Specifications | How to Calculate Winch Loads | Winch Load Calculator (Excel Spread Sheet) Understanding the DC electric-powered WINCH
|
|||||||||||||||||||||||||||||||||||||||||||||||||||||||||||||||||||||||||||||||||||||||||||
Winch Plate | Install | Front Number Plate Holder | Remote Throttle | Winch Kit | Winch Instructions | Battery
Understanding the DC electric-powered WINCH
![]()
Return to Jeep Specs
Shop for Jeep Toys and Books | See the Toy Jeeps | Off-Road Index
Photos (except as
noted), Layout and Design © 2002, 2007 Paul M.
Provencher All Rights Reserved.
Contents of this Web Site may not be used without written permission
Visitors since 11/28/04