6/9/07
Aftermath
To give an idea of
the impact that one minor lapse of attention can have, even after getting
out of the mud hole and getting home safely, I have enumerated all the
things that had to be done in order to restore the Jeep and contents to the
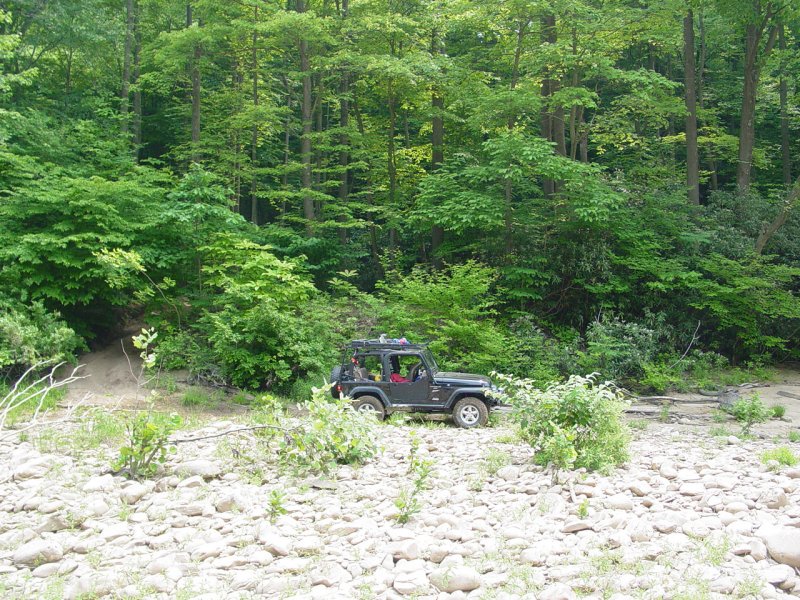
condition before getting stuck. This trip into the mud is far from our
usual activity. We never go looking for mud, avoid it at every turn,
and would never think of making mud a destination.
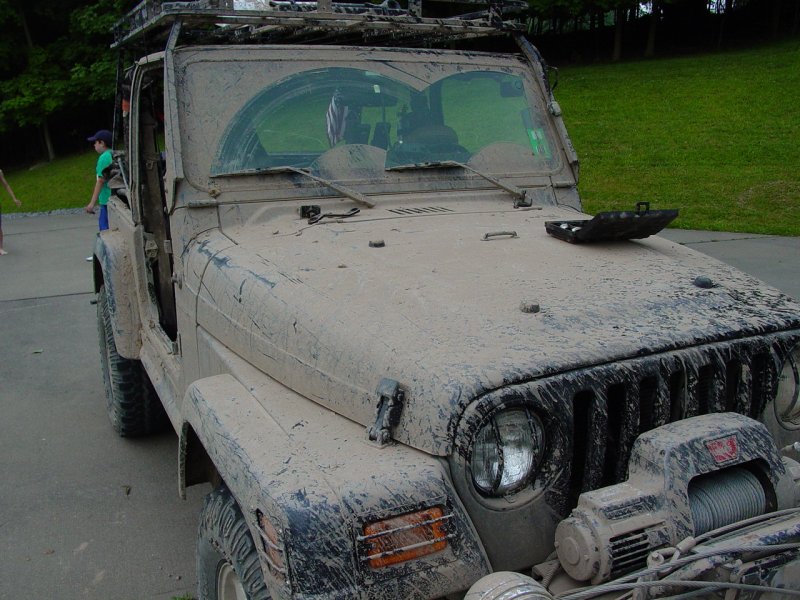
If this Jeep were
completely stripped inside and out, and was properly built for mud, things
would be much different. But this Jeep is a daily driver and creature
comforts are a big part of how it is laid out. Here then is what lies
ahead if you go topless into a mud hole. A conservative estimate of
time spent on the clean-up operation suggests I have spent nearly 40 hours
so far, and have another 10 or 20 hours ahead to take care of a few
follow-up items. That's a pretty lousy fun-to-work ratio. In
terms of cost, it probably approaches $500 in parts and repairs, not taking
into account all the labor and the warrantee service for the winch. A
pretty high ticket for one afternoon trip in the woods.
Overview
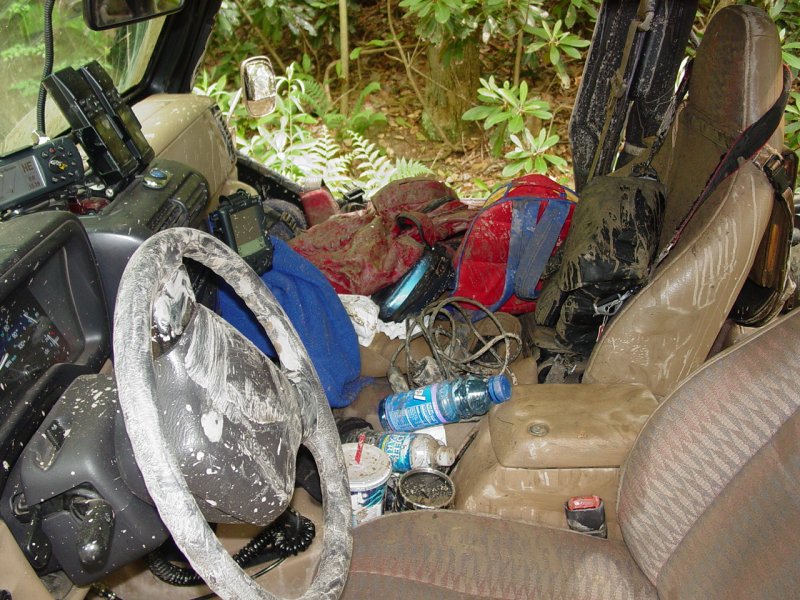
I spent all evening on 6/2/07 trying to
get the Jeep clean. The mud had gotten into most everything inside the
Jeep because the windows were off and I was running the half doors.
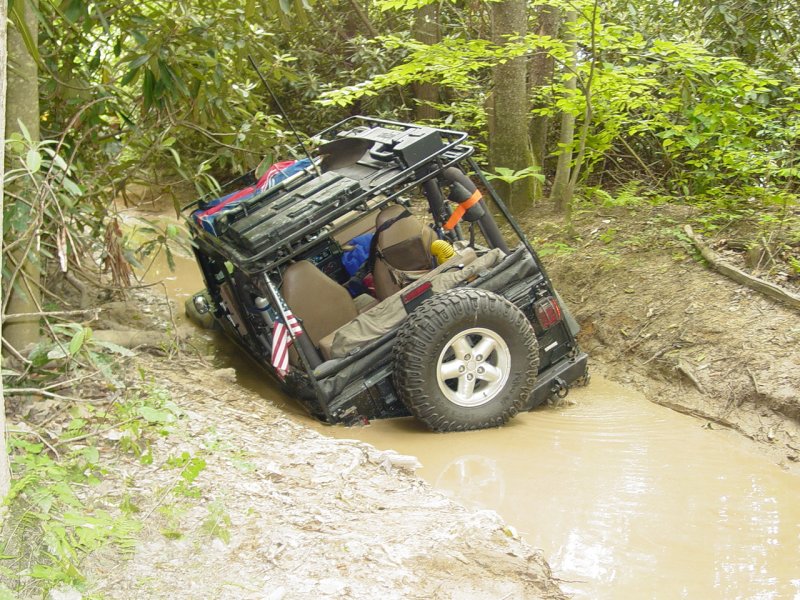
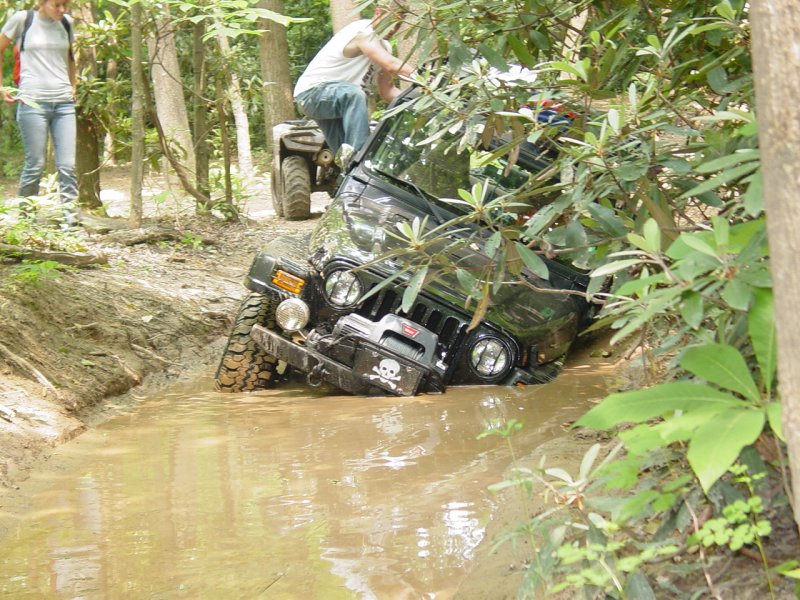
When I tried to power out of the mud hole, the front right tire slung muddy
water into the cab. Here's a list of what the muddy water landed on:
-
CD Cases (2) with approximately 150
CD's inside
-
Camera case with Camera inside
-
Electronics Case with power inverter,
and various wires
-
Knap sacks (3)
-
emergency blanket rolls (2)
-
coolers
-
gloves
-
seats
-
carpet
-
roll bar padding
-
tweeters
-
subwoofer
In short, this trip into the mud was quite
a disaster. I don't know why people seek it out. It's so
damaging. Since it's a moot point I set aside my frustration and got
to work cleaning up the mess.
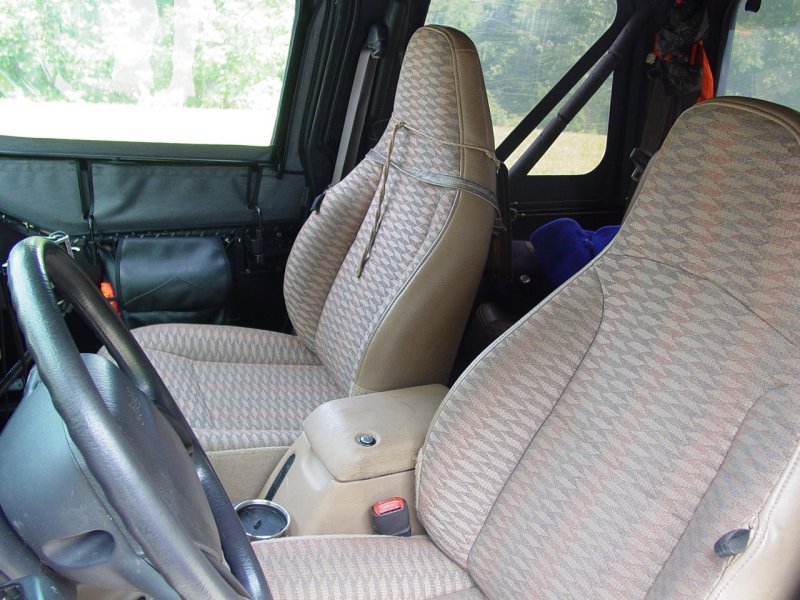
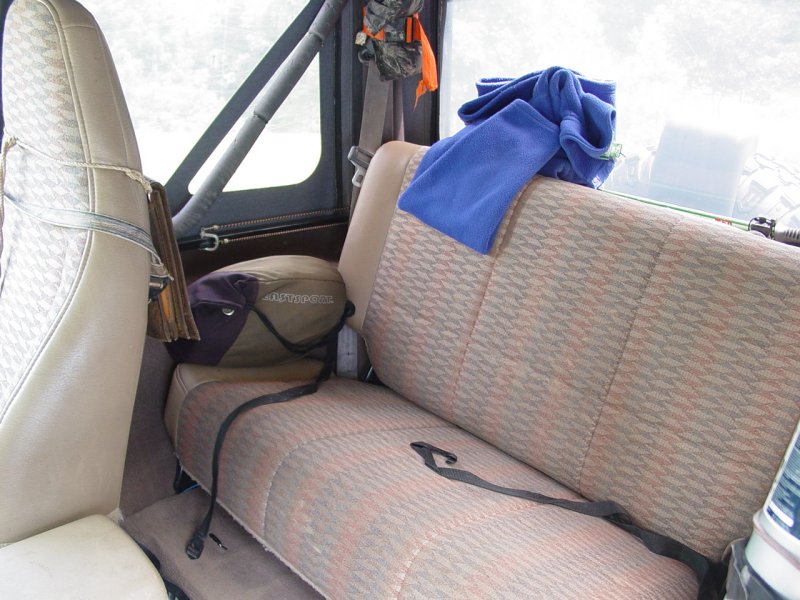
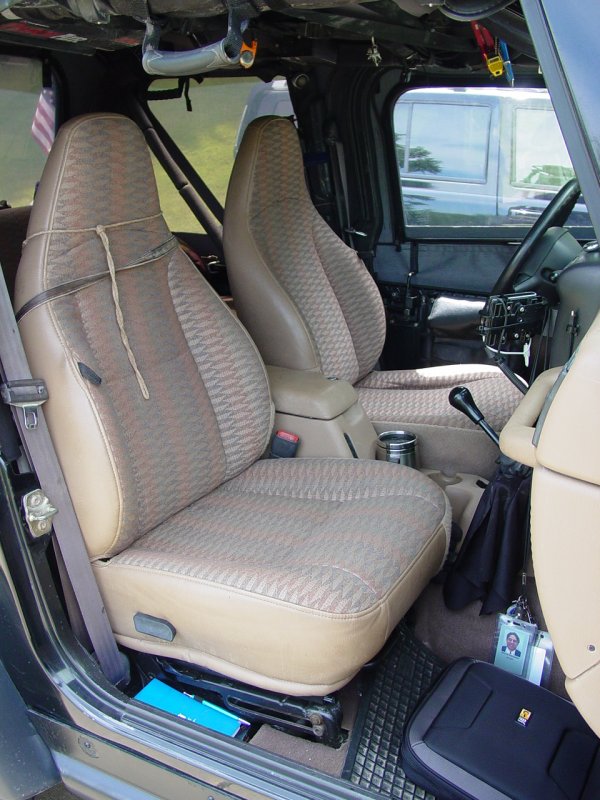
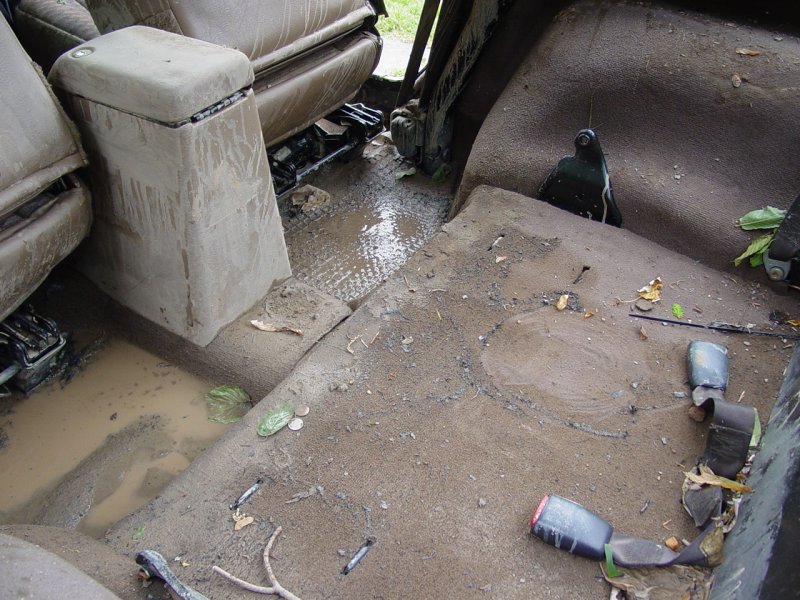
Seats and Carpet
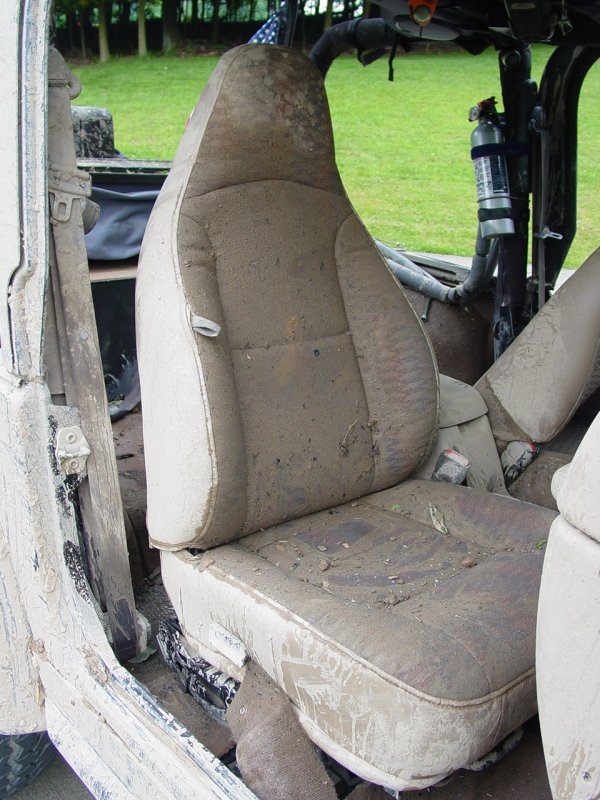
I completely removed the seats and
carpeting and washed the thick mud off with a garden hose. I scoured
them to get as much off as possible. The next day I went to Lowe's and
rented a Rug Doctor with upholstery attachment and used it to deep-clean the
carpets and seats. This took the better part of Sunday (6/3/07) and
Monday evening. I set them aside to dry for a couple days.
When I finished cleaning the seats and
carpet, I spent some time cleaning out the seat frame and sliders to get all
the mud out and then to lubricate all the moving parts with spray-in lithium
grease. Without a doubt, the seat mechanisms would rust and stop
working if I didn't. This took another couple hours as I was very
thorough.
Rack
The roof rack
was a mess. It got sprayed with thrown mud and water and repeated
attempts to hose it off didn't work. That meant hand-washing each rail
with a brush or cloth to get the mud off. I also had to clean off the
storage containers and jack case.
Jack
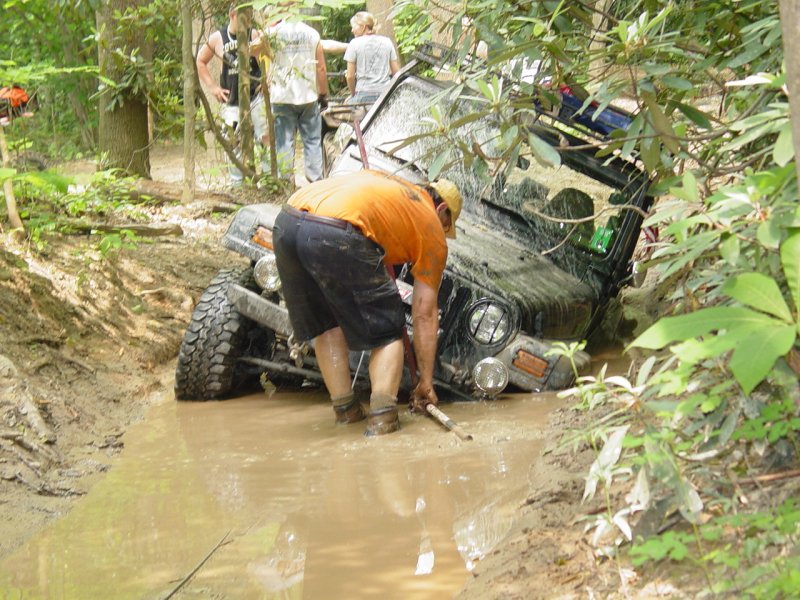
The
Hi-Lift jack saw some use. Indeed, if we had been alone, it would
have been the only thing left offering hope of self recovery. Since it got wet
and muddy, it needed to be cleaned and lubricated before being stored again
so that next time we need it, it will be ready.
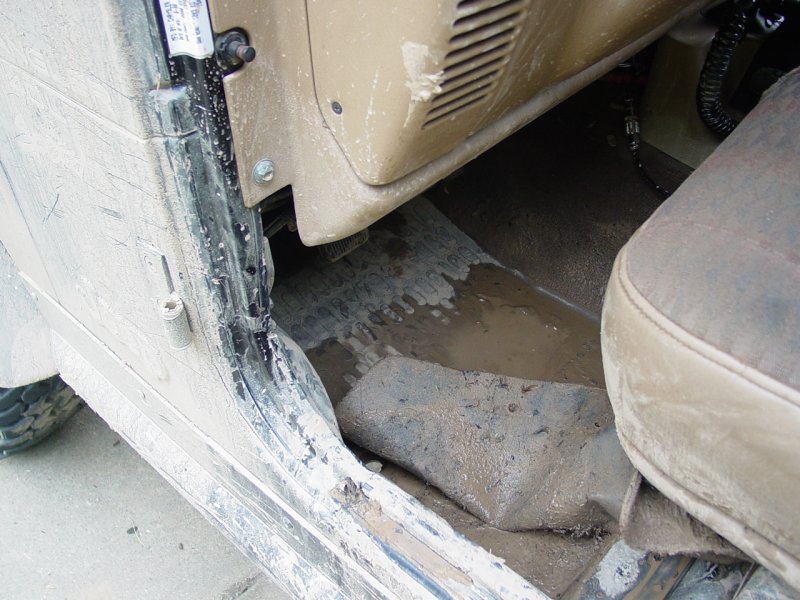
Body
While I had the seats and carpets out I
inspected the floor for any signs of damage. This meant first cleaning
all the mud out of all the crevices. I put plastic over the dash area
and hosed out the Jeep interior. I had removed the floor plugs on
Saturday so the water drained out of the floor pretty well. I noted
one problem area with some surface rust from condensation on the
passenger-side floor.
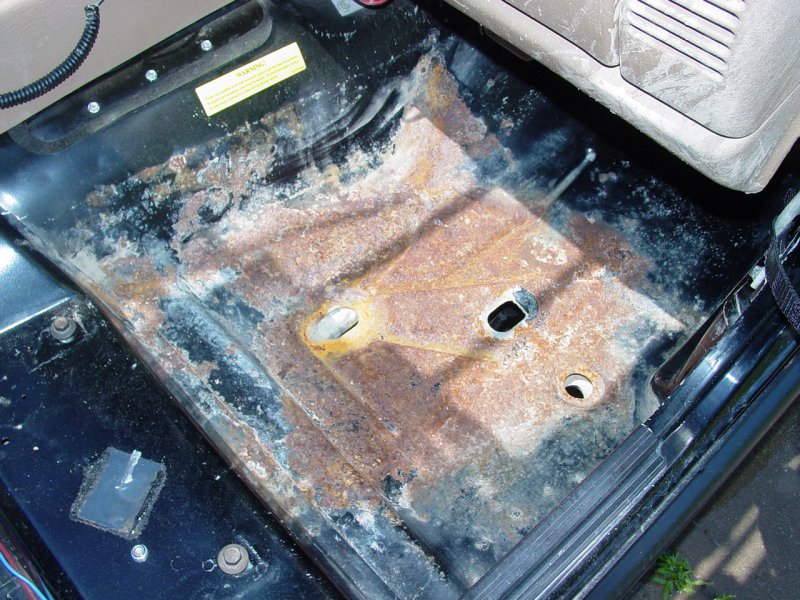
To combat this I purchased a POR-15 kit
and followed the instructions to first clean the metal and surrounding area,
apply a metal prep to neutralize the rust, then finally to paint the floor
with POR-15. The write up with
pictures is located here.
Stereo
The jury was out on
my head unit. The symptoms were
not good. On the way out of the woods the stereo started reporting
Error 11 codes. The manual says this is because of either dirty or bad
CD's or an electrical problem. All the counter measures recommended
did not work. So it went in for service. I didn't know if
this was related or not. The unit didn't get wet directly. And
the CD that was in the unit played the entire time we were on the trail up
until it's failure on the way out. It is possible that something found
it's way in there, but I am not sure it was because of the mud hole.
Still, the timing is suspicious...
I removed the unit from the Jeep.
I sent it out for service. The problem was that a piece of the one of the CD storage
cases (a die-cut-out for the hole in the CD sleeve) found its way into the
inside of the CD player! Clearly, this was not a problem caused by
the mud encounter. While the unit was out of the dash, I
installed an XM
Radio.
CD Cases
I removed each and every CD stored in two
cases (about 150 CD's, carefully wiped those that had anything on them (very
few) and set the CD's aside in one of those CD-storage cases that blank CD's
come in. Then I cleaned each compartment of both cases. This
took a couple hours. I will probably replace the CD storage case
anyway because the zipper is failing, the binding of the storage slots is
coming apart, and I don't think it's possible to get all the dirt out of
them. Fortunately most of my CD's are duplicates and the originals are
stored at the house (so that they don't get spoiled...) I have about
10 or 20 CD's that have to be made over again. That's not too bad,
especially since some of those were already bad before this little
activity... I ended up purchasing a new CD case that was more robust
and holds more CD's and put all my CD's into it.
Emergency Brake
The emergency brake is seized. I
ordered a cable from Jeff to fix this. I took his advice and ordered
the Rubicon cable as he has found that the Teraflex cables are not as good.
Interior Panels
I spent several hours wiping the various
interior panels down with a damp rag. It was like the directions on
the back of a shampoo bottle that very simply read: "Lather, Rinse, Repeat".
Every single spot had mud on it. Some areas were worse than others but
it all required care and attention. A couple more hours of cleaning.
Dash and Other Electrical
I was very fortunate that all the dash and
under dash components, as best I can tell from close inspection, escaped
submersion or water/mud splash contact. The high watermark on the
driver's side was a diagonal from the bottom of the door opening to the
bottom of the transmission hump. The edge of the OBD-II connector just
barely got wet and perhaps the cover of the courtesy light on the drivers
side, but everything else was high and dry. That was a relief in light
of all the other carnage.
Camera
Another possible casualty was my
digital camera. I handed it
out to Ted as soon as I saw that things were getting messy and it appears to
work properly, but a single white line running across the preview screen
appeared the next day after this trip. I don't know if it is a
coincidence or not, but this mud sure is shaping up like a WV Bermuda
Triangle for me.
Engine Compartment
During the time we were in the mud hole,
the cooling fan was just barely touching the water and making some noise
because of it. But it did not bend and did not make contact with the
radiator or anything else under the hood.


It did a lot of splashing so
I did carefully rinse the engine and ancillary components. It will
require another session with rags and wiping of individual components to get
it really clean. Fortunately the critical moving parts are all located
on the other side of the engine and were well up out of harms way during the
whole mess.
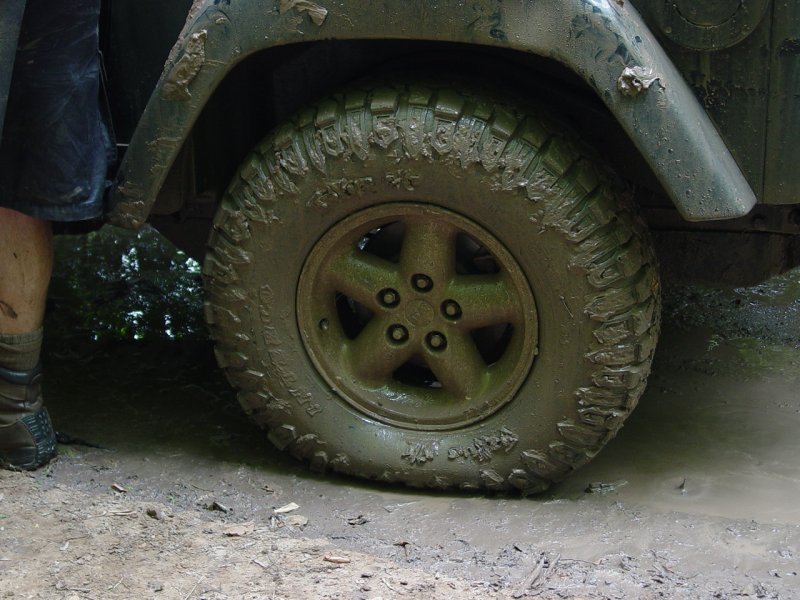
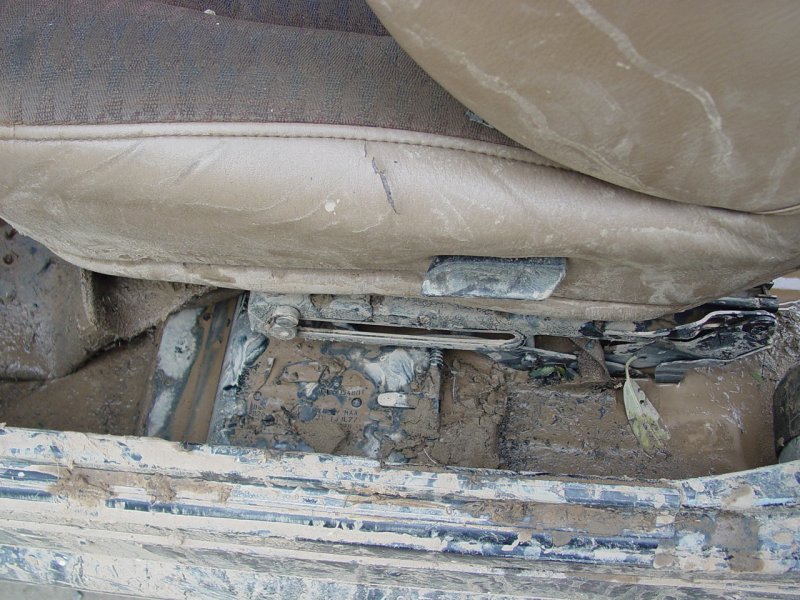
Chassis/Suspension
A great deal of mud made its way into the
frame and reinforcing members of the body. I spent several hours
flushing each area several times and fishing out the debris that had gotten
inside. I wanted to make sure that no moisture traps remained to cause
premature rusting of the frame or body. This was tedious work.
Several times I thought I was done only to dislodge more junk that required
flushing the compartment again.
Brakes
The disc brakes (front and rear) were
relatively easy to clean but a surprising amount of mud and debris was
rinsed out. I will have to remove the wheels and tires to be sure that
I have gotten it all.
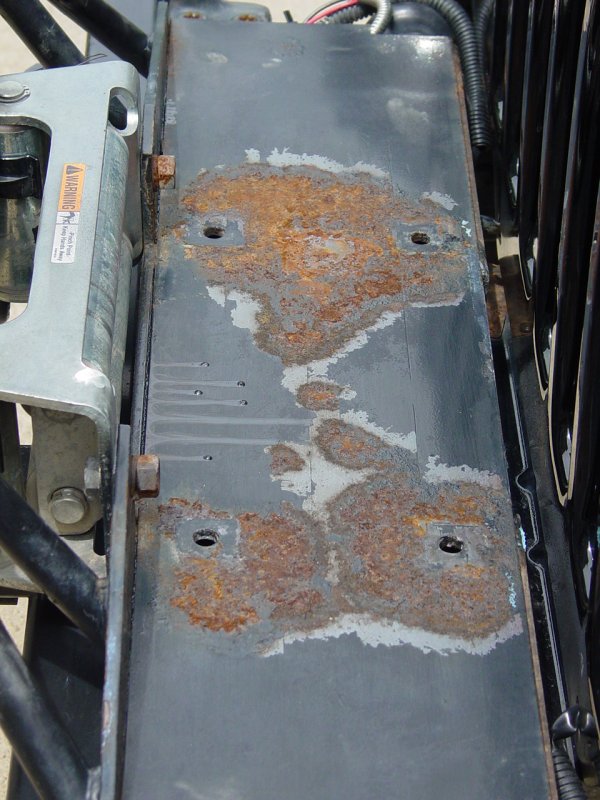
Gas Tank Skid Plate
The
gas tank skid plate has trapped
a large amount of mud. It has drain holes but they're plugged. I
shall have to remove it to get it clean. I will take that opportunity
to treat it to some POR-15.
Winch Plate
As part of removing the winch to be sent
out for service, I removed the
winch plate. The underside powder coating had failed.
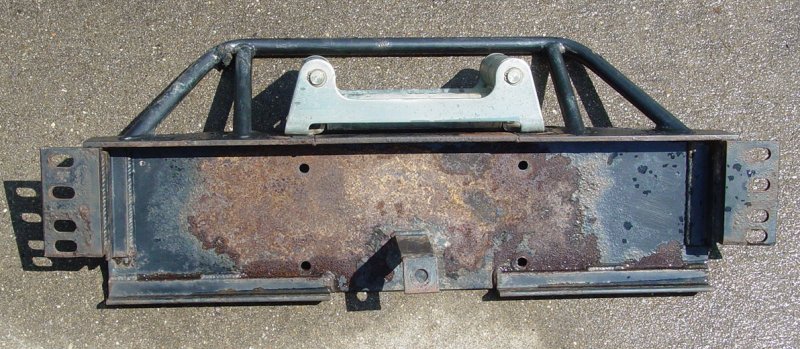

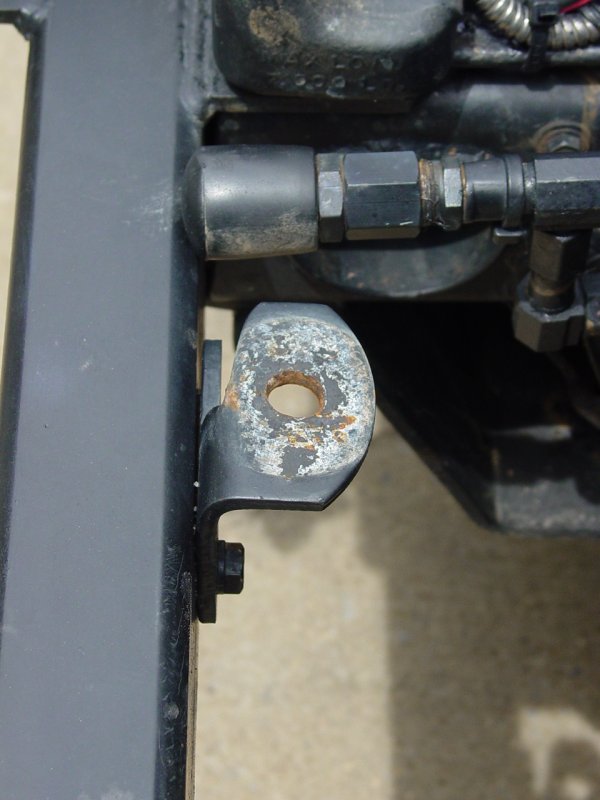

I
scraped the scale and rust off and followed the same steps to prep and paint
it with POR-15 as the other areas. It came out so well I will probably
follow the recommendations for refinishing the entire winch plate using
POR-15 products and topcoats that do not suffer UV-graying.
Winch
The winch
problems became apparent when I tried to recover the Jeep from the mud hole.
As such they were not caused by the mud, but the failed winch certainly
complicated the recovery. When I got it removed from the Jeep, I had
to free the cable that had pulled tight through a layer of cable.
Since I had already taken off the housing cover to see if I could free the
spool, I first had to reassemble the ring gear and planetary gears, etc.
In order to do that I had to immerse them all in parts cleaner to get the
old grease out, then put some assembly lube on them so that when I put them
back together they didn't form one big seized mess. This took several
hours as I used a toothbrush to clean each individual part in the parts
cleaning solution before putting new lube on them.
Once reassembled, I reattached the winch
to the winch plate backwards, and the winch assembly to the front bumper.
Then I positioned the Jeep with the cable run to a large tree. I
carefully backed up just enough to put tension on the cable and then an inch
or three more to pull the pinched cable free. Then I removed the winch
plate from the Jeep, and the winch from the winch plate. Then I was
able to unspool the cable, one wrap at a time until all 125 feet of cable
had been removed. This was so I could ship the winch to Warn for
repair. By removing the cable I would save some money on shipping -
125 feet of cable is quite heavy!
Top
The
full soft top had been carefully folded and stored on the rear deck of
the Jeep. Still, it did not escape the mud that was thrown during the
recovery operation. There were some heavy deposits of mud that I had
to wash off which meant partially disassembling the top, after removing it
from the Jeep. After I finished cleaning the top I reinstalled it on
the Jeep. With pretty much everything inside cleaned up, it would no
longer prevent easy access to the interior.
Add-a-Trunk
The trunk panel was removed in order to
remove the carpeting and to do the best job cleaning. In doing so I
discovered a couple of the well nuts had deteriorated enough that they would
not go back together, so I replaced them
Cargo
Anyone who has read this site well will
know that I travel with a considerable amount of gear. This part of
the clean-up was perhaps the most tedious. This mud hole managed to
seep into every item I carried onboard. I had to hand-clean or wash
the following items:
-
knap sacks (3)
-
emergency blanket rolls and
covers (2)
-
foul weather coat
-
spare wool hats (2)
-
baseball caps (3)
-
picnic blanket
-
hand warmers
-
Oasis Deflators (leather case,
deflators, tire pressure gauge)
-
on-door storage pouches (2)
-
sunscreen and bug sprays
-
jumper cables and canvas tool
wrap
-
factory jack, extension and
lug wrench
|
|
Summary
We spent less than an hour stuck in the
mud, but the clean-up has taken several full days to complete. I spent
four Saturday and Sundays working the various areas. I think if one
were to add up the labor, an insurance company might well consider the Jeep
totaled, even though mechanically it's just fine. But the labor to get
it cleaned up was staggering.
The
damage that could no be fixed by cleaning includes the following:
-
Stereo Head Unit
-
Digital Camera
-
Tweeter
-
Emergency Brake Cable
I am hoping that is the extent of the
damage...