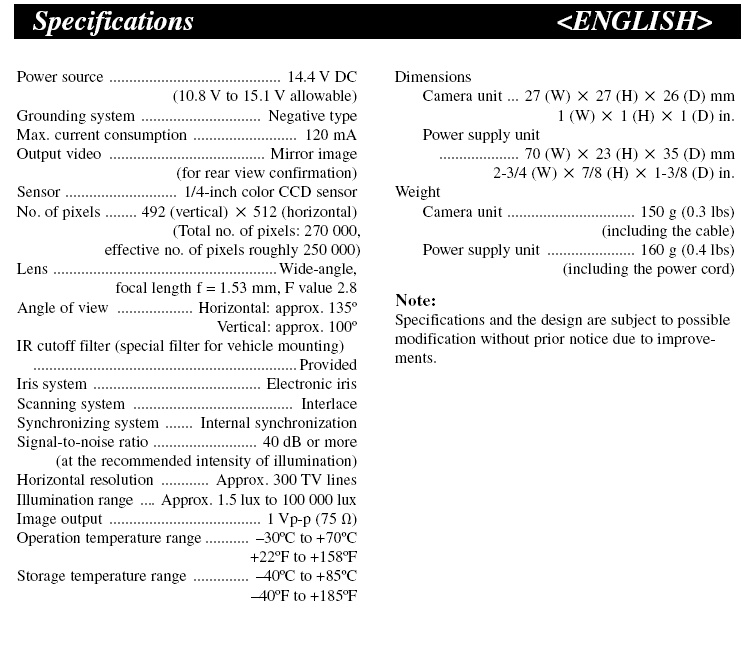
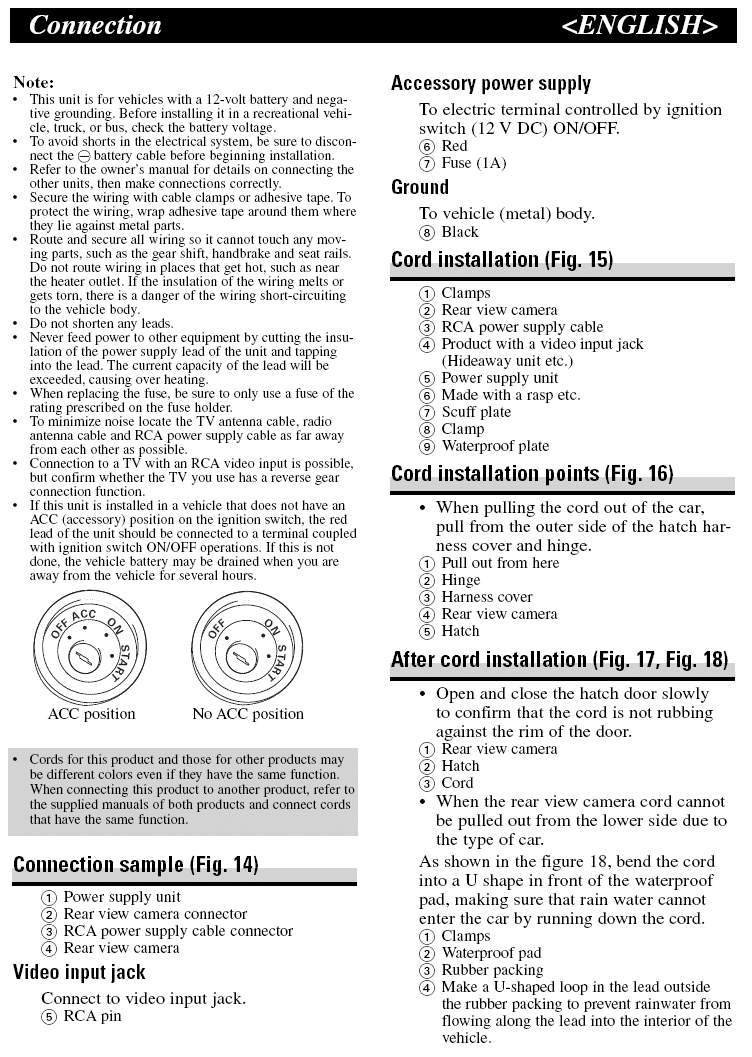
What's Back There...?
This car is
very challenging to drive backwards. It goes beyond
normal things. The rear view is fine for going down
the highway and the mirrors give good view to the rear
though the side rear three-quarter view isn't great. I
have resorted to putting
little mirrors on the sun visors to
help there. But parking is still challenging if one
must either back in, or when finished, back out. The
first week I had the car I got several wake-up calls about
the extra need to pay attention to the backing up task.
Every time I
went to Wal*Mart I looked at the cheap rear-view camera and
every time I would leave it on the shelf, waiting for it to
come down from $100 to the $20 it's probably worth. It
is one of the items that has never in my experience been
"Rolled Back". So eventually I stopped watching it but
never stopped thinking about how nice it would be to have
one. Our
Jeep Commander has one that came from the factory and it's very useful for
spotting the curb before the rear juts past, for lining up
when parking, and so on.
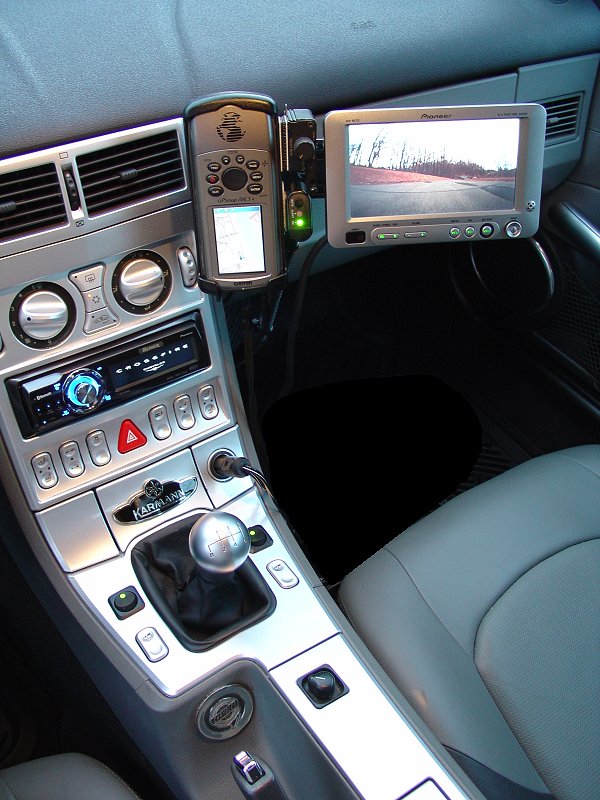
Once I
installed the
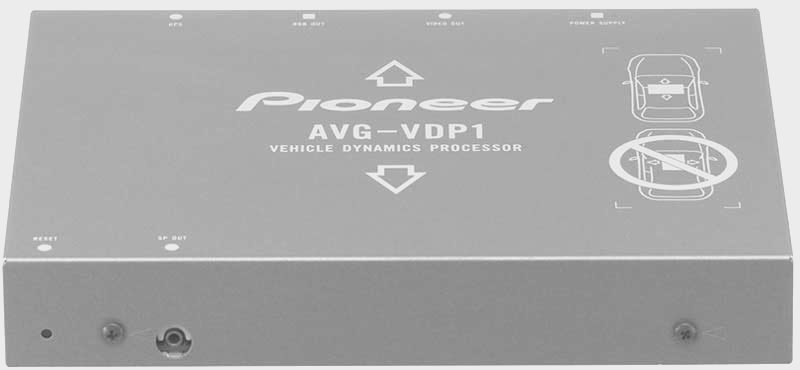
Vehicle Dynamics Processor (VDP-1), I had a
video screen. That's all that's necessary to use this
unit, and provisions are there to plug it into it's own
box and from there to the video screen box. So when I
installed the VDP-1 I left room on the component mounting
board to install the control box for this device. As
it turned out the control box is the size of a box of Tic-Tacs,
so the space I left was very generous...
I
stalked the units online until I found one at rock-bottom
price that was new and complete. As presentation is
often everything and some pay extra for the box, this unit
was a decent bargain, shipping for a good bit less than the
ones that had the box. It arrived in like-new, never
installed condition.
It cost me little
more than the Wal*Mart unit and far exceeds it's
capabilities and quality. The added bonus is that the
camera is wired in rather than wireless and battery-powered.
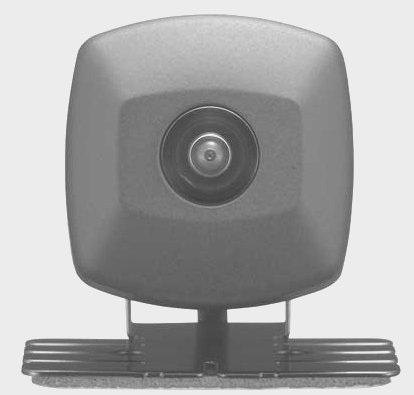
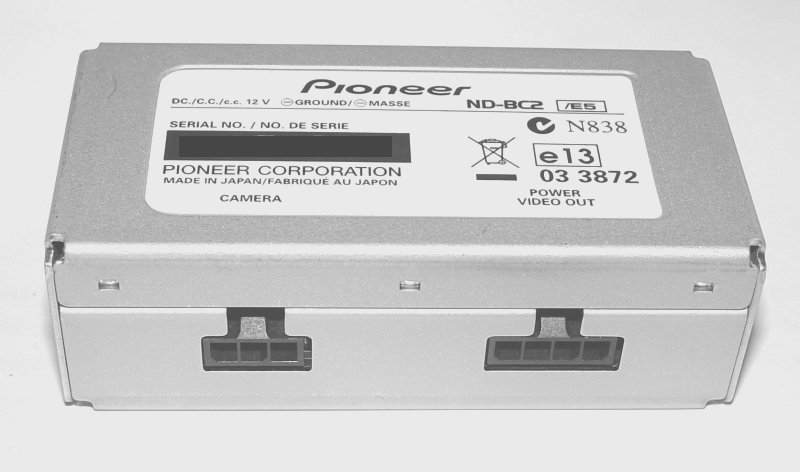
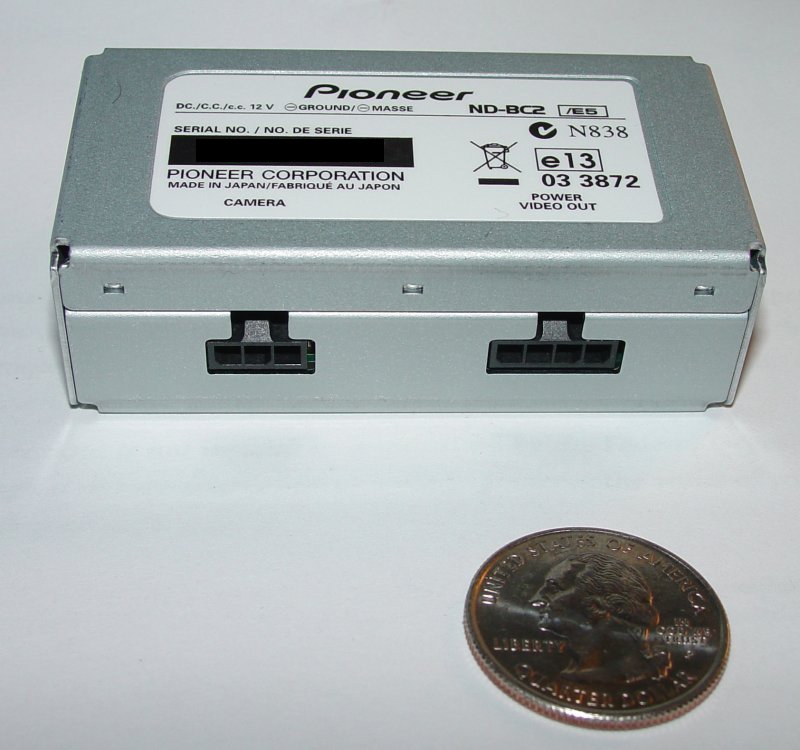
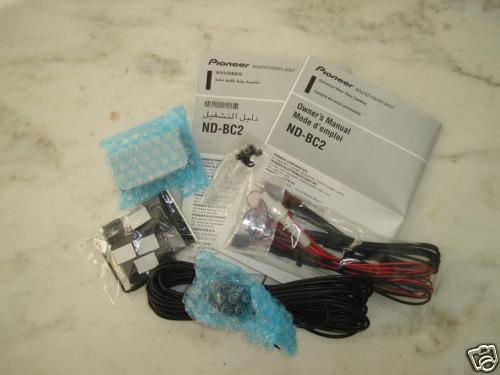
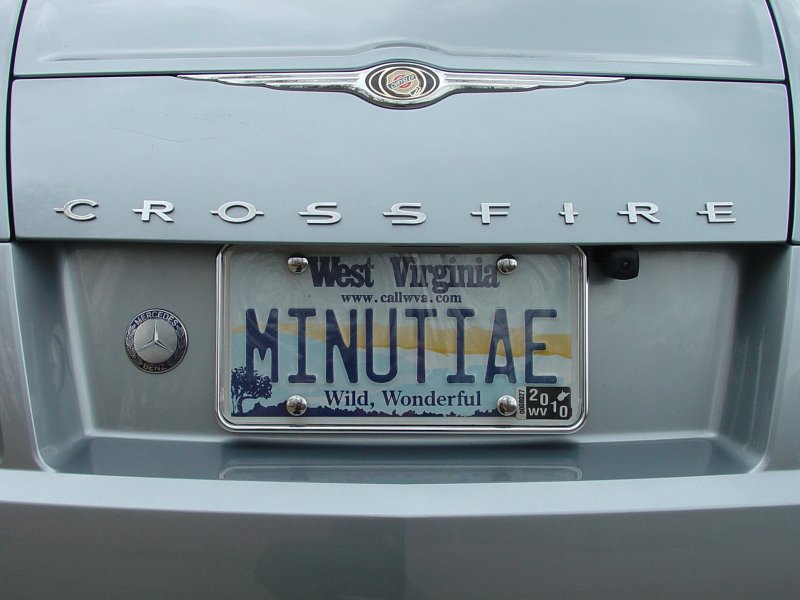
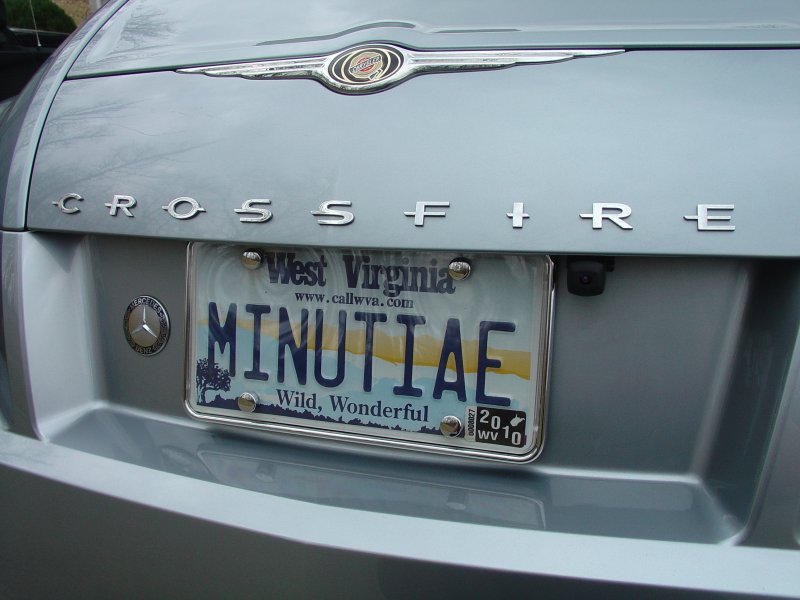
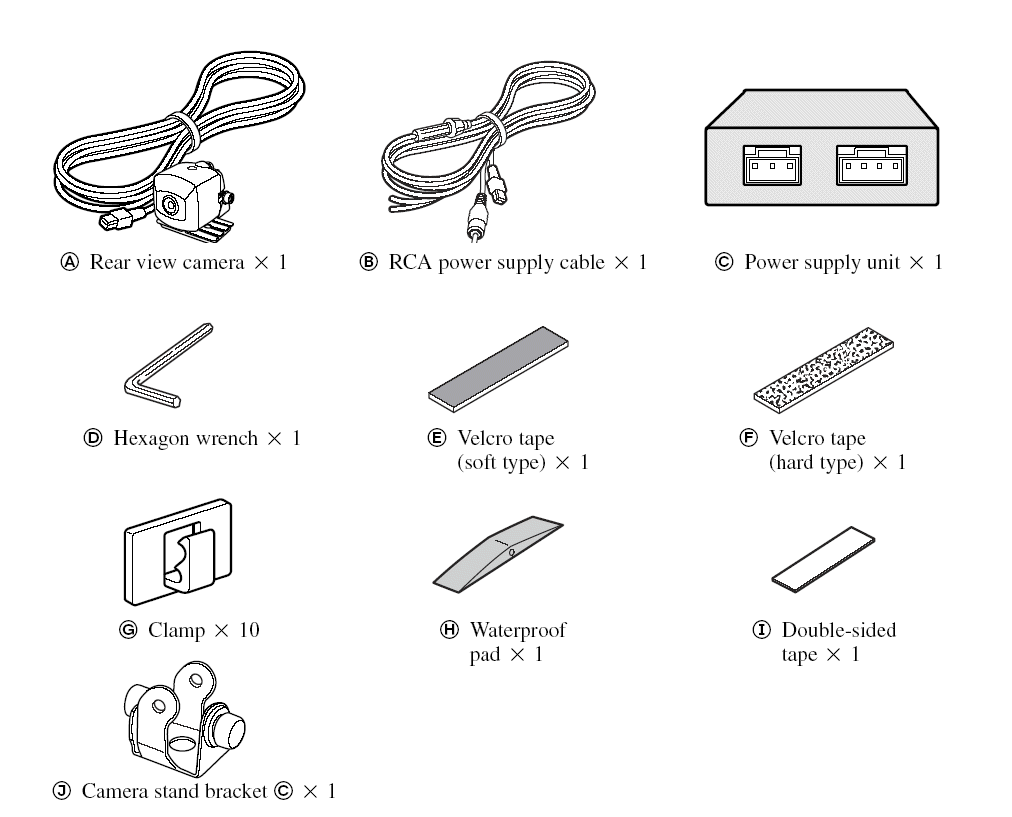
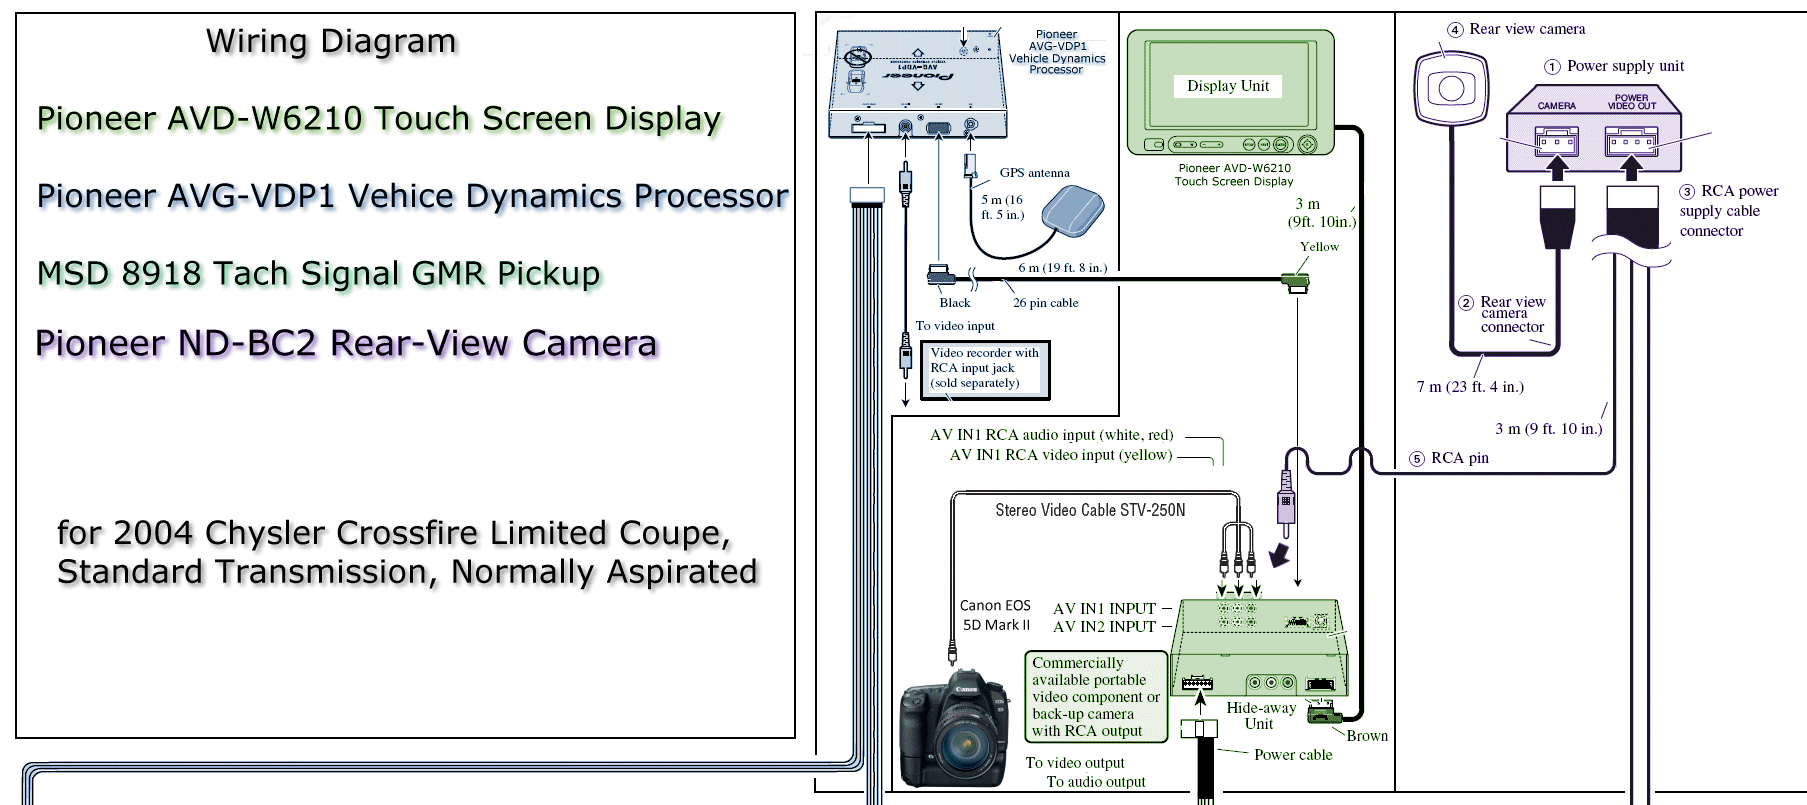
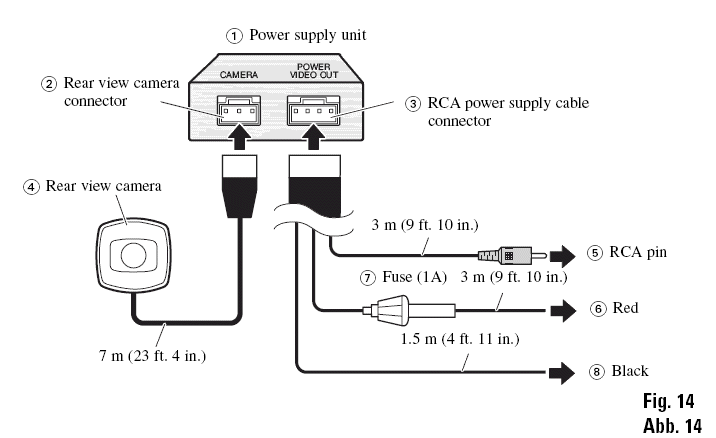
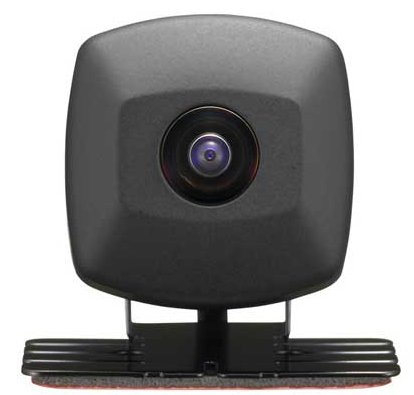
Pioneer ND-BC2
Rear-View Camera
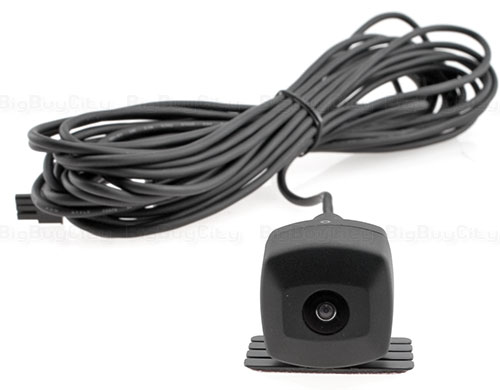
Installation
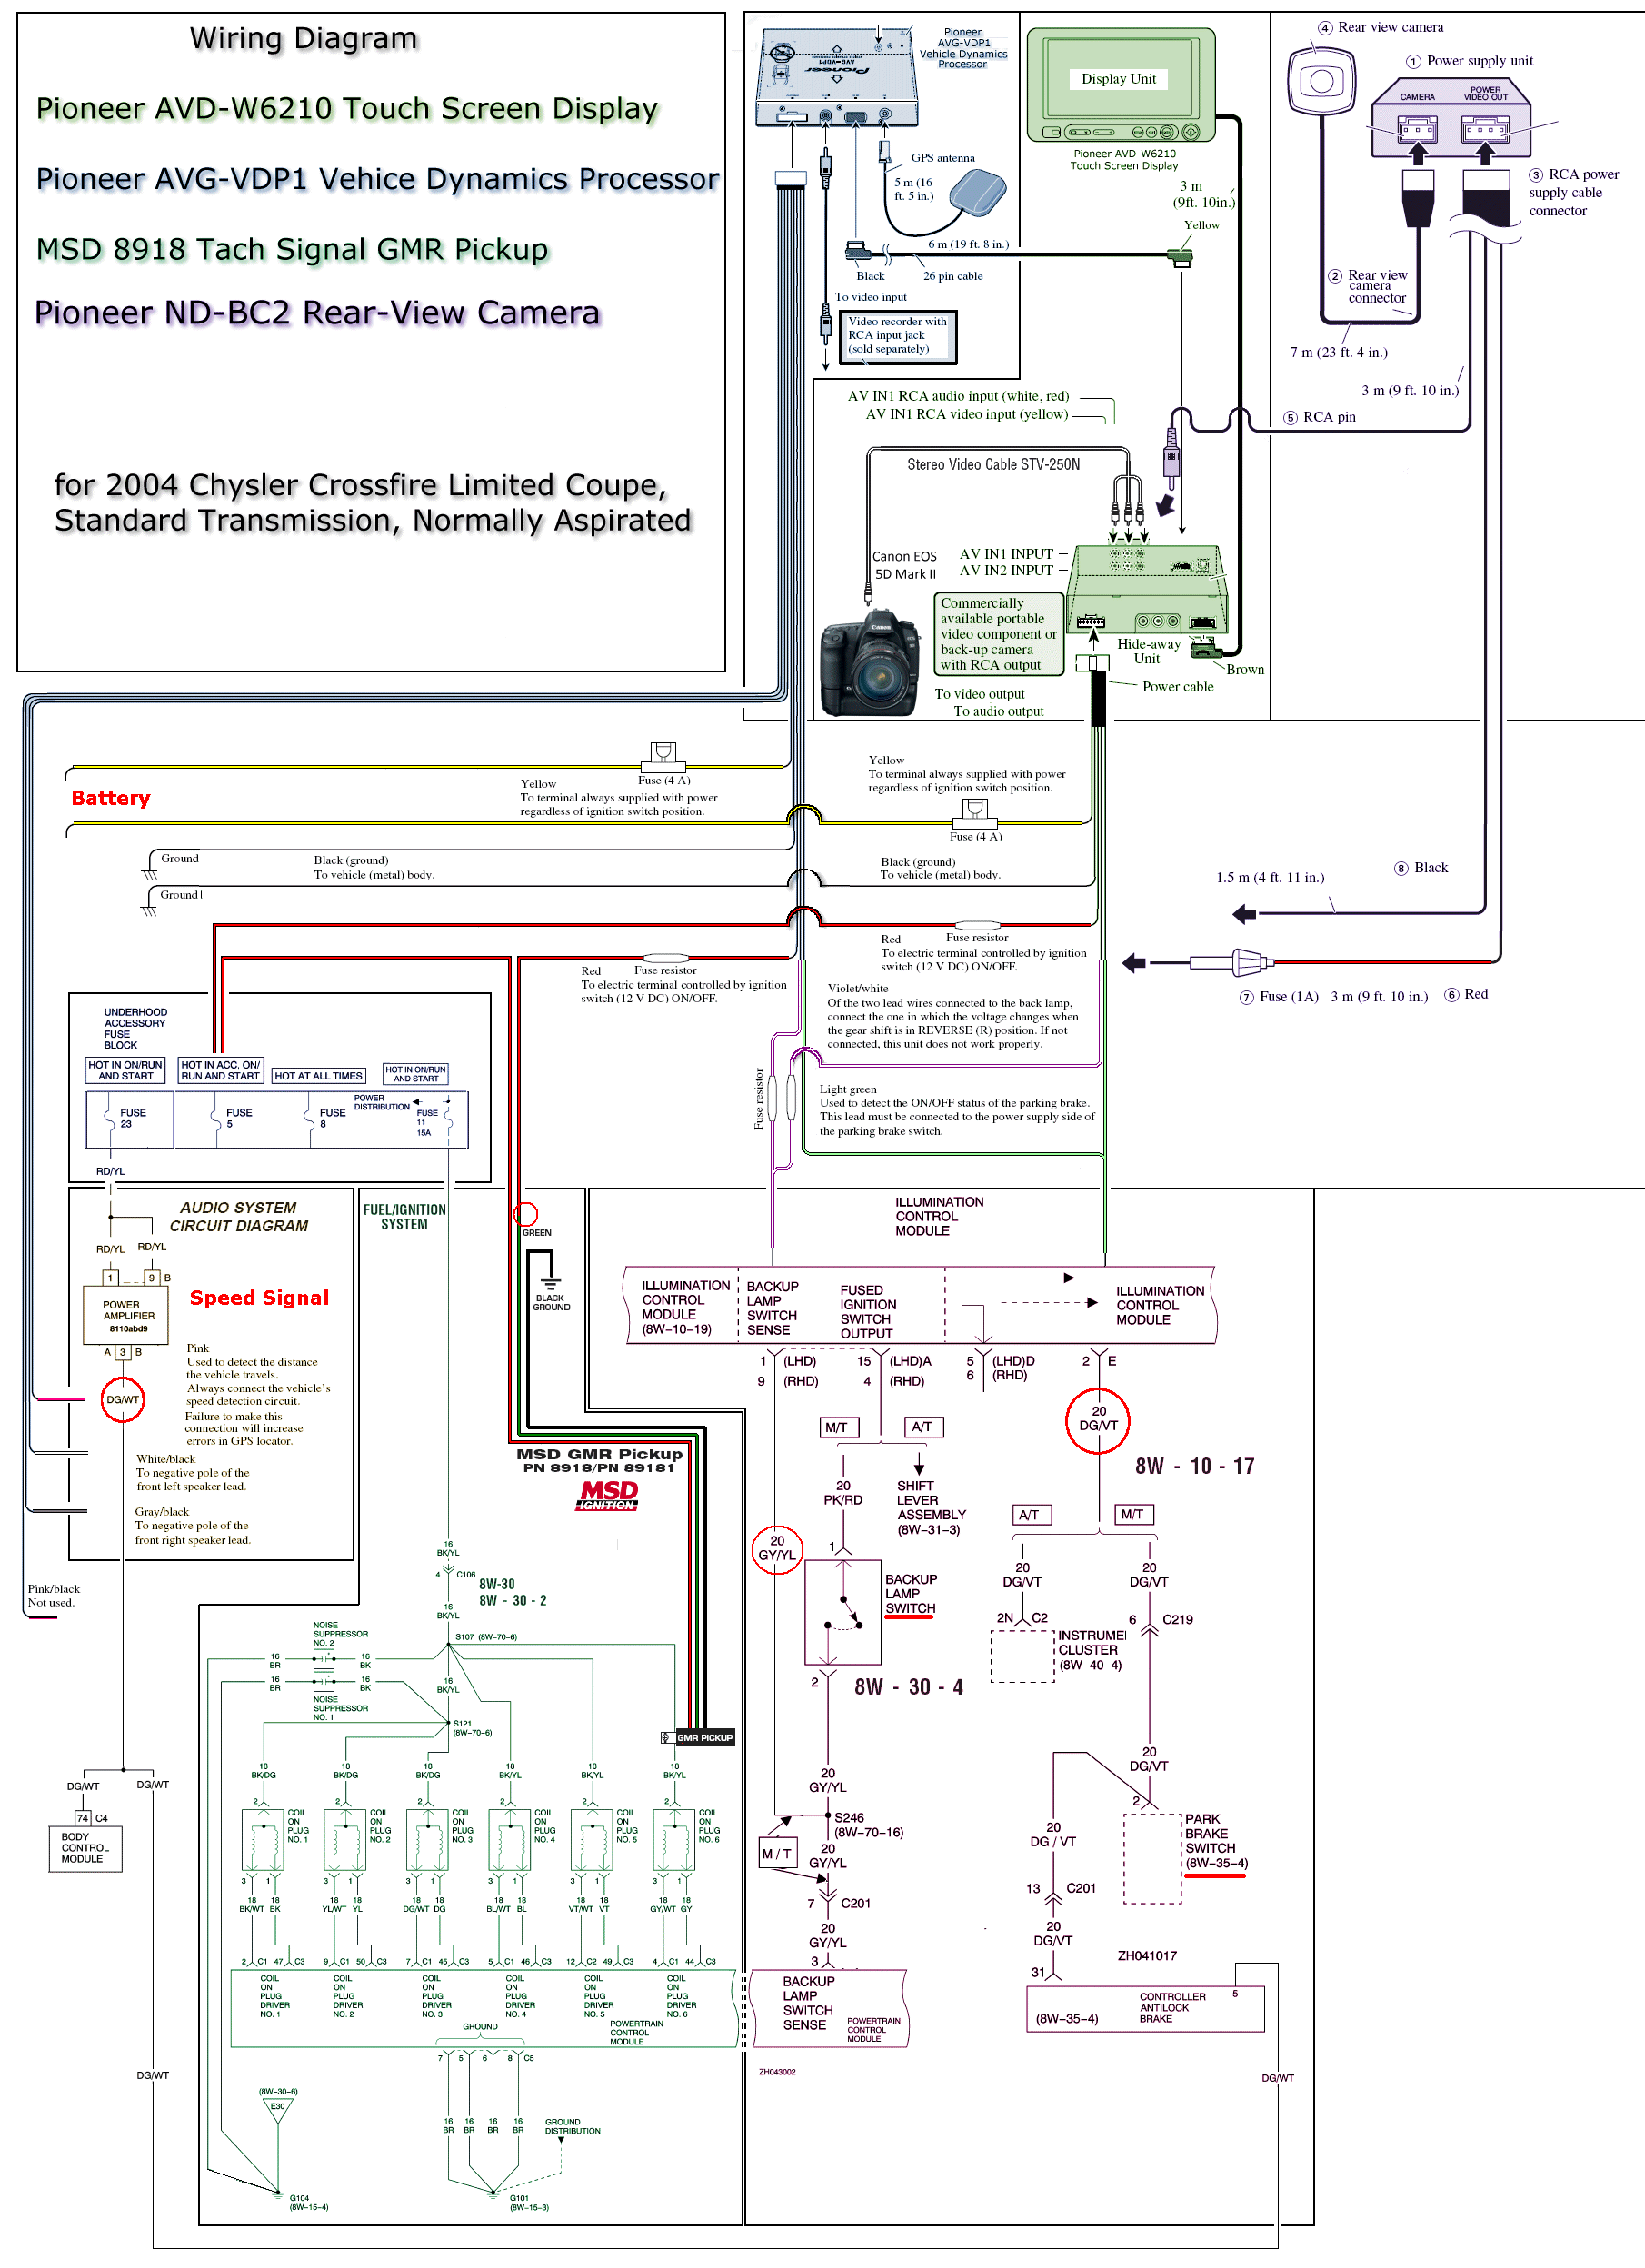
The
Vehicle Dynamics Processor (VDP-1)
Installation made this install easy.
I had already implemented significant
infrastructure to support those components
and the addition of a camera was merely
plug and play. The only real
considerations were cable runs, mounting
the control box, adding the power,
ground and reserve switch connections,
and sticking the camera to the car.
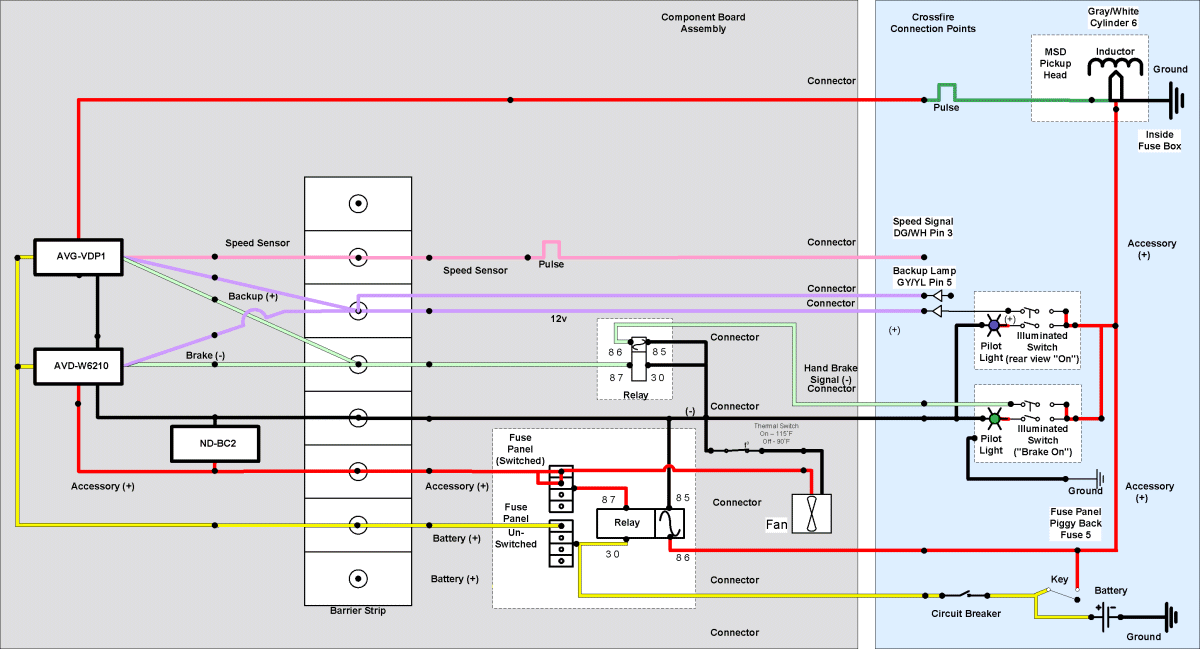
The wiring diagram below is updated to
show the addition of pin-outs on the
connector, leads for power, ground and
reverse signal.
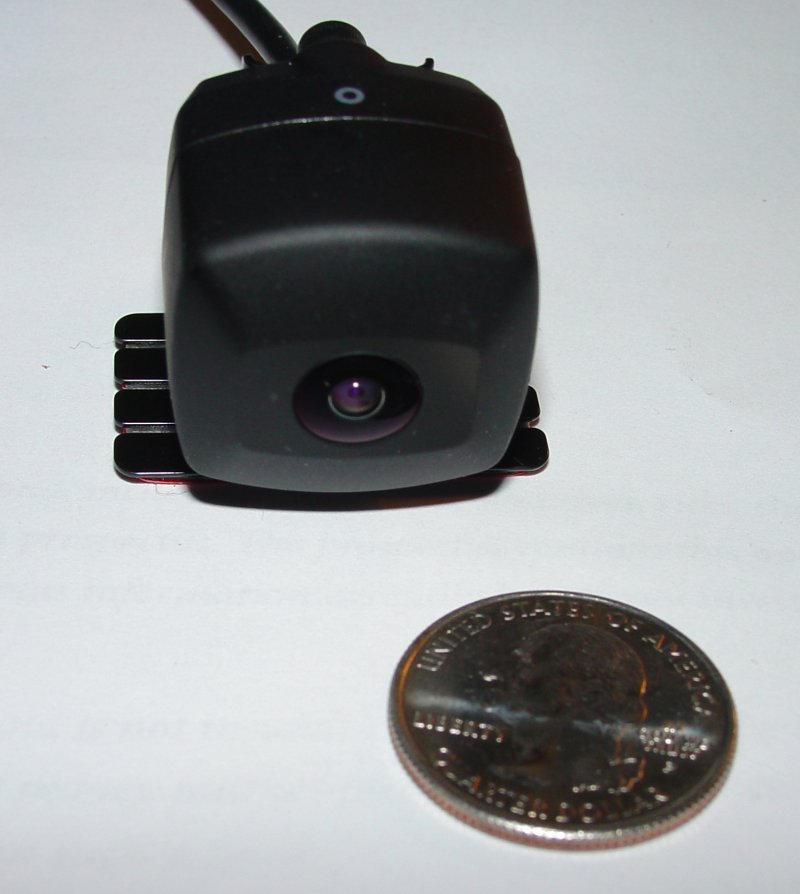
I did have a false
start with the bracket. The "foot" that can be
seen in the picture above is offset from the bracket that
holds the camera. The bracket hinges like a
clam, with the foot on one side and the camera on
the other. When I first installed it, I
placed the foot below the bracket and camera.
The result was
the foot was visible below the camera, sticking out
like a sore thumb on the car. This
may not matter to some folks but it wasn't as clean
as I would like. I went back to find a picture
to show what I mean, but it appears it was so
unacceptable I didn't even take a picture of it!
I keep a small supply
of 3M adhesive trim tape on hand. It was a
simple matter to remove the tape from the foot of
the bracket and replace it with new tape, then
reinstall the camera. If I had taken the time
to look at what I was doing, I could have avoided
this step. 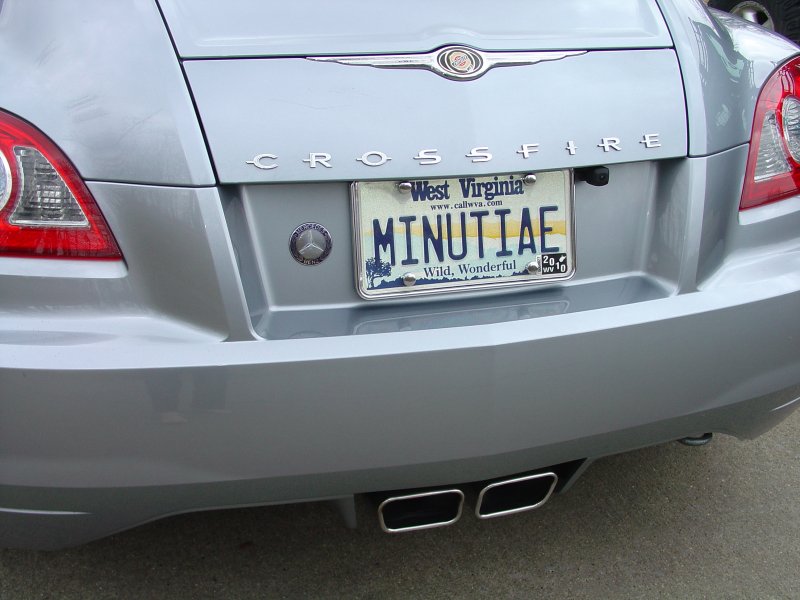
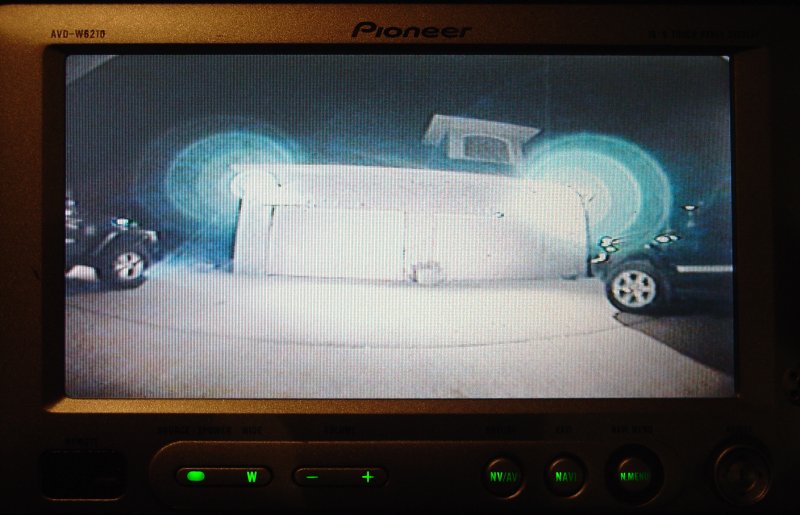
Night Shot (above)
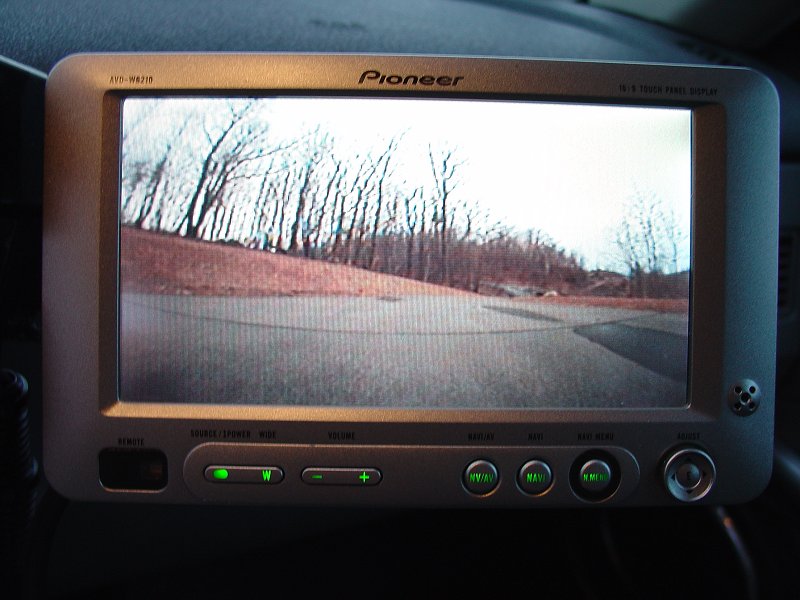
Day Shot (above)
  
Rear-View On Demand
The
rear-view camera comes on automatically when the car is put in
reverse gear and the reverse lights come on. But I wanted
to take it one step further and have the rear-view camera
available on demand without putting the car in reverse.
The rear view is not that great so there are times when being
able to see better out the back comes in handy, and it's not
always when the car is in reverse. When I connected the
switch to the reverse signal lead on the barrier strip, the
camera only came on when I put the car in reverse. I
checked the leads and power from the switch I installed and
everything seemed OK.
I could not figure out why the
switch would not activate the camera, but reasoned that perhaps
something was going on to cause a side-effect. I added
diodes so the switch and reverse lights would not "know" about
each other, and this cured the problem. When either the
reverse lamps come on (the car is in reverse) or the switch is
activated (or both), the camera comes on and provides a
rear-view. Just what the doctor ordered.
The deeper
details of the installation of the supporting
equipment are below
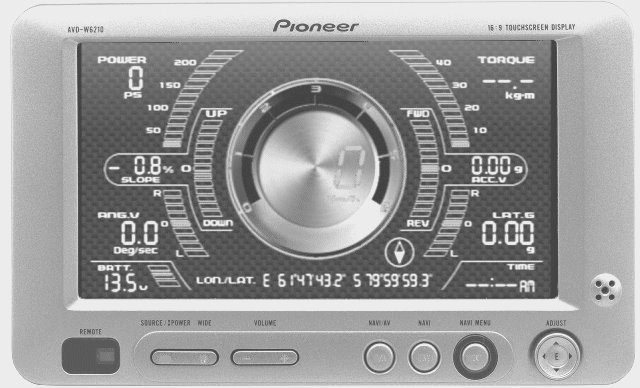
Here's what Pioneer says
about it.
 |
Installation Plan
There's
really not much to this installation.
I already have the video controller with
open terminals. I already have the
power connections and reverse signal on
my component board. My vehicle has
a spot that is perfect for mounting the
camera, and the cable snakes through a
hole in the rear fascia. The video
screen was already mounted and cabled.
All the hard work was done when I put in
the VDP-1.
Basically
the power and reverse signal connections
are made, the video cable is run from
the camera to the display controller.
If a screen has not already been
installed, that controller and power
source would be connected and the screen
mounted.
This
augments the drawing that shows the
AVG-VDP1 and AVD-W6210 components
already installed. Click to see
the detailed drawing including car
electronic systems.

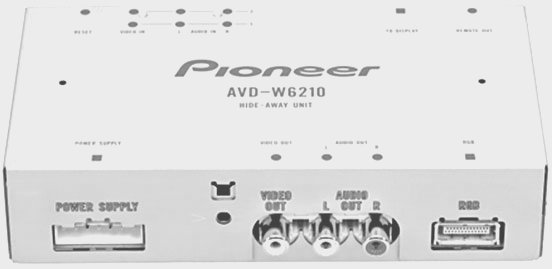
Video Screen
Installation
One of the
most difficult aspects of my install was
already done. The video screen I
used (the Pioneer AVD-W6210) had a
cumbersome bracket assembly. I
opted to remove it and use a compact
swivel head meant for XM radio and other
small electronics installations.
This reduced the complexity and size of
the installation, and allowed me to put
my screen on an existing bracket shared
by my GPS, radar detector control, and
sub-woofer remote. It still is a
bit ungainly. My desire is to
purchase a second glove box cover and
customize it to integrate these items
into the front panel. The expense
of all these elements has kept me moving
at the pace of making purchases without
a credit card - save and pay as I go.
So once the cost of this install is
absorbed, I very well may move on to the
glove box. If I didn't care about
returning the car to stock someday, or
didn't think I would mess up during the
customization, I might just go ahead and
do the modification without the spare
part...
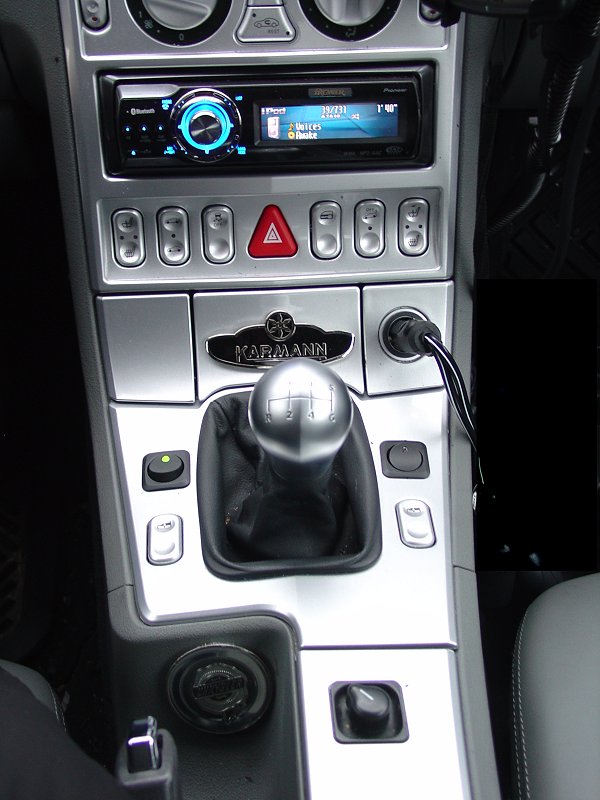
The
control panel itself was simply velcro'd
to the space for this purpose left on
the component board.
Rear-View On Demand
The
rear-view camera comes on automatically when the car is put in
reverse gear and the reverse lights come on. But I wanted
to take it one step further and have the rear-view camera
available on demand without putting the car in reverse.
The rear view is not that great so there are times when being
able to see better out the back comes in handy, and it's not
always when the car is in reverse. When I connected the
switch to the reverse signal lead on the barrier strip, the
camera only came on when I put the car in reverse.
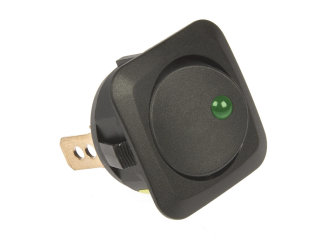 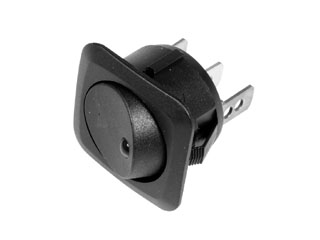

(switches below
are similar but with round instead of square edges)
Carefully
measuring to make sure the structure of the
panel would not be damaged, and to assure
the space behind the panel was deep enough
to allow switches, I marked the switch
locations - carefully lined up with the
window switches, and parallel to each other.
I
checked the leads and power from the switch I installed and
everything seemed OK. I could not figure out why the
switch would not activate the camera, but reasoned that perhaps
something was going on to cause a side-effect. I added
diodes so the switch and reverse lights would not "know" about
each other, and this cured the problem. When either the
reverse lamps come on (the car is in reverse) or the switch is
activated (or both), the camera comes on and provides a
rear-view. Just what the doctor ordered.
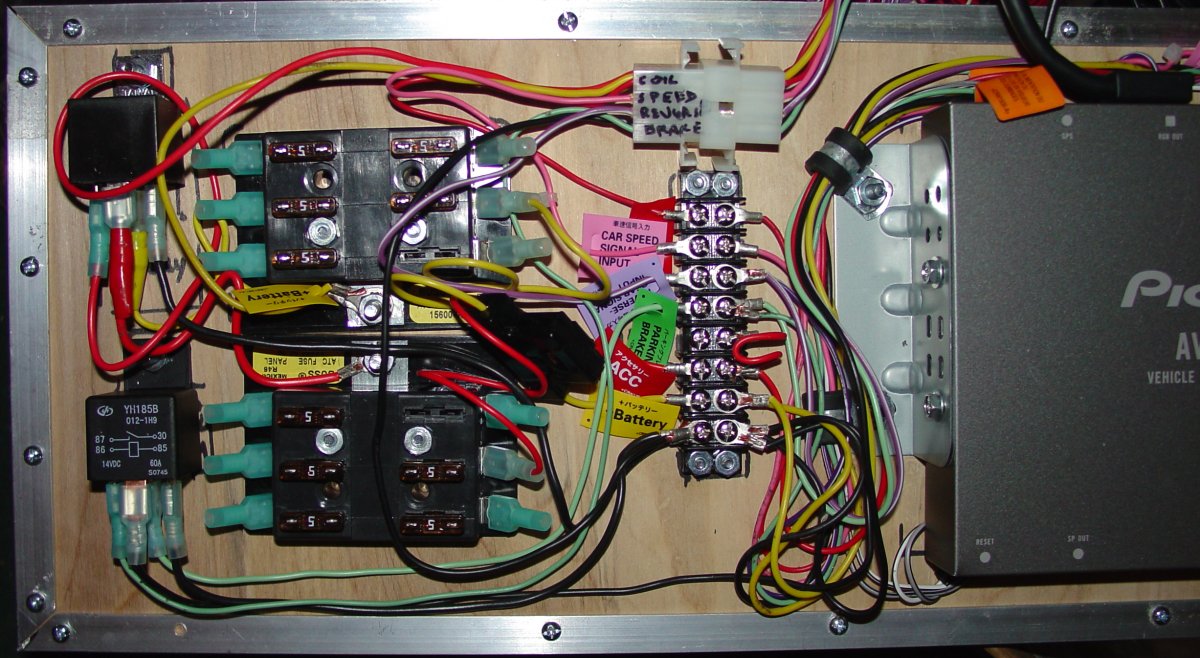
Fuse Panels

Since this
subsystem has so many elements, I decided to
incorporate another pair of fuse boxes.
One fuse box takes a 12-volt (+) feed from
the battery with a 30-amp circuit breaker providing
protection between the battery and the
firewall. This lead supplies the power
to the "un-switched" fuse panel.
This power is
fed through another relay that is activated
by the same factory-original fuse panel feed
that is activated by the key (and controls
the stereo). When the key is turned
on, the 12-volt signal activates the relay,
which makes the connection from the
un-switched fuse panel and provides power to
the "switched" fuse panel.
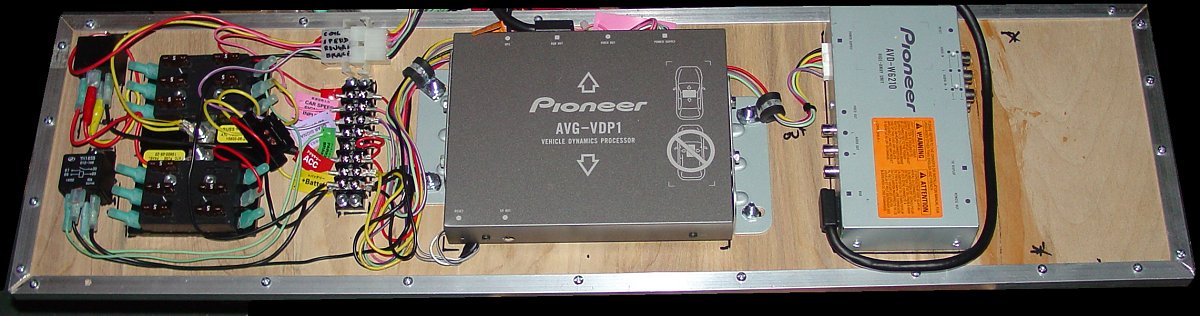
Component Construction
I
previously constructed a storage compartment
by creating a four-inch deep insert that
goes into the cargo area. I fabricated
a heavy-duty cover and carpeted it to match
the car. To this I attached my
sub-woofer. The compartment is not
easily detectible. Here it is shown
open.

For this set
of components, I took a 1/4" piece of finish
quality birch plywood. I laid out the
parts as described in the wiring plan above.
Then I attached the components to the panel.
I left some room on the right for the
rear-view camera control box (I can dream,
can't I?) and space between the components
for airflow and wiring.
Using a
variety of small hardware fasteners, I
anchored all the pieces to the panel.
Then I added a border on the panel to give
it rigidity, and to raise it up slightly off
the floor of the compartment.
In order to be
sure it would be easy to remove the
components, I created a harness for the
leads that go to various parts of the car,
isolating the board and components so that
only the harness connector need be separated
to remove the entire unit. This is
necessary because the tire repair and
jacking equipment lie under the compartment.
 
The finished
product is workmanlike, not something to
open up and show off at a car show.
That's not what I made it for. I just
wanted the parts to be anchored down, easy
to move as a unit, and with as few wires as
possible. I could have spent a lot
more money and time to make it pretty -
maybe someday...

|
Operation Manual
|