2006 MINI Cooper  - Auxiliary Audio Input with Mini Cooper Factory Stereo


harman/kardon drive + play iPod Controller Garmin GPS V harman/kardon drive + play iPod Controller MINI Cooper Auxiliary Audio Input (Indication on Factory Head Unit) Delphi Roady XT XM Satellite Radio MINI Cooper - Factory Radio MINI Cooper - Electronics

MINI Cooper Electronics Marathon Install | MINI Cooper Auxiliary Audio Input | harman/kardon drive + play | Garmin V GPS | Motorola HF 850 Bluetooth Hands-Free | Delphi Roady XT XM Satellite Radio | Factory Radio


9/13/09

4X4 ICON 2000 - 2008 The DVD! - Click here for details!

4X4 ICON 2000 - 2008 The DVD!


MINI Cooper Maintenance and Modification


Finally, a factory head unit that takes a simple plug to accept auxiliary audio input...

Previous Experience - Jeep and Crossfire

When I purchased my Crossfire, the quest for auxiliary audio input options turned me into a crazed audiophile.  Along the road to finding a way to install another music source, I discovered the wonderful (and recently, quite affordable) harman/kardon drive + play, a nasty thing called FM modulation (wireless and wired), and soon became disheartened.  But the flaw was not with the harman/kardon drive + play.  That unit worked brilliantly and was very satisfactory when wired directly to the head unit.  The problem was the factory Crossfire head unit had no provision for an auxiliary audio input.  With the Crossfire, the only way "in" was through FM Modulation.  And FM modulation was the culprit.  It's a last-ditch option to get music to play from the factory head unit and speakers when there is absolutely no other way to do it.  It's a "better than nothing" solution in my opinion.  It lasted 10 minutes in my car, to give you an idea how unsatisfactory I found it to be.  It was not better than nothing.

So for the Crossfire (and for that matter, the Jeep), I purchased a replacement head unit and numerous music sources.  In a sense it grew out of all proportion to my original intention, though I am very happy with the result.  I shopped aggressively and managed to get most items for significant discounts from retail.  Still, my original motive was to simply "plug in" my iPod and call it good...  I did achieve that goal, but also quite a bit more that was overkill for Maria and the MINI Cooper.
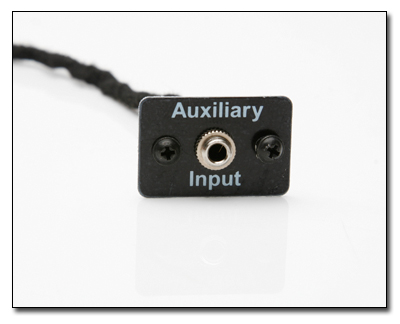
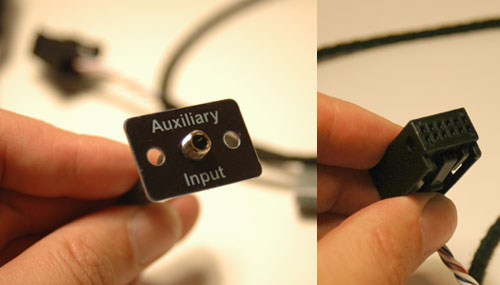
MINI Cooper

The good news for MINI owners is that since the MINI Cooper has a nice little socket on the back for the purpose of adding an auxiliary audio input, auxiliary inputs are well within reach of the do-it-yourselfer with about $40! 

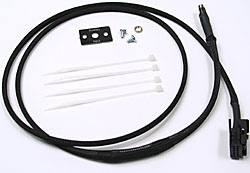
I did not have to go down the crazy hi-fi road for Maria.  I was able to purchase a simple plug-in lead and provide a simple 3.5 mm plug to use for playing the XM radio and iPod.  It took barely 1/2 hour to add the input to the car!  I do like the drive + play so will install that to give iPod control and one-stop switching to the XM radio that I have left over from the last car.  That involves just plugging in the drive + play via the 3.5mm plug, the XM radio into the drive + play, and wiring of the drive + play and XM into the car (power and antenna).

Mini Auxiliary Audio Input

I searched the internet (DOH!) and came up with the factory Auxiliary Audio Input directly from BMW (MINI).  It consists of a connector to the radio, a 3.5mm socket, and a faceplate and retaining hardware.  So simple a caveman can do it...

Auxiliary Audio Input

The factory installation instructions call for a lot of work to remove the radio from the dash, which is not necessary.  The following instructions give a great easy shortcut.

1) Pull Knee Panel (under the steering wheel) down (or remove the euro parcel tray if you have that installed). It pops right out and hinges at bottom.
 

2) Reach up behind head unit and feel for hole in back of the stereo. Plug the AUX connector in.
 

3) Fish the wire back behind unit over top of unit towards the glove box or any other location where it can fit. A good location to mount it is in the lower cubby tray area right under the toggle switch...there is a removable panel that you can mount the input plug in with minimal hassle.

3a) (At this point I did remove the glove box (it's only 5 Torx-20 screws, and two Torx-20 screws holding the column next to the radio).  You do have to be careful when the glove box comes loose to disconnect the light lead, and reconnect it as you reassemble the glove box.


4) Drill holes for AUX input 'dongle' connector as shown in the instructions. The faceplate will cover the holes.
 

5) Fish under glove box or other location and tighten.
 

6) Screw in small screws.
 

Details
 
SKU 82 11 0 153 367
Price: $39.95
 

I took off the panel under the steering wheel.  I had to give it a good pull but it came right off intact.  I felt behind the radio and found the socket for the auxiliary audio input.  I put the plug in the socket and fished the wire to the passenger side, where I had removed the five screws holding the glove compartment in place.  This is too easy!

I brought the glove box into the garage, selected the proper sized drill bits, and used my center punch to mark the spots to drill.  I drilled out the holes, installed the plate and input jack then installed the glove box back into the car, being careful to reattach the glove box light lead and air conditioning tube (!) that I had removed when I took it out.

I turned on the radio and selected 'AUX' using the MODE switch on the radio and, with the 3.5mm lead plugged into the input and iPod, I had music.  It took me about 15 minutes.  Quite a bit quicker than other exercises of this sort...


Here are the factory instructions with my comments or suggestions added:

Install Instructions Part Number 01 29 0 309 667

Install Instructions Part Number 01 29 0 309 667

Install Instructions Part Number 01 29 0 309 667

With the Auxiliary Audio Input installed, the head unit becomes a musical oyster...  OK, so maybe I did go down a bit of a rat hole...

Here's the final configuration:

Motorola HF850 Bluetooth Handsfree Delphi Roady XT XM Radio harman/kardon drive + play iPod Controller MINI Cooper Auxiliary Audio Input Auxiliary Fuse Panels - Switched and Unswitched Ancillary Electronics - Hands-Free, Satellite Radio, iPod Controller, GPS, Auxiliary Audio Input, Auxiliary Fuse Panel - Click Item to read Install Notes


MINI Cooper - Auxiliary Audio Input

MINI Cooper Electronics Marathon Install | MINI Cooper Auxiliary Audio Input | harman/kardon drive + play | Garmin V GPS | Motorola HF 850 Bluetooth Hands-Free | Delphi Roady XT XM Satellite Radio | Factory Radio


MINI Cooper Maintenance and Modification


Shop for Jeep Toys and Books | See the Toy Jeeps | Off-Road Index 


Click or the [ BACK ] button on your browser to return to the previous page.

Photos, Layout and Design © 2009 Paul M. Provencher All Rights Reserved.
Contents of this Web Site may not be used without written permission

Hit Counter Visitors since 9/6/09

Home