Commentary - Crossfire Factory Head
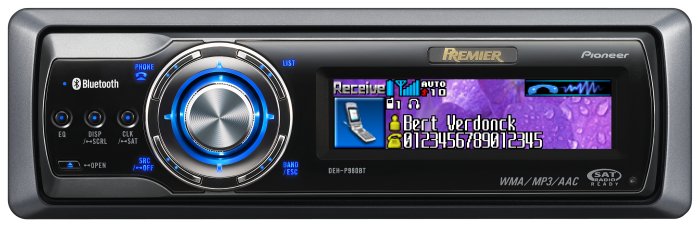
Unit with Drive+Play is "OK" but I want more...much more...
|
Web Site Note:
Once I
decided on the Pioneer Premier DEH-980BT, it caused a domino
affect. The separate bluetooth adapter went back
unopened. The Drive+Play and
Roady XT XM tuner were
installed for eight months with the new Pioneer head unit,
and then swapped out for Pioneer-compatible
iPod and
XM
components. At that time I revised these web pages to
present the installation of the head unit,
auxiliary fuse
panel, the
Pioneer iPod adapter and
Pioneer XM Tuner
components as separate pages. For completeness, I have
left the wiring diagrams for installing the Drive+Play with
the Factory or Pioneer, and have provided the updated wiring
diagrams for the fully integrated Pioneer solution.
The most
logical installation options given the various combinations
of devices I have used is one of the following:
-
(OK
sound - most economical solution) Chrysler Factory
Radio with harman/kardon Drive+Play and Roady XT XM
Tuner - uses wired or wireless FM Modulation to transmit
iPod and XM Tuner signal to system through factory FM
radio, Becker USA sells low-cost, effective phone
connection compatible with Chrysler Factory system.
-
(Best
sound, cleanest installation, cost no-object solution)
Pioneer DEH-P980BT featuring integrated Bluetooth
wireless hands free phone connection, with Pioneer iPod
and XM Tuner components - all components are integrated
using the Pioneer IP-BUS direct connection.
I had one
intermediate configuration:
-
(Better
sound, moderate cost, cluttered install) Pioneer
DEH-P980BT with harman/kardon Drive+Play and Roady XT XM
Tuner - this was the initial configuration following
install of the Pioneer DEH-P980BT that I ran very
happily for eight months until I got a great deal on the
Pioneer components and reconfigured)
|
After
installing the Harman/Kardon Drive+Play to use my iPod
with the stereo system, I discovered the wired
and transmitted FM Modulation methods of getting the signal to
the head unit were not satisfactory to my listening habits and
tastes. The kids didn't notice the difference, and quite a
few people who use this solution with the Crossfire factory
stereo are quite happy. But for me, the quality of
the sound just wasn't there. The FM interference and the
narrow frequency response of the FM signal conspired to make the
sound quite poor, lacking channel separation.
Additionally, the OEM head unit did not offer a way to connect
auxiliary units beyond what you can sneak through the additional
input that is provided by the Drive+Play.
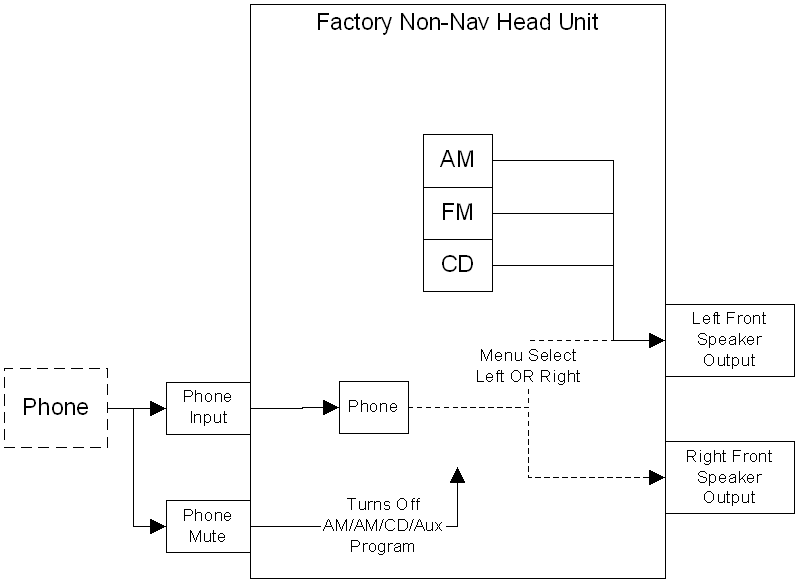
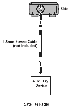
The closest the
factory unit by itself comes to providing an auxiliary input is
a mono connection for the cell phone system. (diagram).
This isn't even close to what is necessary for quality audio
accessories. Nevertheless,
I did install this feature
before the Drive+Play, thinking I would get another Motorola
Bluetooth to route my phone to the stereo. This will work
so if you are happy with your factory stereo using the Drive and
Play, I highly recommend adding the Phone connection.
Decisions, Decisions...
Back to the
iPod and other auxiliary inputs, I knew that the
iPod and recorded material was not the problem. By
comparison, the same iPod plugged
directly into
my Jeep head unit with a
stereo connector produced the kind of music quality that I
expect - clean sound with no static or noise, and the full
frequency response and stereo imaging available at the head unit. The missing
link was definitely a directly wired connection with no FM in
between. The problem was that the Becker factory radio (rebadged
as an Infinity 6806) did not provide an auxiliary input.
Well, the hardware has provisions but the firmware isn't
programmed to support it.
I explored the
options and found two for my existing head unit:
In short, the
Infinity/Becker head unit offers no easy way to add high quality
auxiliary inputs. My plans to wire in a
hands-free blue-tooth phone accessory would have to be achieved.
This would add yet another device to the already cluttered dash
panel. This just wasn't shaping up very well.
The solution
was fairly obvious. I needed to have a new head unit
that natively supported auxiliary inputs.
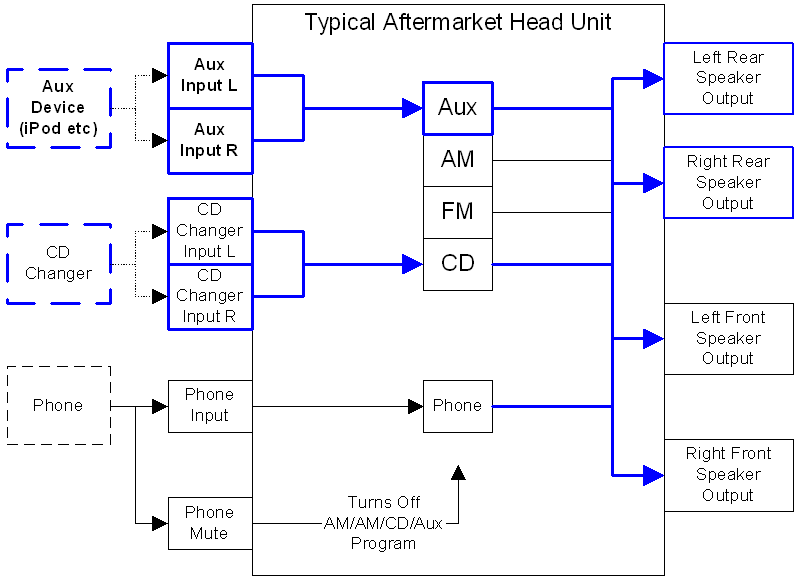
The Pioneer in
the Jeep has a bus circuit ("IP BUS") that enables a host of options,
including the support for an auxiliary channel. I took a
look at the latest Pioneer units compatible with my car and
found one unit that both fit the opening in the dash and solved
several problems for me at once:
-
natively
supports auxiliary inputs via 3.5mm/1/8" mini phono jack
-
CD/MP3/WMA/AAC
compatible CD player
-
built-in
Bluetooth wireless phone with voice dialing, etc.
-
supports
the standard Pioneer bus just like my Jeep head unit:
-
enables
iPod with control through front of head unit
-
enables
XM or Sirius radio through the front of the head unit
-
enables
remote CD Changer
More here...
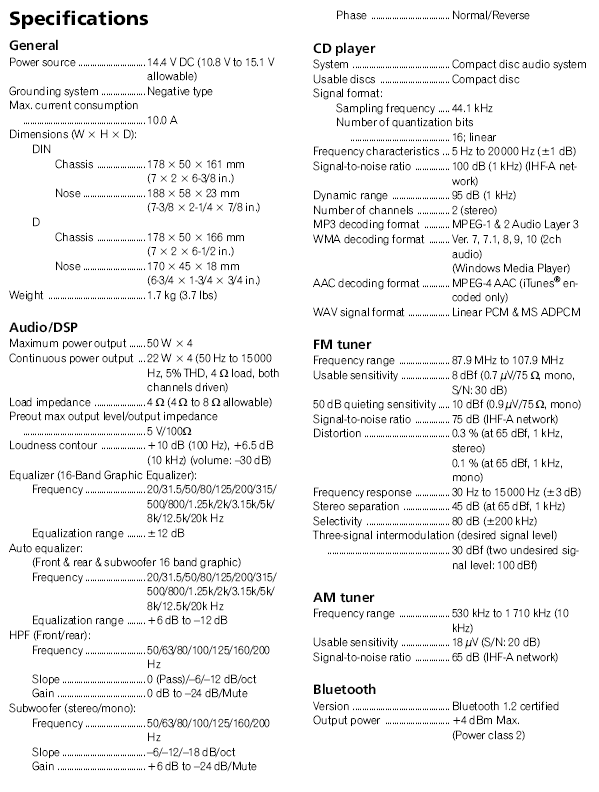
Overview |
Specifications
|
Accessories
This
effectively solved all my problems in one fell swoop. I
canceled the Motorola IHF-1000 Bluetooth Hands free unit that
I had just ordered.
I can directly connect my iPod to the head unit without using FM
modulation. I can play a wide variety of CD formats.
And I have iPod, Satellite Radio, and CD-changer options.
I considered
and dismissed units with built in navigation. I considered
and dismissed DVD units with the flip-out screens. And I
dismissed lower end units of similar design to the DEH-P980BT.
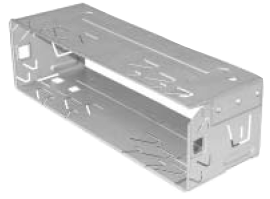
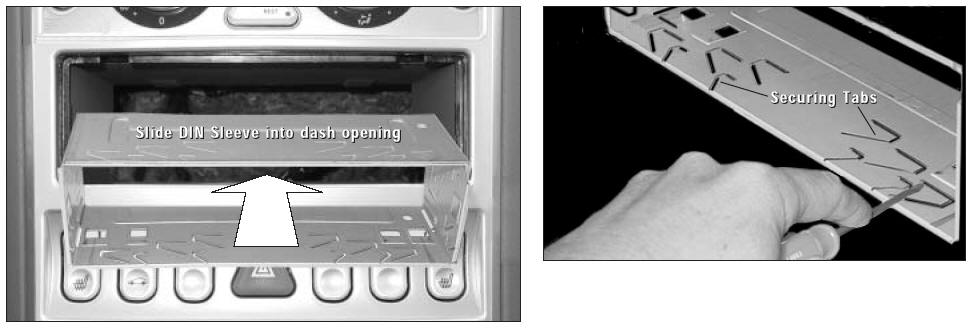
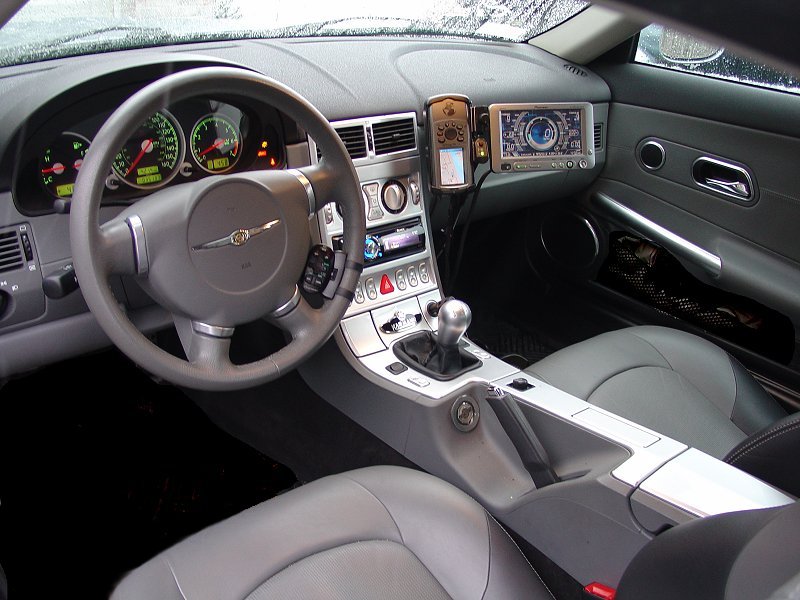
Installation
The install of
the head unit, (for those with moderate experience with stereos) is
pretty straightforward. The unit comes with a DIN panel insert
that is locked in place with tabs.
I purchased
separately a harness connector that fits the plug leading to the
existing system. It is spliced to the wires on the new head
unit.

Schosche VW01B
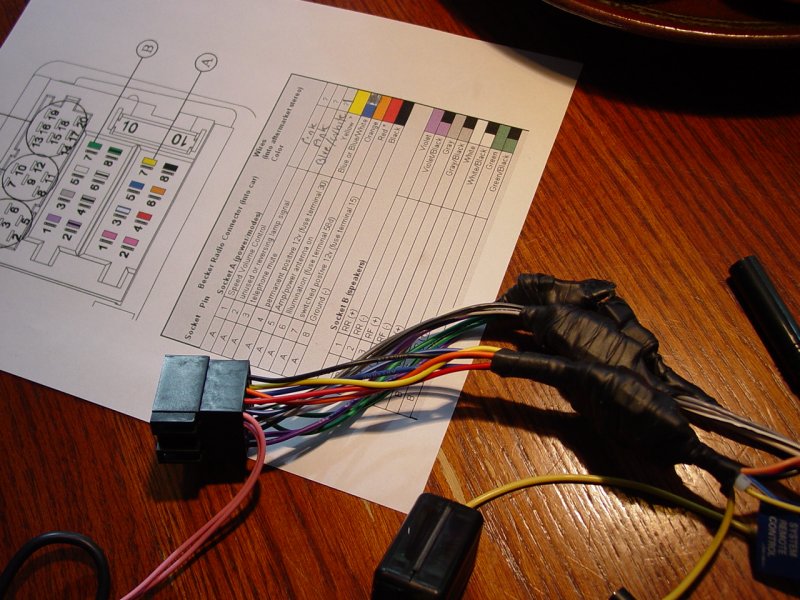
I left the Socket A, Pins 1 and 2
disconnected; and connected the rest of the pins on Socket A.
I left the rear speaker leads disconnected and connected the
front speaker leads on Socket B.
|
|
|
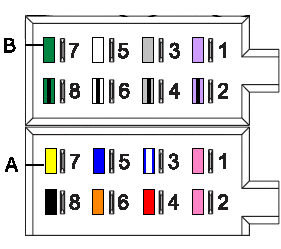
Becker Radio Connector (into car) |
Wires
(into aftermarket stereo) |
|
Socket |
Pin |
|
Color |
|
|
|
|
|
Socket A (power/modes) |
|
|
|
|
A |
1 |
Speed Volume Control |
|
|
|
|
A |
2 |
unused or reversing lamp signal |
|
|
|
|
A |
3 |
telephone mute |
Blue/White |
|
|
|
A |
4 |
permanent positive 12v (fuse terminal 30) |
Yellow * |
|
|
|
A |
5 |
Amp/power antenna on |
Blue |
|
|
|
A |
6 |
Illumination (fuse terminal 58d) |
Orange |
|
|
|
A |
7 |
switched postive 12v (fuse terminal 15) |
Red * |
|
|
|
A |
8 |
Ground (-) |
Black |
|
|
|
|
|
|
|
|
|
|
|
|
Socket B (speakers) |
|
|
|
|
B |
1 |
RR (+) |
Violet |
|
|
|
B |
2 |
RR (-) |
Violet/Black |
|
|
|
B |
3 |
RF (+) |
Gray |
|
|
|
B |
4 |
RF (-) |
Gray/Black |
|
|
|
B |
5 |
LF (+) |
White |
|
|
|
B |
6 |
LF (-) |
White/Black |
|
|
|
B |
7 |
LR (+) |
Green |
|
|
|
B |
8 |
LR (-) |
Green/Black |
|
|
|
|
|
|
|
|
|
|
|
|
RR - Right Rear |
|
|
|
|
|
|
RF - Right Front |
|
|
|
|
|
|
LF - Left Front |
|
|
|
|
|
|
LR - Left Rear |
|
|
|
|
|
|
|
|
|
|
|
|
* |
Permanent Positive and switched positive |
|
|
|
|
|
|
leads should be checked and wired based |
|
|
|
|
|
|
on state measured coming out of car harness |
|
|
|

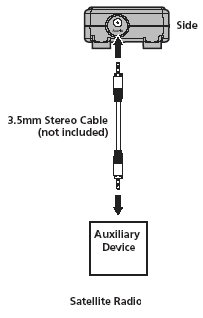
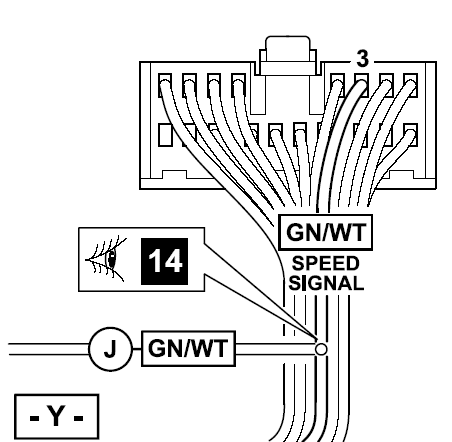
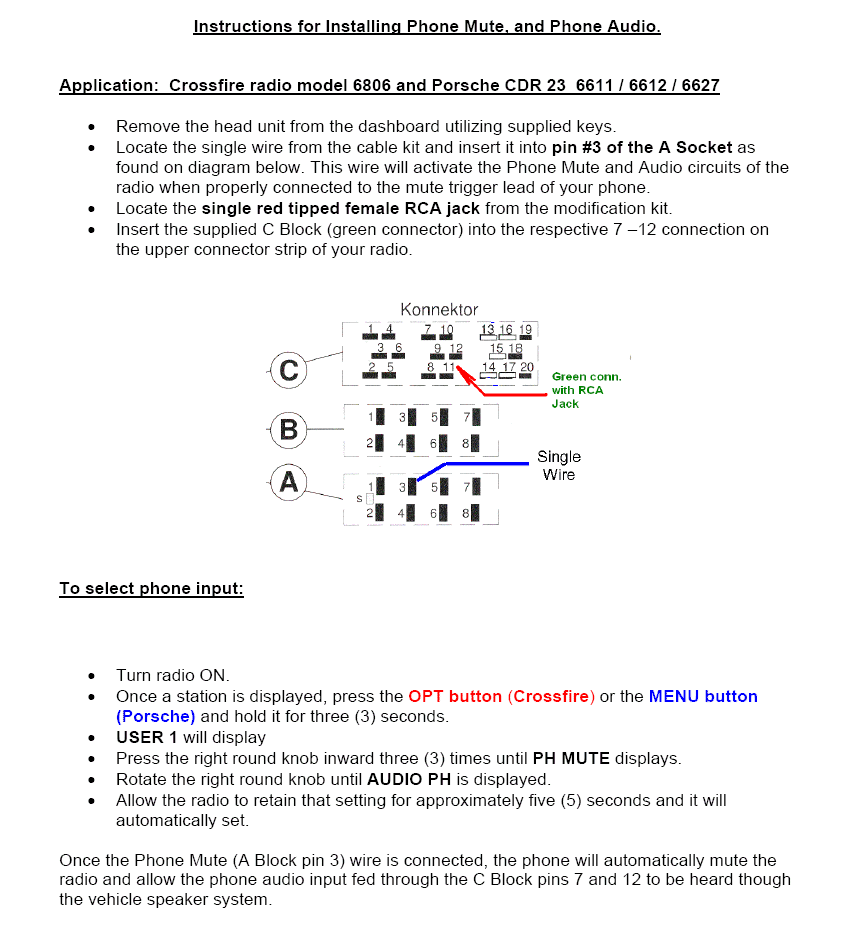
Note: This chart shows the colors of the wires in the
Schosche VW01B connector. The purpose of the red and
yellow wires are swapped for this application:
It's a
good idea to test the leads in the
harness connector before you attach it
to the head unit by plugging it into the
car and checking the red and yellow
leads with a multi-meter to make sure it
matches what I documented here.
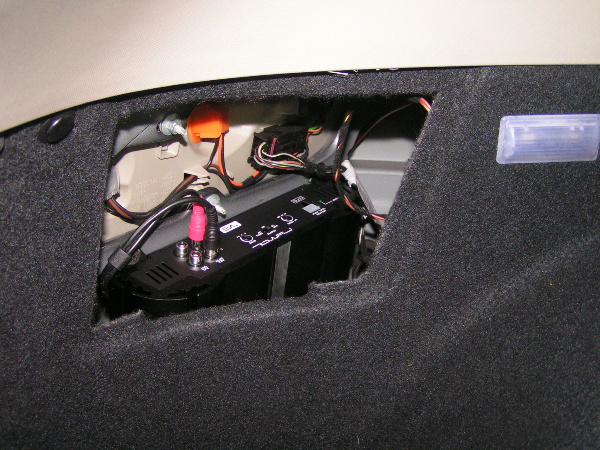
With the
harness adapter spliced to the wires
coming out of the Pioneer DEH-P980BT all
that remains is to connect the auxiliary
devices, radio antenna, and harness
connector to the car's harness socket.
This is
the appearance of the connector in the
car:
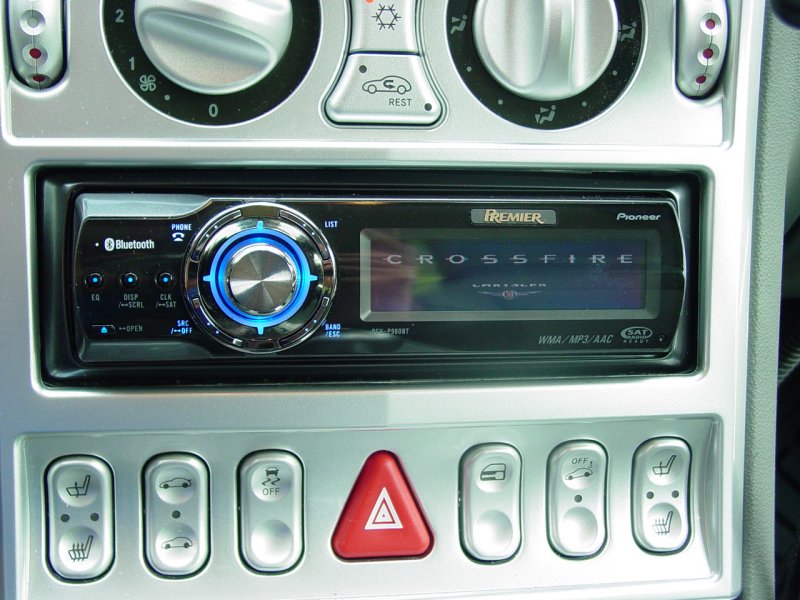
Pioneer Premier
DEH-P980BT with Drive+Play iPod adapter and Roady XT XM Tuner
This section
presents the configuration of the head unit with the Drive+Play
and Roady XT.
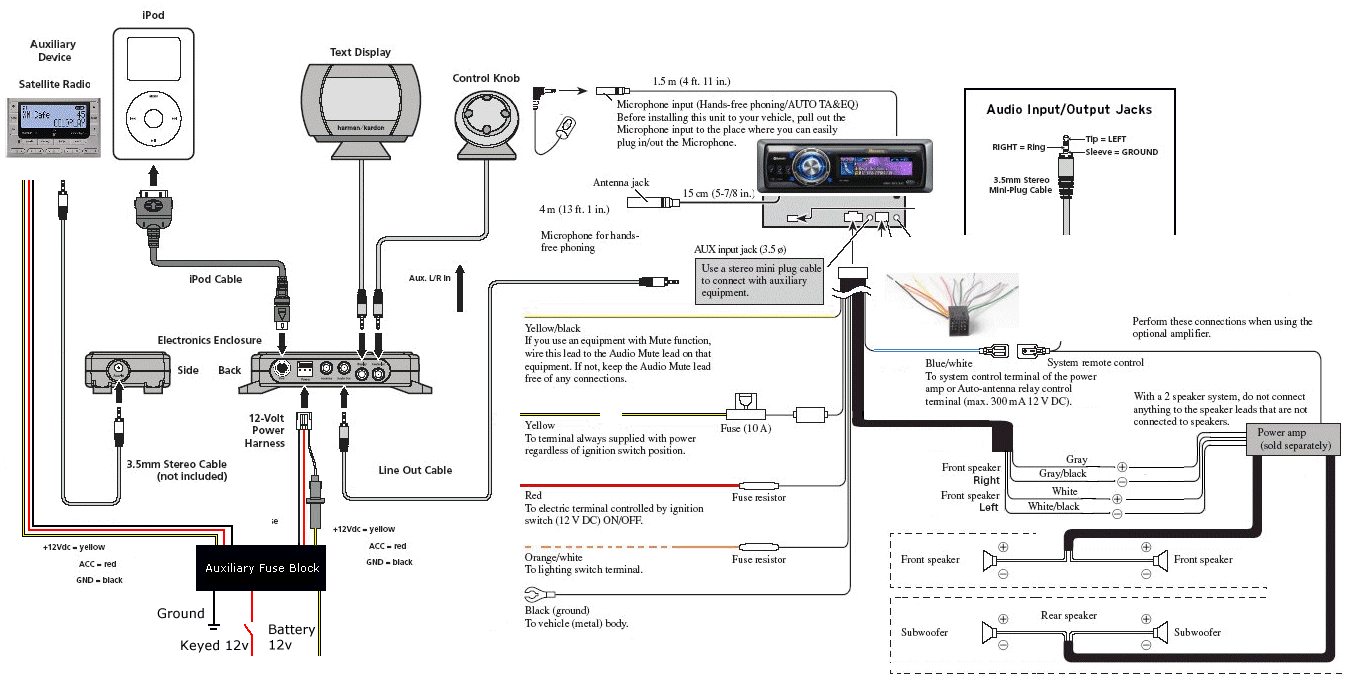
I routed the
AUX lead (previously plugged into the back of the head unit
using a 3.5mm stereo lead and the microphone lead into the console and out to the Drive+Play
(AUX) and driver's side visor (MIC) respectively. I
connected the socket to the car wiring harness. I used an
antenna adapter from the previous phase of this install to
connect the antenna lead to the back of the stereo.
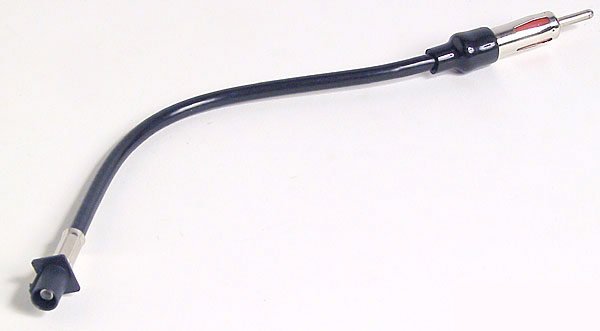
Euro
female to Motorola male
Works with a variety of 1999-up European
and American vehicles
Then I slid the
head unit into place in the dash. I turned on the car and
everything worked first try! I used the automatic features
for setting the equalizer base setting
and speaker phasing. I turned on
the AUX port in the Pioneer menu, tested the iPod and
external XM radio (both rock!) and
coupled my Bluetooth phone. Then I
uploaded some new screen visualizations.
The manual is thick - nice bedtime
reading!
As part of
the installation of the Pioneer
DEH-P980BT, I installed
an
auxiliary fuse panel for the stereo
and other electronic devices to be
added.
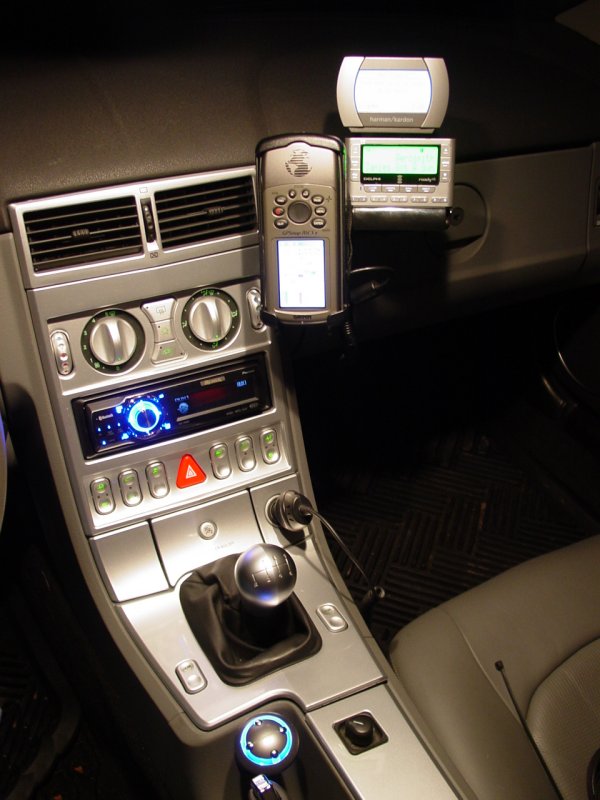 |
| With
External GPS, Drive+Play iPod Interface and XM Radio |
      
I plugged the
existing XM radio receiver into the Harman/Kardon auxiliary
input which eliminates the FM modulation of XM radio signals.
The Harman/Kardon automatically switches between the iPod and
the XM radio channels so I don't have to deal with it on the
head unit.
This greatly
reduced the complexity of the wiring to the Drive+Play and
eliminated the addition of the hands-free unit which would have
further complicated this install and dash. Here is the
component layout for this set-up.
Click image to Enlarge
Pioneer Premier
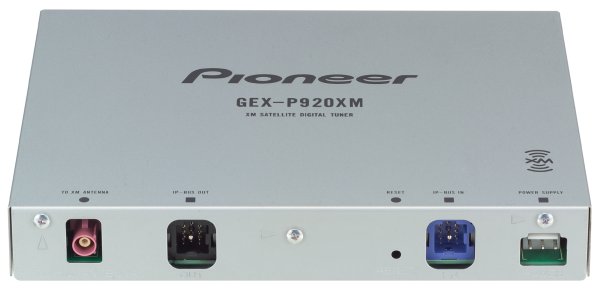
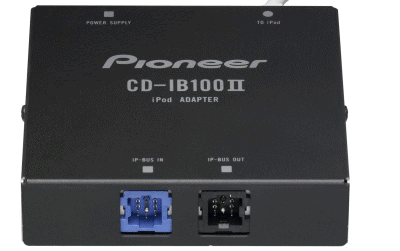
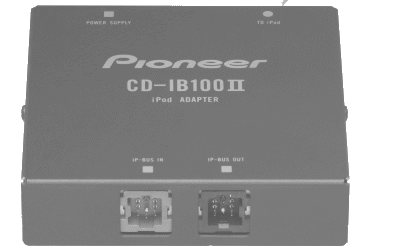
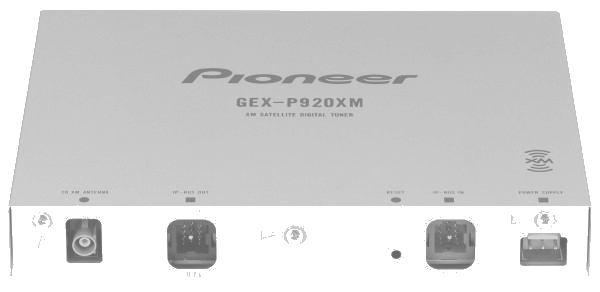
DEH-P980BT with CD-IB100II iPod Adapter and GEX-P920XM XM Tuner
Later I elected
to eliminate the Drive+Play and XM radio receiver from my dash and use a hidden
units available from Pioneer. If the iPod sound quality is as good as in the Jeep, I doubt I will
need to add a CD changer, but that option is available as well.
6/18/09 Updated
Component Layout (below) following installation of Pioneer iPod
and XM integrated components
After eight months
of living with the new head unit, the Drive+Play and Roady XT, I
am very happy with the sound but not so happy with the extra
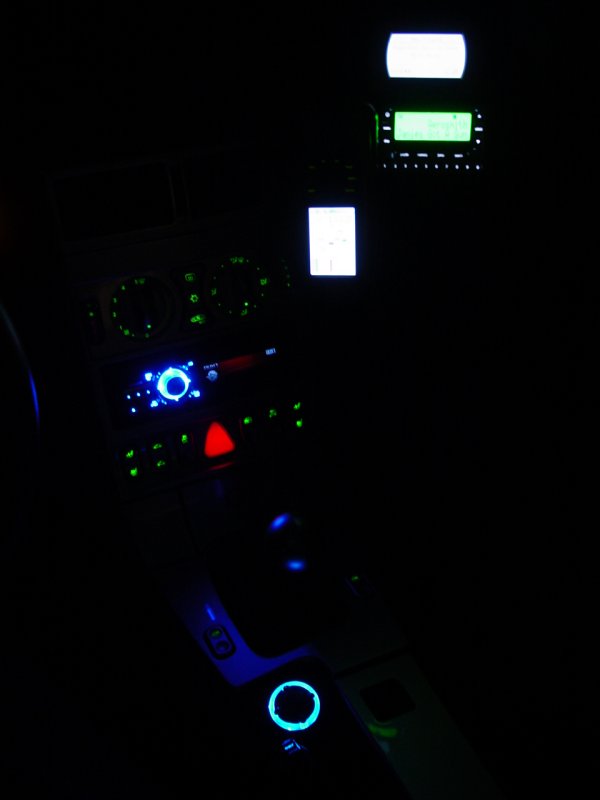
gear bolted to the dash. The lights at night look cool but
can be a bit bright. The extra gear is in the way of the
passenger airbag.
I decided it was
time to integrate the iPod adapter and XM tuner into the head
unit controls and do away with the external gear. All I
did was remove the Drive+Play and Roady XT from the bracket,
remove the knob from the console, and the power connections from
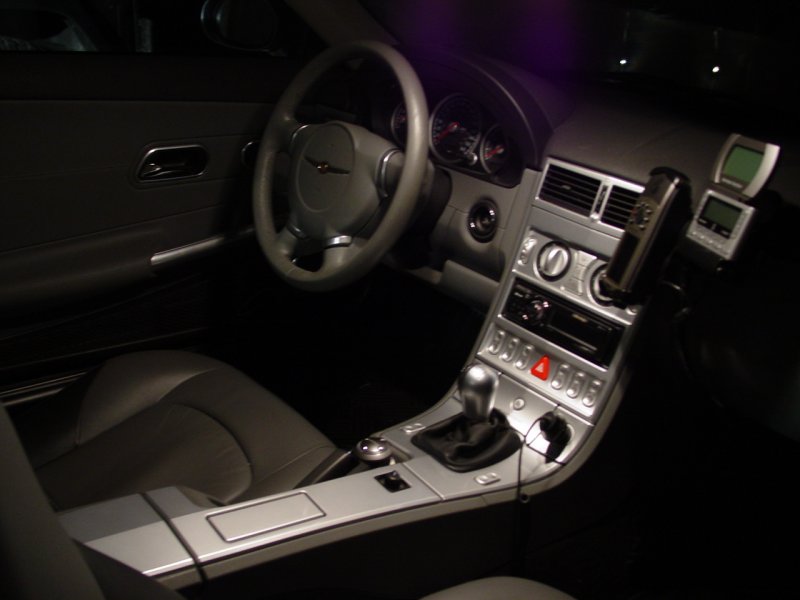
the auxiliary fuse panel. Then I installed the two Pioneer
components. Bam! Cleaner dash and all controls in the head
unit!
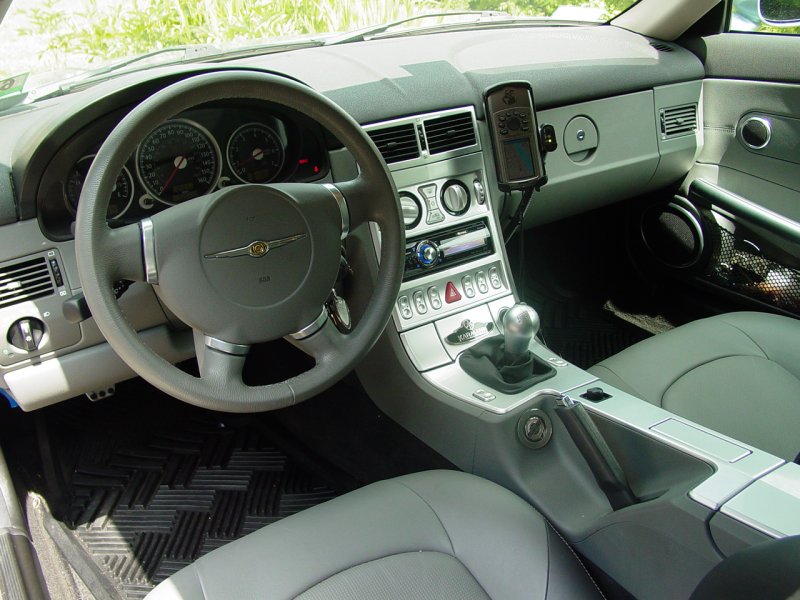
Here is a logical view
of the stereo system
|
Pioneer / Infinity Sound System |
| |
Radio Devices |
|
External Devices |
| |
Sat Antenna |
|
Antenna |
|
USB Device |
iPod |
Music |
Phone |
|
Generic Device |
| |
Cable |
|
Cable Splitter |
|
USB Cable |
iPod Cable |
Blue Tooth |
|
Mini Cable |
| |
 |
|
 |
|
 |
 |
|
|
|
|
|
| |
|
|
|
|
|
|
|
|
|
|
|
|
Source |
XM |
|
External 1 |
|
External 2 |
iPod |
|
BT Audio |
Phone |
|
Aux |
|
| |
|
|
|
|
|
|
|
|
|
|
|
|
| |
XM Satellite Radio |
|
HD Radio |
|
USB |
|
|
|
|
|
|
|
| |
|
|
|
|
|
|
|
|
|
|
|
|
| |
AM |
|
FM |
|
|
CD |
|
|
|
|
|
|
|
|
|
|
|
|
|
|
|
|
|
|
|
|
| |
|
|
|
|
|
|
|
|
|
|
|
|
|
|
|
|
|
|
|
|
|
|
|
|
|
|
| |
|
|
|
|
|
|
|
|
|
|
|
|
|
|
|
|
|
|
|
|
|
|
|
|
|
|
| |
|
|
|
|
Sub |
|
|
Head Unit |
IP-BUS |
|
|
|
|
|
|
| |
|
|
|
|
|
|
|
|
|
|
|
|
Out |
|
|
|
|
|
|
|
Rear |
|
Blue Tooth |
In |
|
| |
|
|
|
|
|
|
|
|
|
|
|
| |
|
|
|
|
|
|
|
Front |
Auxiliary
Stereo Cable |
| |
|
|
|
|
|
|
|
|
|
|
|
|
|
|
|
|
|
|
|
|
|
|
|
|
|
|
|
|
|
|
|
|
|
|
|
|
|
|
|
|
|
|
|
|
|
|
|
|
|
|
|
|
|
|
|
|
|
|
|
|
|
|
|
|
|
|
|
|
|
|
|
|
|
|
|
|
|
|
|
|
|
|
|
|
|
|
|
|
|
|
|
|
|
|
|
|
|
|
|
|
|
|
|
|
|
|
|
|
|
|
|
|
| |
|
|
|
|
|
|
|
|
|
|
|
|
|
|
|
|
|
|
|
|
|
|
|
|
|
|
|
|
|
| |
Factory Tweeter |
|
|
|
|
|
|
|
|
|
Factory Power Amp |
|
|
|
|
|
Factory Tweeter |
|
Front |
Factory Mid-range |
|
|
|
|
|
|
|
|
|
|
|
|
|
|
|
Factory Mid-range |
| |
Factory Sub-Woofer |
|
|
|
|
|
|
|
|
Left |
Added Speakers |
Right |
|
|
|
|
Factory Sub-Woofer |
| |
|
|
|
|
|
|
|
|
|
|
|
|
|
|
|
|
|
| |
|
|
|
|
|
|
|
|
|
|
|
|
|
|
|
|
|
|
| |
|
|
|
|
|
|
|
|
|
|
|
|
|
|
|
|
|
|
| |
|
|
|
|
|
|
|
|
|
|
|
|
|
|
|
|
|
|
|
|
|
|
|
|
|
|
|
|
|
|
| |
|
|
|
|
|
|
|
|
|
|
|
|
|
|
|
|
|
|
|
|
|
|
|
|
|
|
|
|
|
|
| |
|
|
|
|
|
|
|
|
|
|
|
|
|
|
|
|
|
|
|
|
|
|
|
|
|
|
|
|
|
|
|
|
Rear |
Speaker Array |
|
|
|
|
|
|
|
|
|
 |
|
|
|
|
|
|
|
Speaker Array |
|
|
|
|
|
|
|
|
|
|
|
|
|
|
|
|
|
|
|
|
|
|
|
|
|
|
|
|
|
|
|
|
|
|
|
|
|
|
|
|
|
|
|
|
|
|
|
|
|
|
|
|
|
|
|
|
|
|
|
|
|
|
|
|
|
|
|
|
|
|
|
|
|
|
|
|
|
|
|
|
|
|
|
|
|
|
|
|
|
|
|
|
|
|
|
|
Sub |
|
|
|
|
Powered Sub-Woofer |
|
|
|
|
|
|
|
|
|
|
|
|
|
|
|
|
|
|
|
|
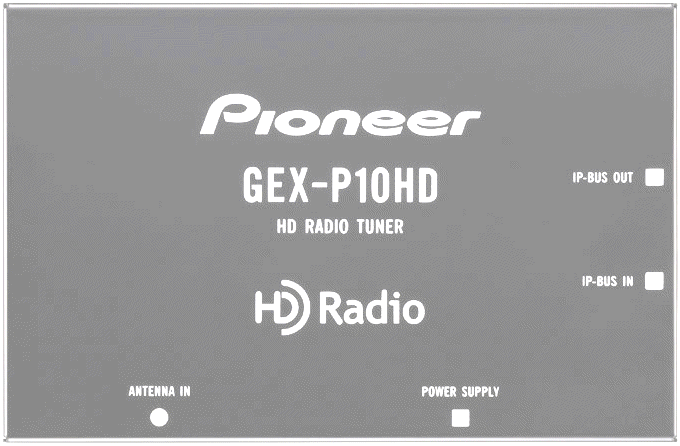
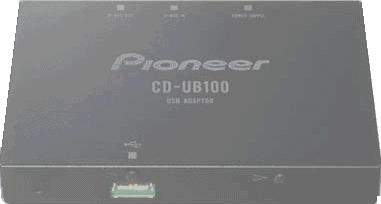
The wiring chart
below illustrates the configuration and additional pages added to
the web site explain the Pioneer DEH-980BT head unit,
iPod Adapter,
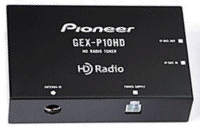
XM Tuner,
HD Radio,
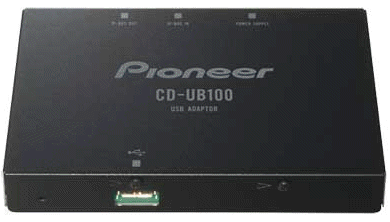
USB Adapter,
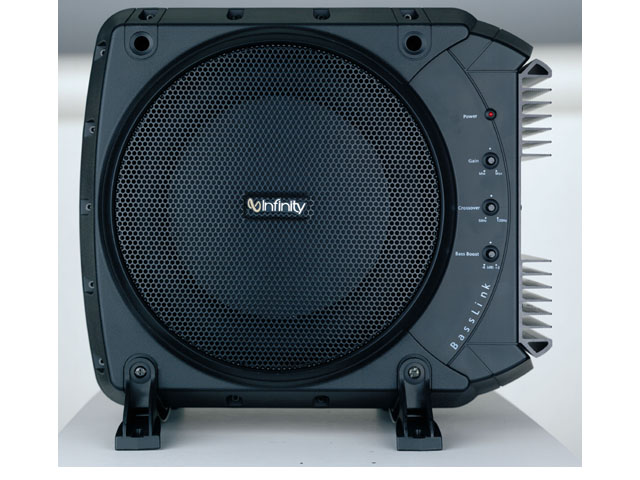
Infinity 3022cf rear
speaker array, and Infinity Basslink
installations.
Here is the
updated component layout and wiring. The major components may be
clicked to see more details about them.
|

Updated Component Wiring Diagram
(click on components for write-ups)
|
Operation Manual
Installation
Manual
Overview |
Specifications
| Accessories
|
