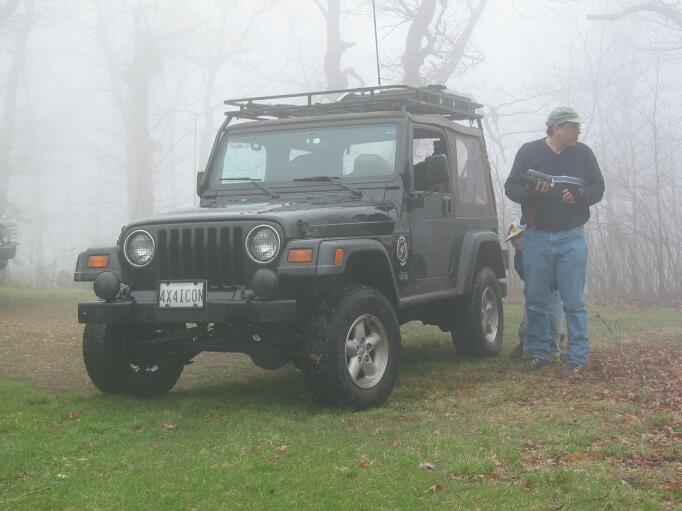
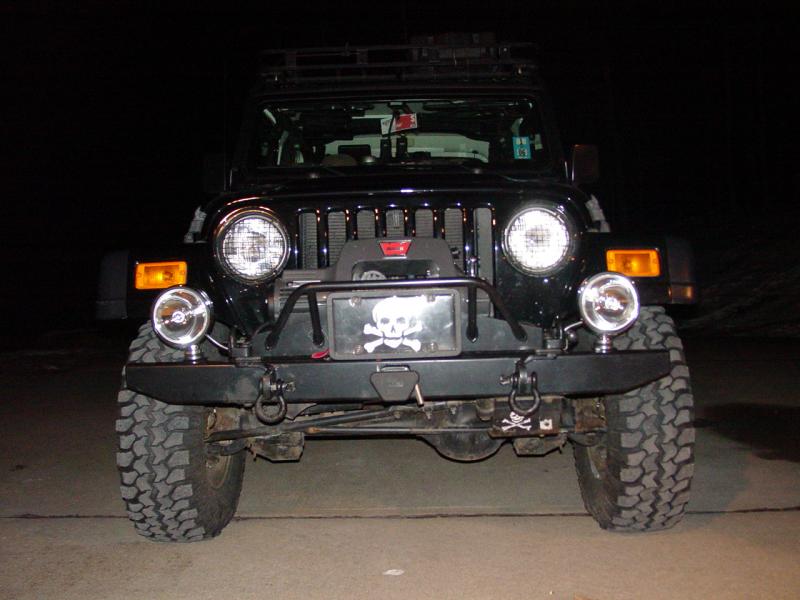
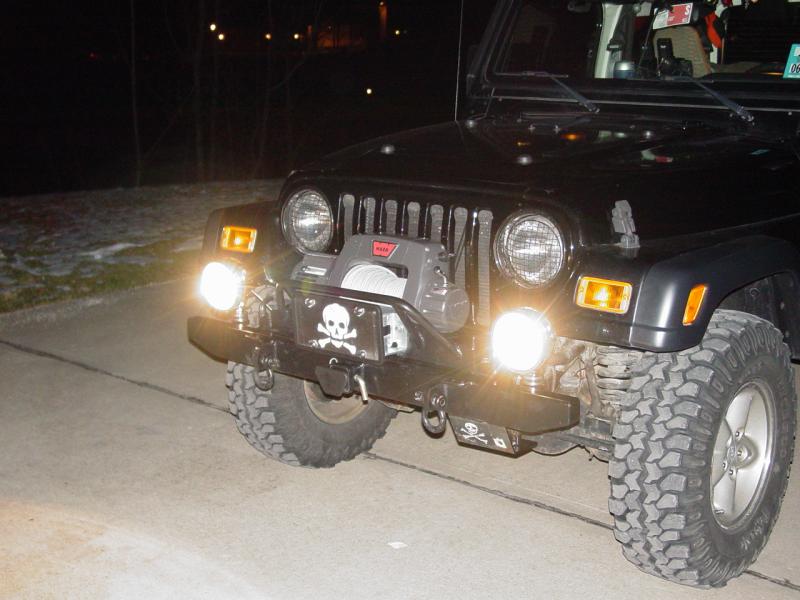
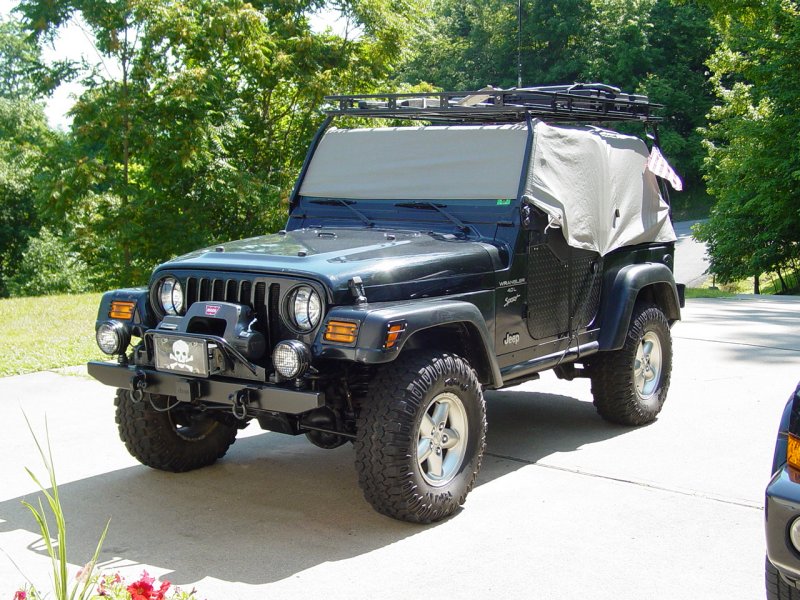
Quite some time ago I had installed some driving lights on the
front bumper. Well, I ran the wiring and got everything connected, When I
flipped the switch, it blew a fuse. I had run out of time and never bothered to
figure out what the problem was. For a couple years they stayed there with covers
over them. I suspect I got a reputation for having lights on my Jeep that didn't
work...
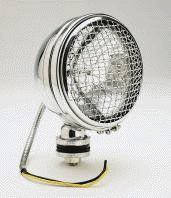
When I had the accident in October of 2004 one of the lights got
knocked off. The insurance company replaced both lights with a complete set of KC
Daylighters. I asked the body shop to let me install them and took them home in a
box.
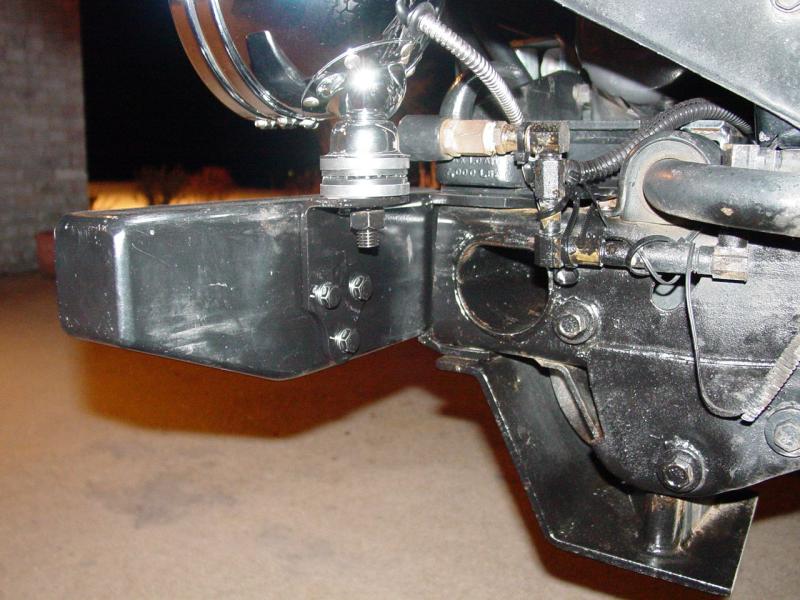
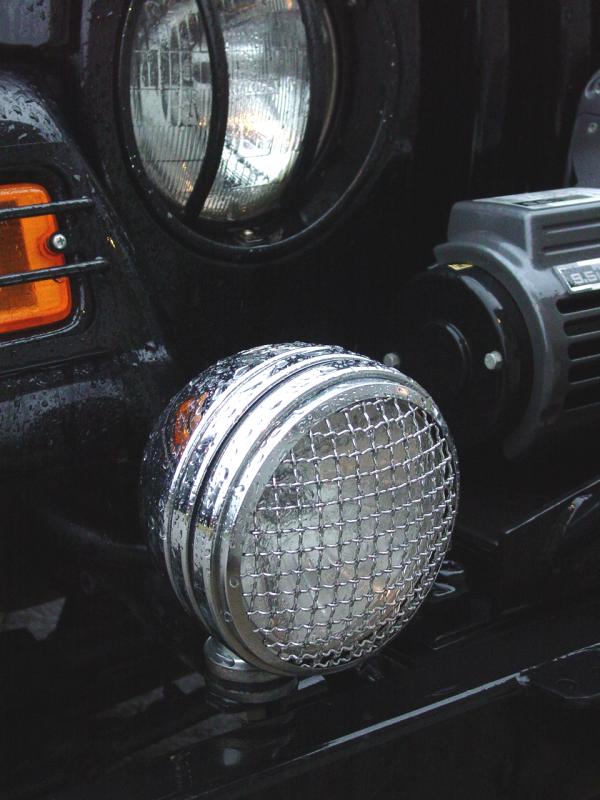
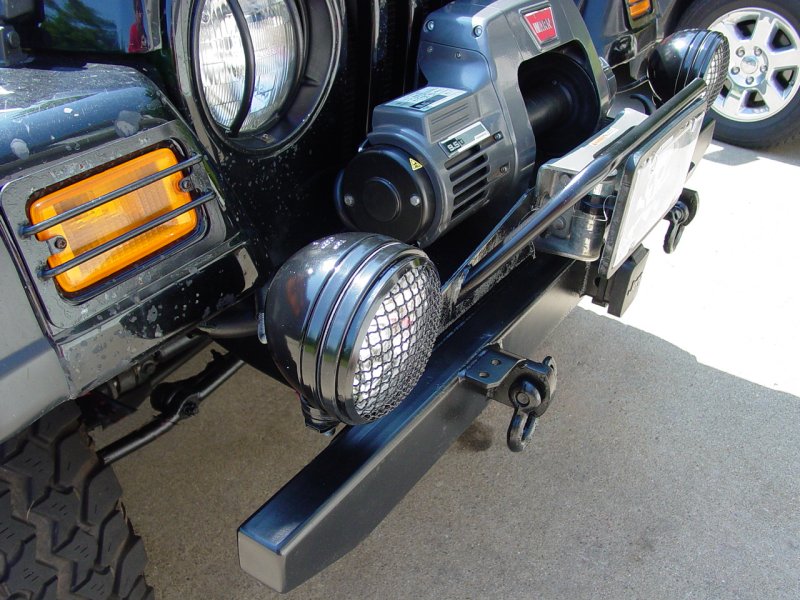
I got a new front bumper as a result of the same crash and
realized that I was going to have to find brackets to fit the lights. The ones sold
by the manufacturer of the bumper stack under the tow hooks. This would be fine
except that in addition to the tow hooks I have the winch plate. This makes the
bolts too short to add yet another piece of metal.
I looked around and found a solution:
right-hand corner brackets. They are used to build
used to build truck racks, removable
gates, knockdown crates, and fence sections.
They were perfect for mounting my lights. They came powder coated, pre-drilled with three holes,
and a platform large enough to mount the light.
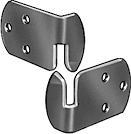
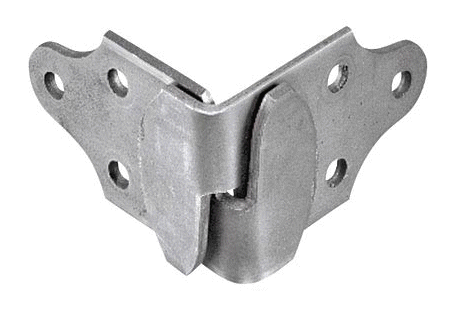
I found mine at Ace
Hardware but they are also available at
McMaster-Carr and
Northern Tool.
|
McMaster-Carr
18445A51 |
|
Heavy Duty Steel
Bracket Right Hand, Corner Style, 5-3/8" L X 2-1/2"
H |
| |
|
Northern Tool
|
|
End Gate Left Corner
Fastener Northern Tool Part Number 12725 |
|
End Gate Right Corner
Fastener Northern Tool Part Number 12726 |
|
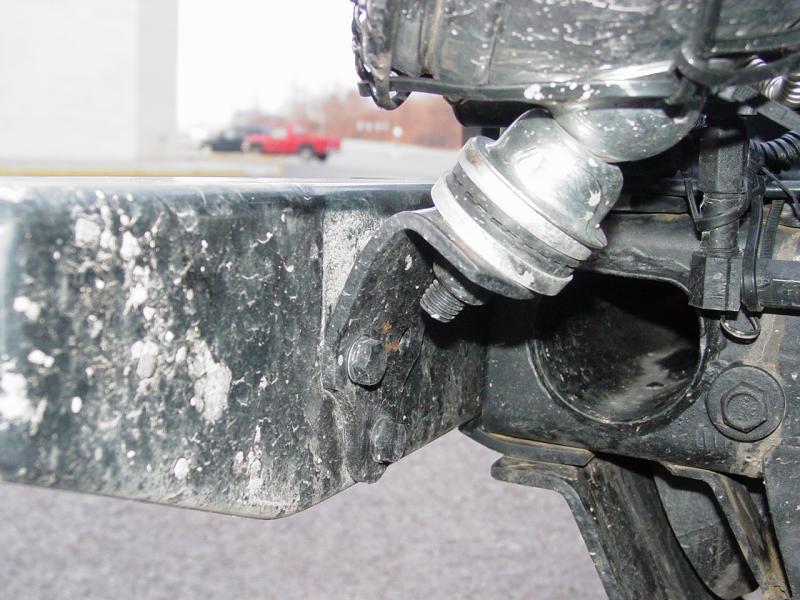
I had only to drill one hole and I
was ready to begin the installation.
Well, more accurately I had two holes to
drill in the brackets and six holes to drill in the bumper. After drilling the holes
I tapped them so I could bolt the brackets onto the back of the bumper with 5/16-18 x
1" bolts with lock washers. I used zinc plated bolts rather than stainless
steel because the dissimilar metals (mild steel bumper and stainless steel bolts) would
cause a galvanic reaction and cause the bumper to rust prematurely.
I used the same drill and tap that I had
used to install the sway bar disconnects.
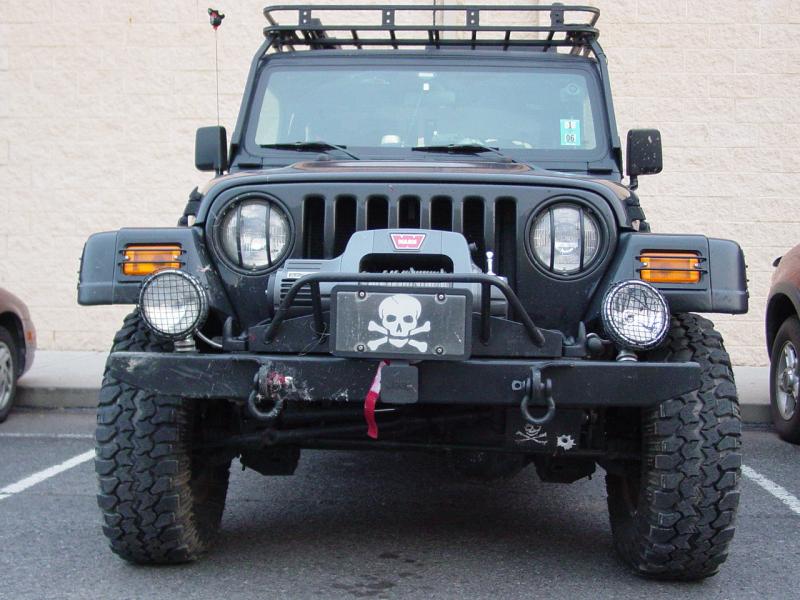
I located the spot I wanted the lights to
occupy - just far enough outboard to allow for some clearance for the two hoods and winch,
but no so far as to obscure the turn signals.
I marked the location by placing a piece
of brown packing tape under the bracket and used and magic marker to draw the holes onto
the bumper. I double checked that the holes were correct then used a center punch to
mark them for drilling.
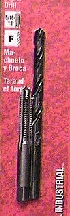
I drilled the holes with an "F"
bit. It went easily then I tapped out the holes, painted the new threads, then
installed the bracket with new bolts and lock washers. Then I sprayed a little black
paint on the bolts to tone them down.
I measured the distance from the end of
the bumper to the center of the bracket I had installed and marked off the same distance
on the other side, then drilled the three holes, tapped them and installed the bracket.
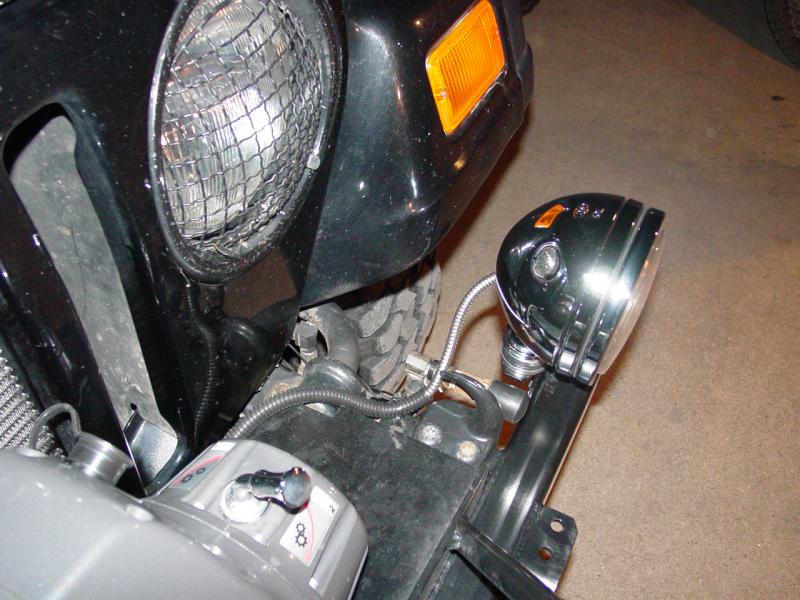
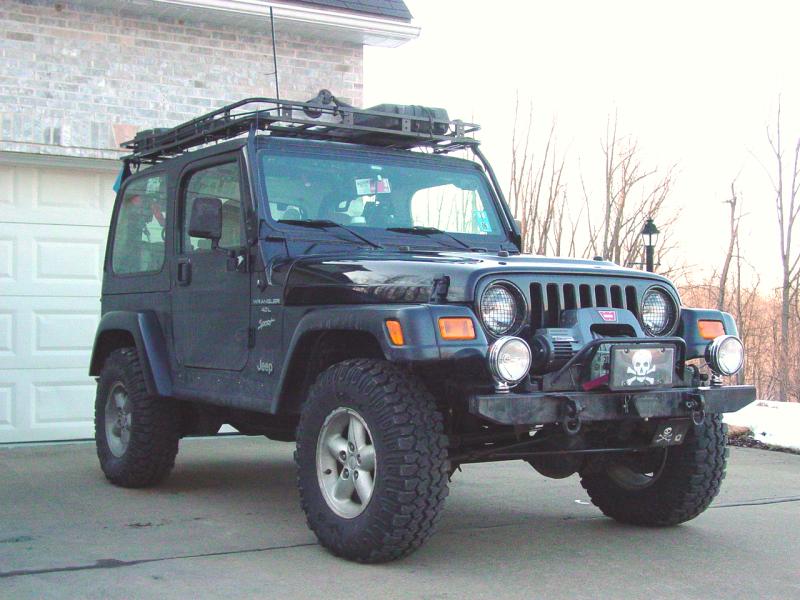
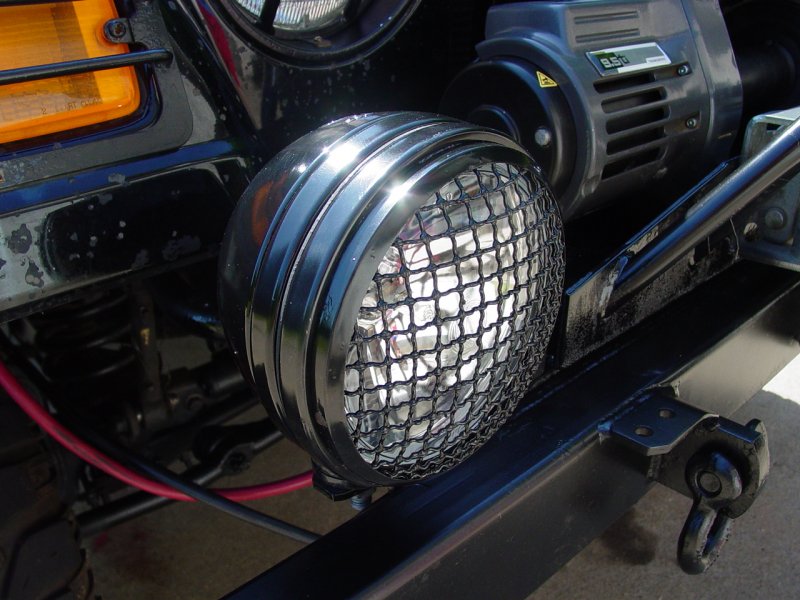
I mounted the lights to the brackets and
found that they probably need to be set back a little so they do not protrude past the
bumper. In a light encounter with another car or a tree in the woods, it would be
nice to have the lights stay in one piece. I will get longer bolts and some sort of
spacer to set them back perhaps 1/4" or 1/2" - just enough to do the job.

That finished the easy part. Now I
had to route all that wire from the power source to the lights and from the power source
to a switch in the cab. I passed the wires to the lights through the holes in the
bottom of the grill and up to the lights.
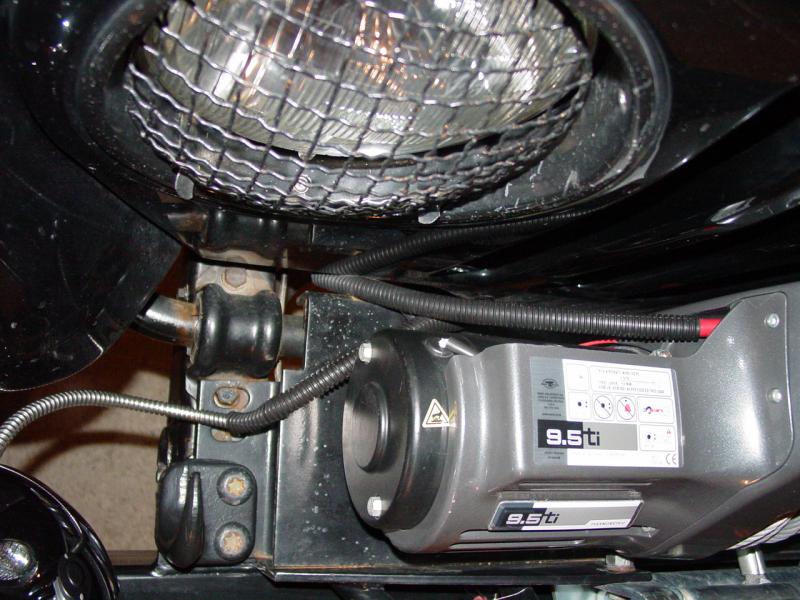
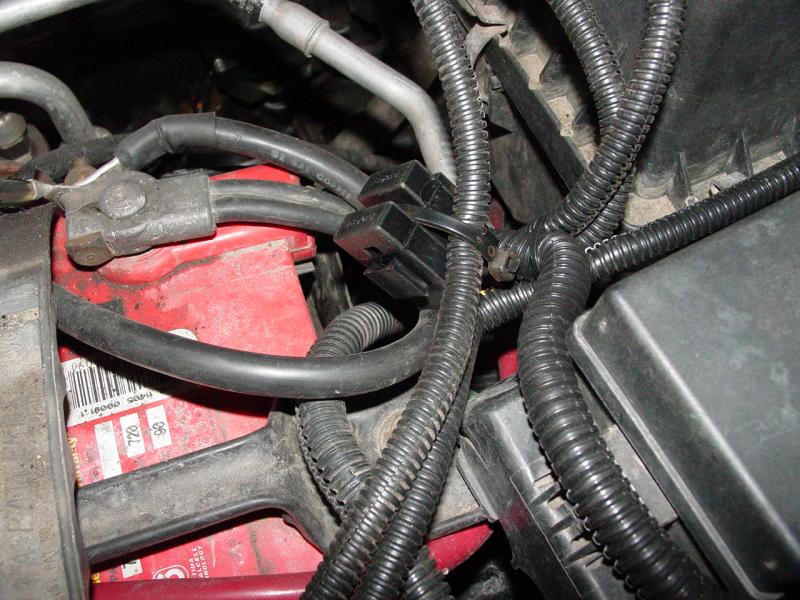
I passed the wires from the power to the
switch through the same big grommet in the firewall as everything else.
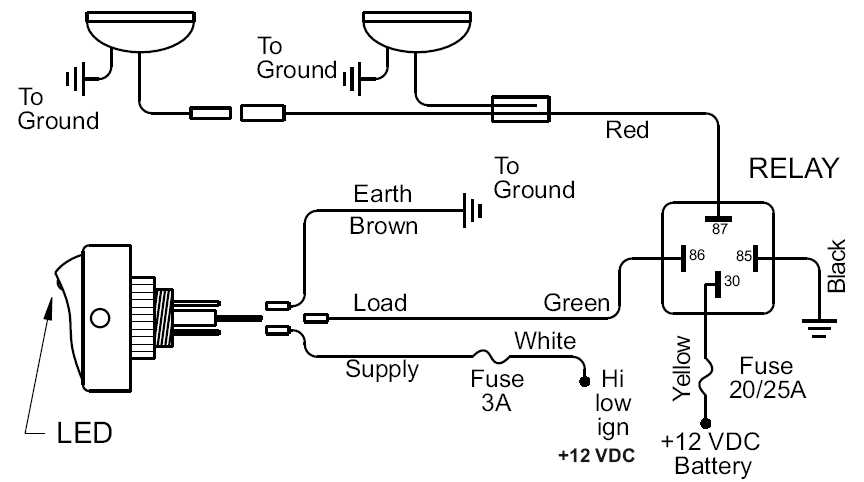
I put a connector on the power lead that
connects to the low beams, high beams or optionally the battery. I chose to connect
this to the battery. I connected the power wire to the battery as well. I
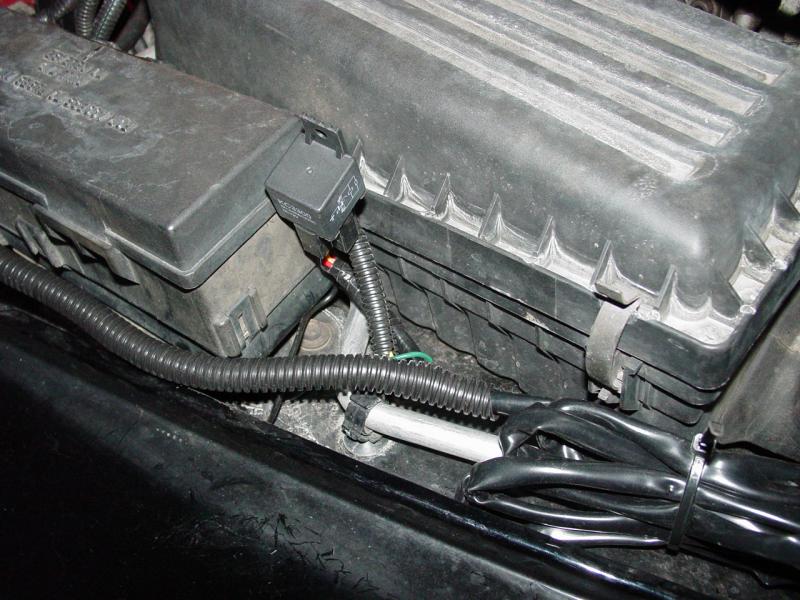
connected the ground wire from the relay to the fender using one of the screws that holds
the relay box next to the air filter box.
Once the wires were threaded through the
fire wall I removed the panel below the steering wheel and the center surround from the
dash that has the junk tray and ash tray. For me this part has become a mounting
point for three GPS receivers and my hands-free cell phone. So removing it takes a
few more steps than just popping the vent panel from the top of the dash, removing the two
top screws and the screw behind the ash tray then popping it off. But pretty soon I
had it all exposed.
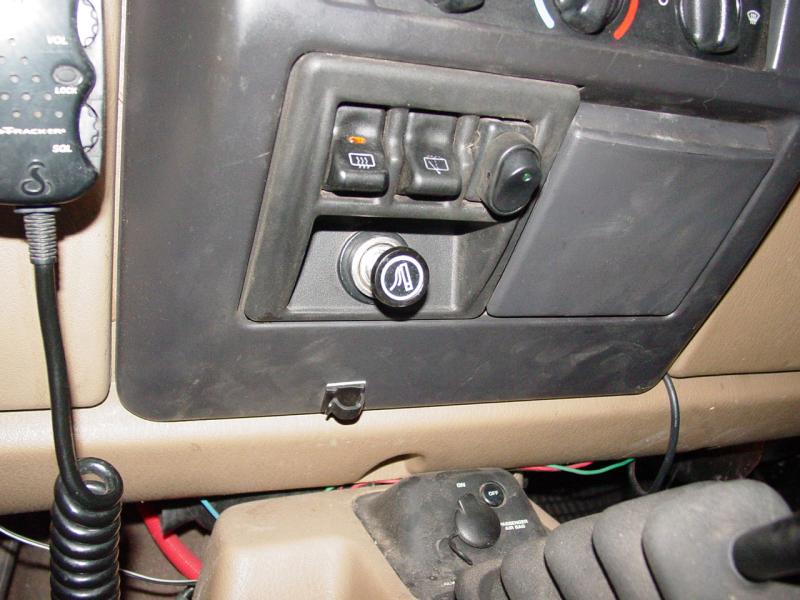
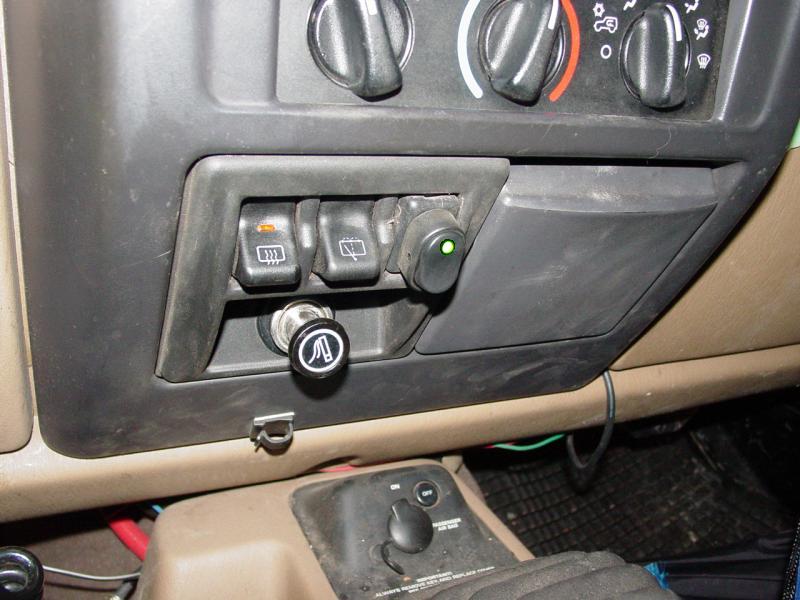
The last time I installed lights I had
drilled a hole in the blank panel that covered the toggle switch for the factory lights.
I found that this hole was the correct size for the new switch that came with the
KC's so I removed the switch I had purchased and installed the new switch. I screwed
the ground wire to the metal panel that holds the cover on the instrument cluster after
first checking to see if it was indeed a good ground.
I tested the lights and they worked.
Ha! Too easy. Well at least in terms of the basic connections. It
took a fair amount of time to drill for the brackets, route the wires and install the
switch. Now I had to reassemble the dash, dress the wires, and aim the lights.
Sheesh!
I got the Jeep lined up on the garage
door. I measured the distance between centers on the lights: 42". I shot
a straight line to the garage door from the center of the lights and got a theoretical
point where each lamp should hit.

Then I turned on the lights and adjusted
them until they hit my mark.
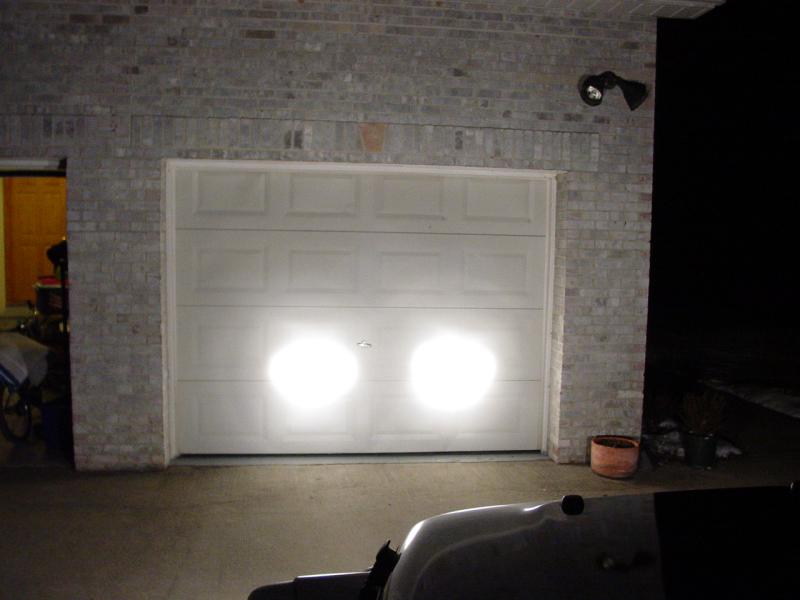
A drive on the road later revealed that
they might be aimed a little bit low as they hit the ground about 50-60 feet ahead.
I think I might want them to project out a bit further but I will fine tune this over the
next few days.
With the lights aimed for a starting
point, I dressed the wires. This meant cleaning up the routing and then putting all
the wires inside loom covers and wire-tying them to stationary anchors like other looms or
brackets. I collected all the extra wire and encased it in larger looms so it would
stay out of the way. I made sure I had enough spare wire around the battery so I
could disconnect the battery and remove it without having to disassemble the connections.
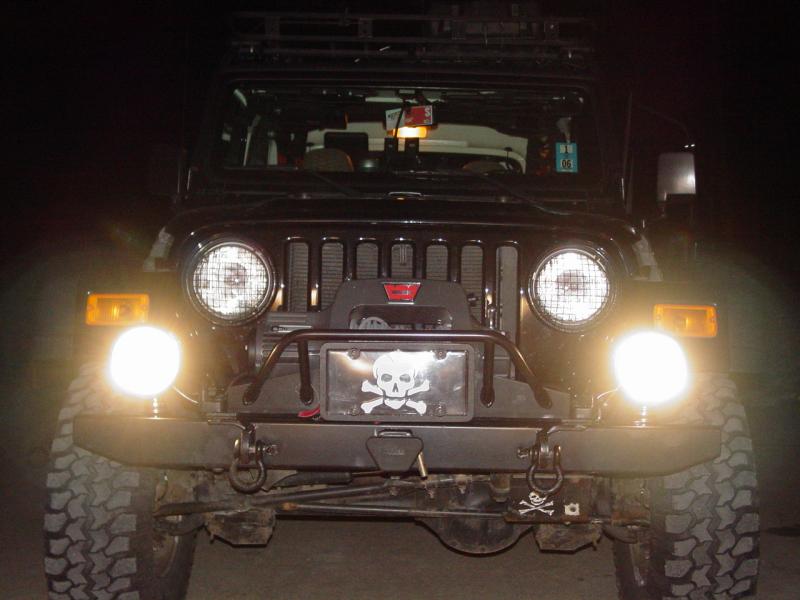
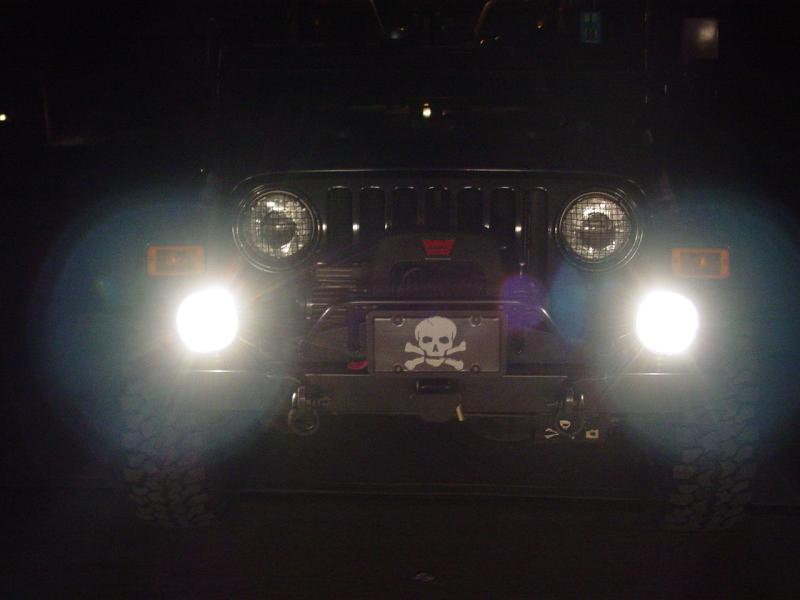
These lights blaze! After driving a
few minutes with them a car came towards me. I turned them off and suddenly felt
like I was driving in the dark. The stock lights seemed dim, even though I routinely
get flashed by oncoming traffic thinking I have left my high-beams on.
The only thing I do not like about them
is that they are chrome... I may have to paint them black...
Since installing the lights I wired up a warning buzzer and warning light system so that
I would not forget to turn them off when I shut off the Jeep and leave them on.


Update: 11/28/05
Deer Strike!
Ted and I had some work to do on
the Jeep... Monday morning I hit a deer on Route 79 on the way to
work... I was doing the speed limit (70 mph) and a little skipper
jumped up onto the breakdown lane. It stopped long enough to look
me straight in the eye and then it decided to make for the other
side of the road. Directly across my path. About the time it
looked at me, I was hoping it would stay put and moved smoothly to
the left lane in hopes I would get past it without touching it.
Instead it was like shouting "PULL!" at a skeet shoot, following the
disc through the air and then pulling the trigger when you had it
tracked... BAM! Only I didn't have a shotgun and it wasn't skeet.
It was the deer stretched out trying to claw past me and instead
taking the full brunt of my front bumper from one end to the other.
After the Jeep hit it, I felt it go under the wheels and chassis and
saw it prostrate in the middle of the road behind me, dead as a
doornail. Great... I was fine; nothing came through the
windshield, but I stopped to take inventory.
The front bumper had serious chunks
of deer where the d-shackles are mounted; there was hair everywhere.

The left-front driving light was
smashed and pushed back into the left-front fender which now had a
crescent-shaped dent where the lamp housing fit neatly...


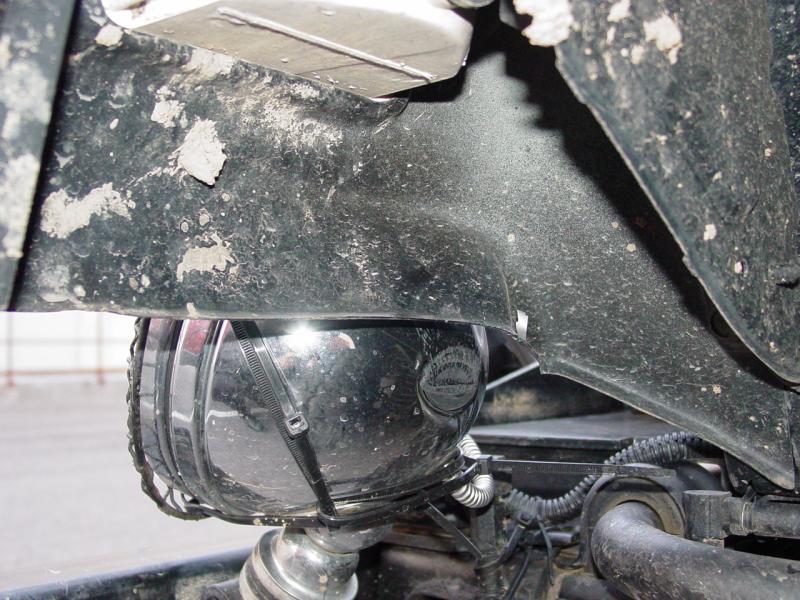
The lamp bracket was bent back, the
lamp housing had some scuffs and a couple small dents.

And that was it. No damage to the
bumper itself; no damage to anything else at all.

The steering linkage was fine,
nothing else was bent, and there was nothing but hair everywhere
underneath... Grateful doesn't even begin to describe how I felt.
I said a little prayer for the deer and continued on to work where I
added my debacle to the collection of stories about my boss who has
hit five or six... I am hoping my fortune is not as good (or as
bad) as his...
So Ted and I spent the morning
doing work on the Jeep. We removed a damaged driving light,
disassembled it, removed the broken lamp lens and set the pieces
aside after tapping the dents out of it with a piece of wood and a
hammer. Next we removed and straightened out the bracket that it
was mounted on, then repainted it and the spot where it mounts on
the front bumper, then Ted put it back on the bumper. I had ordered
a replacement lens and lamp.
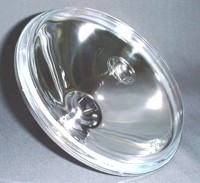
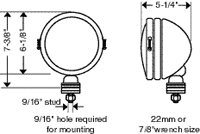
6" Lens / Reflector - Long
Range #
4213
Bulb: 100w H3 Halogen - #
2767

We also bent the lens protector
back into shape and Ted painted it. I started thinking about
replacing them since they were getting long in the tooth...
After that, we spent a few minutes
installing the right-rear fender well liner that had been knocked
off and left behind when my tire blew out a few months ago. That
was fairly easy except for the last fastener that was between the
frame and the spot on the body where it attached to the front edge
of the liner. But I got it installed... Ted knows another new
swear word. With the lamp removed and the other parts repaired, I
snapped the GPSr into the Jeep, loaded Ted up and hit the road to
verify some routes.
Update 12/23/05
Not much more to tell about the
deer strike except that I replaced a lens and
bulb when they arrived. The installation of
the new bulb and lens was a five minute job.
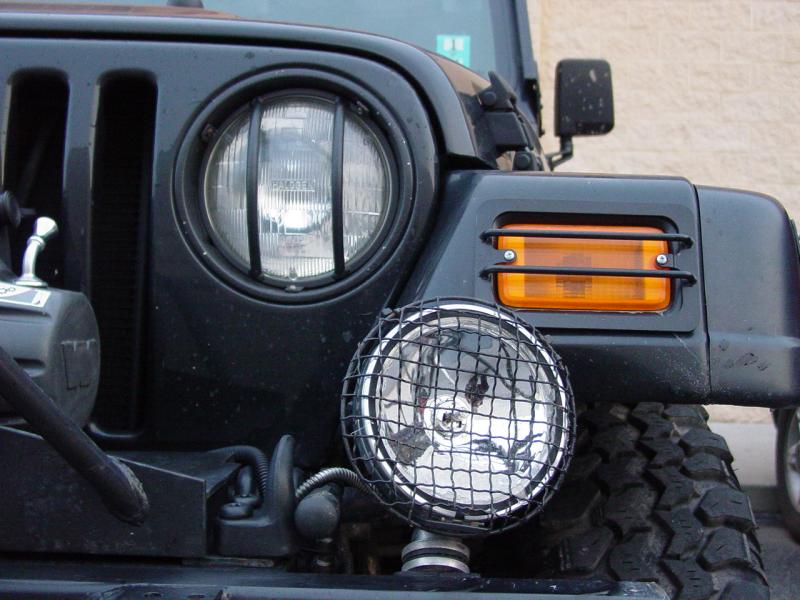
After I swapped the stone guards off
the headlights to the driving lights I noticed some purpose built
stone guards listed in the 4 Wheel Drive Hardware catalog.
They're made to fit KC
cost of the stone guards. So I called up and ordered them,
chipping in the couple bucks. The very next day they came!
I installed them in about two minutes by simply unscrewing the front
bezel and slipping the three ears of the stone guards under then
tightening the screw back up.
I haven't had a chance to take a
picture of the result on my Jeep but it's a definite improvement
over what I had before, at least as far as looks go!


Update 6/30/07
While I was working on
other front end things I decided to paint the chrome light housings,
retaining rings and guards black. I cleaned all the parts,
sanded them with fine paper to roughen them up, then painted first
with POR-15 and then with a top coat to prevent the UV from turning
the black POR-15 gray.
While I was at it I
replaced the large rubber gaskets, the small o-rings on the back of
the housings, a reflector lens that had gotten damaged when we went
too deep in a mud hole...
Replacement Parts - Daylighter / Shockmounted Series
|

|
|
| Size
Specifications |
Pair
Pack
Part # |
Single
Light
Part # |
Description / Lens |
Finish |
Watts |
Beam
Candlepower |
Lens/ Reflector |
Bulb |
Bulb Holder |
Bezel |
| 237 |
1237 |
Daylighter - Long Range |
Chrome |
100 |
240,000 |
|
|
|
|
| 238 |
1238 |
Daylighter - Long Range |
Black |
100 |
240,000 |
|
|
|
|
| 239 |
1239 |
Daylighter - Long Range |
Stainless
Steel |
100 |
240,000 |
|
|
|
|
| 250 |
1250 |
Daylighter -
Long Range |
Titanium Finish |
130 |
300,000 |
|
|
|
|
| 622 |
1622 |
Daylighter - Long Range |
Chrome |
150 |
385,000 |
- |
|
|
|
| 623 |
1623 |
Daylighter -
Long Range |
Black |
150 |
385,000 |
- |
|
|
|
| 624 |
1624 |
Daylighter - Long Range |
Stainless
Steel |
150 |
385,000 |
- |
|
|
|
| - |
1603 |
Buggy Headlight |
Black |
37/60 |
N/A |
- |
|
|
|
| - |
1604 |
Buggy Headlight |
Chrome |
37/60 |
N/A |
- |
|
|
|
| - |
1608 |
Flood |
Stainless Steel |
100 |
21,000 |
|
|
|
|
| - |
1609 |
Flood |
Black |
100 |
21,000 |
|
|
|
|
| - |
1619 |
Flood |
Chrome |
100 |
21,000 |
|
|
|
|
| - |
1676 |
Daylighter - Driving |
Chrome |
100 |
120,000 |
|
|
|
|
| - |
1677 |
Daylighter -
Driving |
Black |
100 |
120,000 |
|
|
|
|
| - |
1678 |
Daylighter - Driving |
Stainless
Steel |
100 |
120,000 |
|
|
|
|
| - |
1686 |
Fog - Clear |
Chrome |
100 |
40,000 |
|
|
|
|
| - |
1686A |
Fog - Amber |
Chrome |
37.5 |
8,800 |
- |
|
|
|
| - |
1687 |
Fog - Clear |
Black |
100 |
40,000 |
|
|
|
|
| - |
1687A |
Fog - Amber |
Black |
37.5 |
8,800 |
- |
|
|
|
| - |
1688 |
Fog - Clear |
Stainless Steel |
100 |
40,000 |
|
|
|
|
| - |
1629 |
24v Fog |
Black |
100 |
N/A |
|
|
|
|
| - |
1233D |
24V - Long Range |
Black |
100 |
N/A |
|
|
|
|
| |
7203 |
6" Rock Shield |
Chrome |
(all) |
N/A |
- |
|
|
|
These are the
ones we installed (above)
More below...